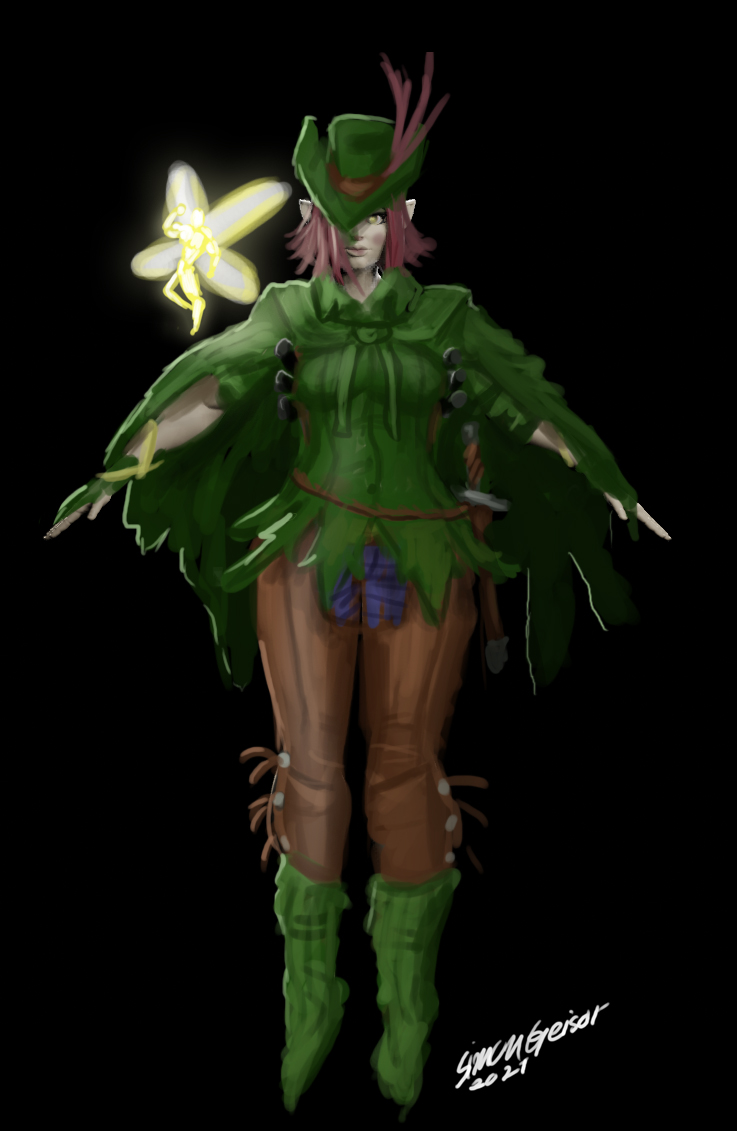
Alright challenge time. Gonna make Peter Pan as an Assassin, gender flipped and more aged for fun. First time her on Flipped normal challenges let see how it works a round here. Below my sketch,not gonna follow it religiously just the general spirit. Not sure I like all the aspects or if it will work with a third dimension, so gonna just go with the flow, been to much of a planer lately just wana work. Depending on the time left once the charterer is somewhat ready, gonna re design the weapons and accessory, or not will see. And yes Tinkerbell is a accessory. Blender, Zbrush, Substance painter and Photoshop are what gonna use
Now Im of to Zbrush or actually making dinner.
Edit: Putting newest picture here, apparently that is how you get a updated thumbnail, ill re-post the original concept.
Edit: did not need to do that so punting back the original picture, Thanks again AdrienRequin for the tip/help
5 Likes
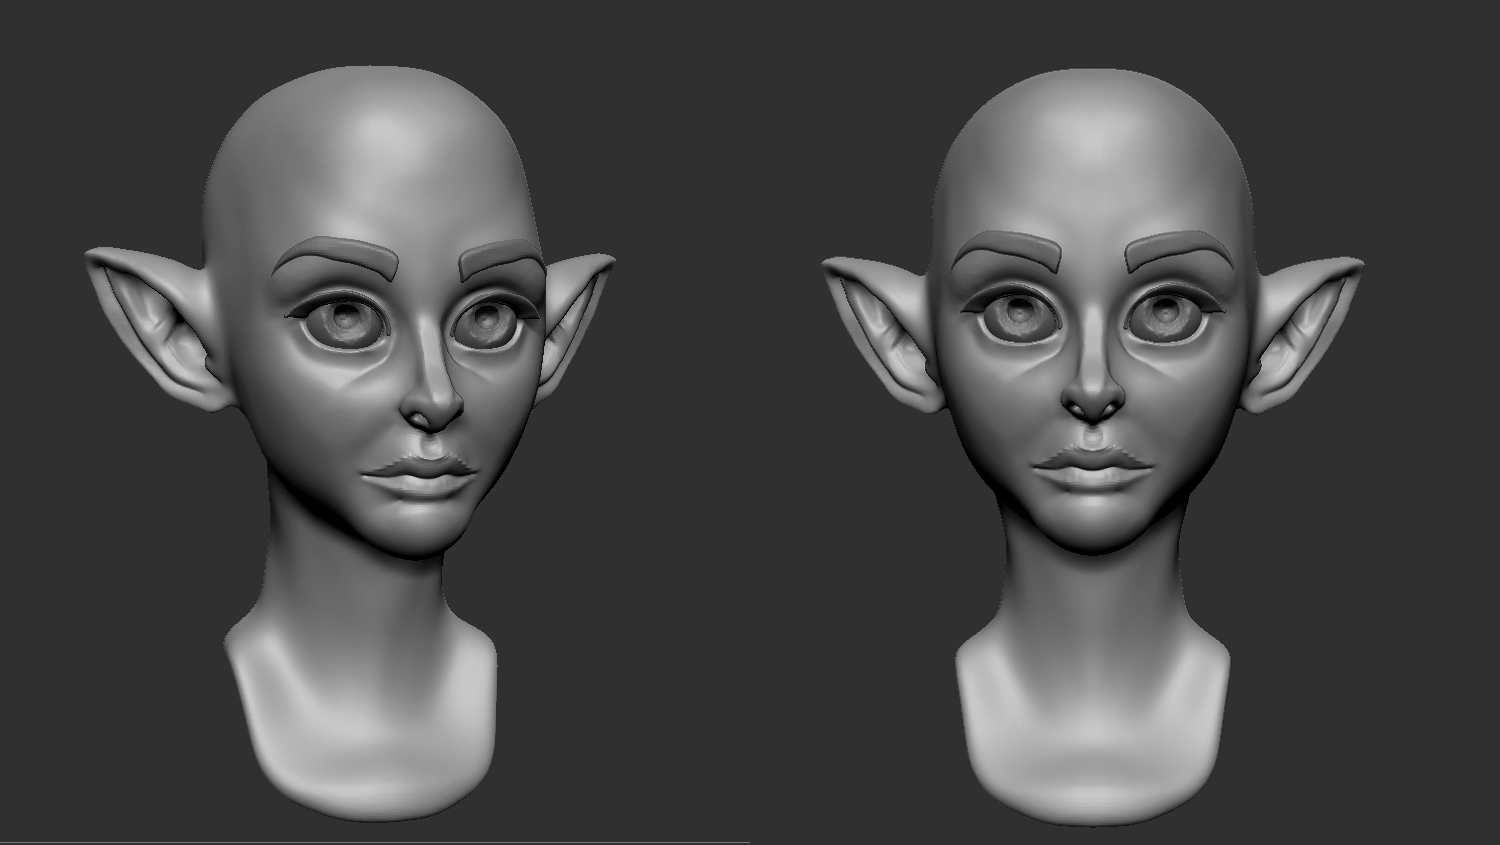
Okay that weekend just fly past, have sculpted beginning of the face, gonna continue working it try to get more character out from it, as it`s pretty plane at the moment. And Pardon the pun but when it comes to making faces the mouth is my Achilles heel.
2 Likes
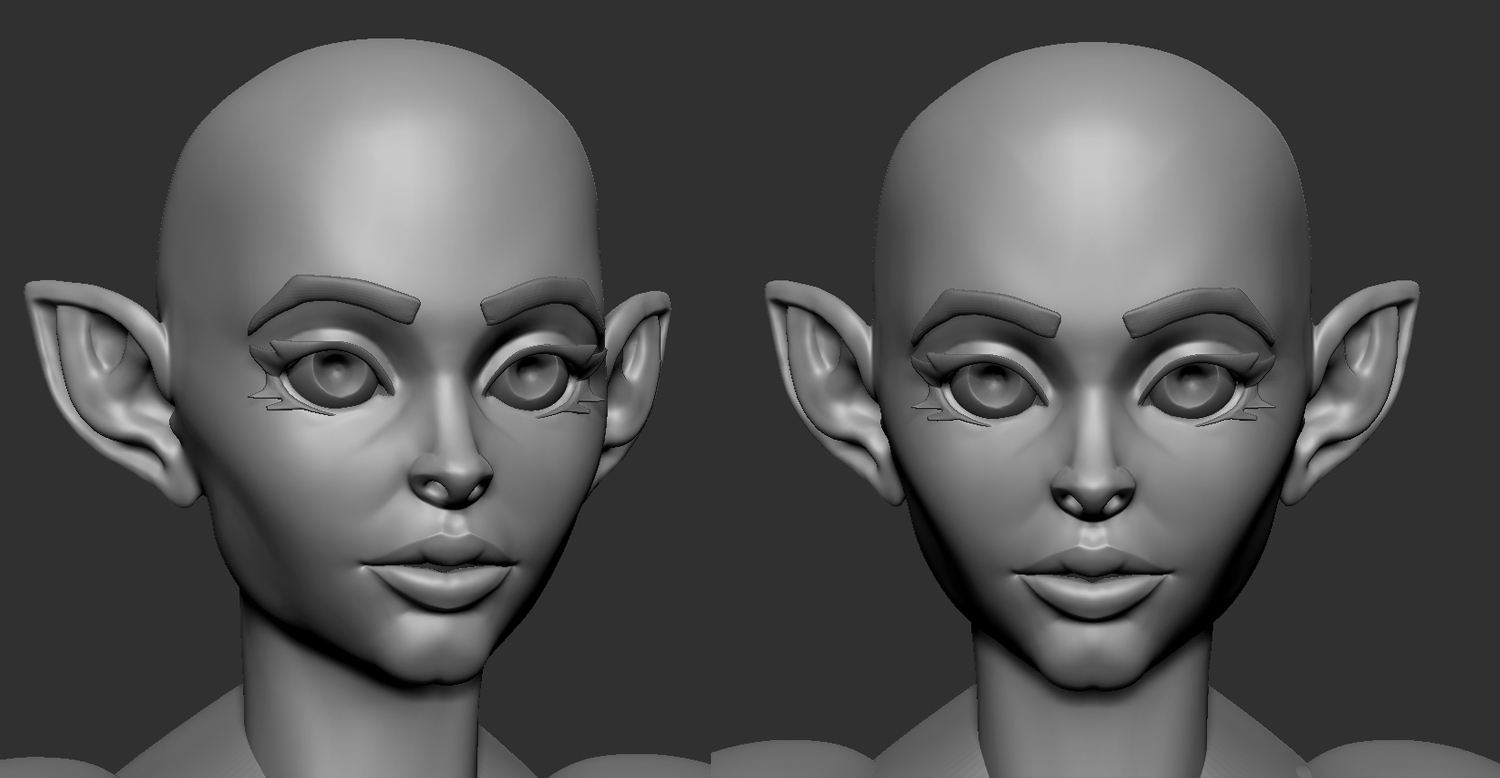
So looking at faces i sculpted before starting this challenge made me realize I could do better, so I just started over, seemed like easier and faster (it was not). There is a argument that is it has now less character than before but it feels more correct it think (we will see in a day or two). Next gonna fix the ears and the mouth, maybe make the mouth slightly open, to later make it easyer to have her smile with it open. Then probably zremech and polish. Plan is to get all that tomorrow done, don`t hold your breath.
1 Like
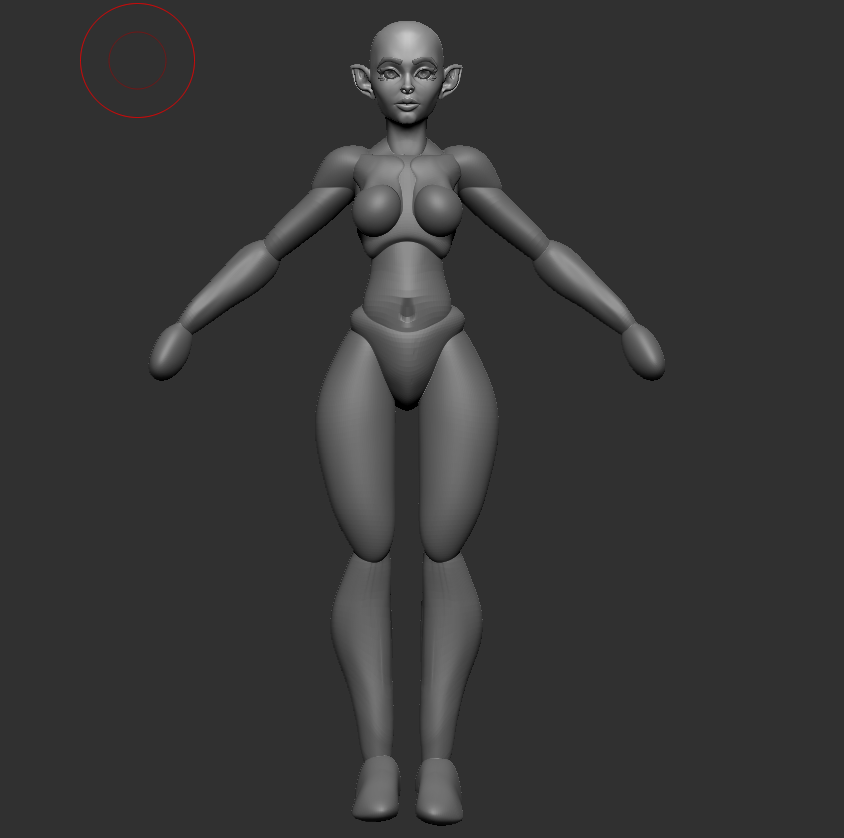
Alright, got the mouth and the ears fixed god enuf for now. Started blocking out the body.
Body blocked out. Gonna take small break the adjust it and the just working till lock good. Probably gonna make the hand in a different öömmm subtool… whatever the different file in a file is called in Zbrush. The foot won`t be seen in the final one so gonna just make the basic shape
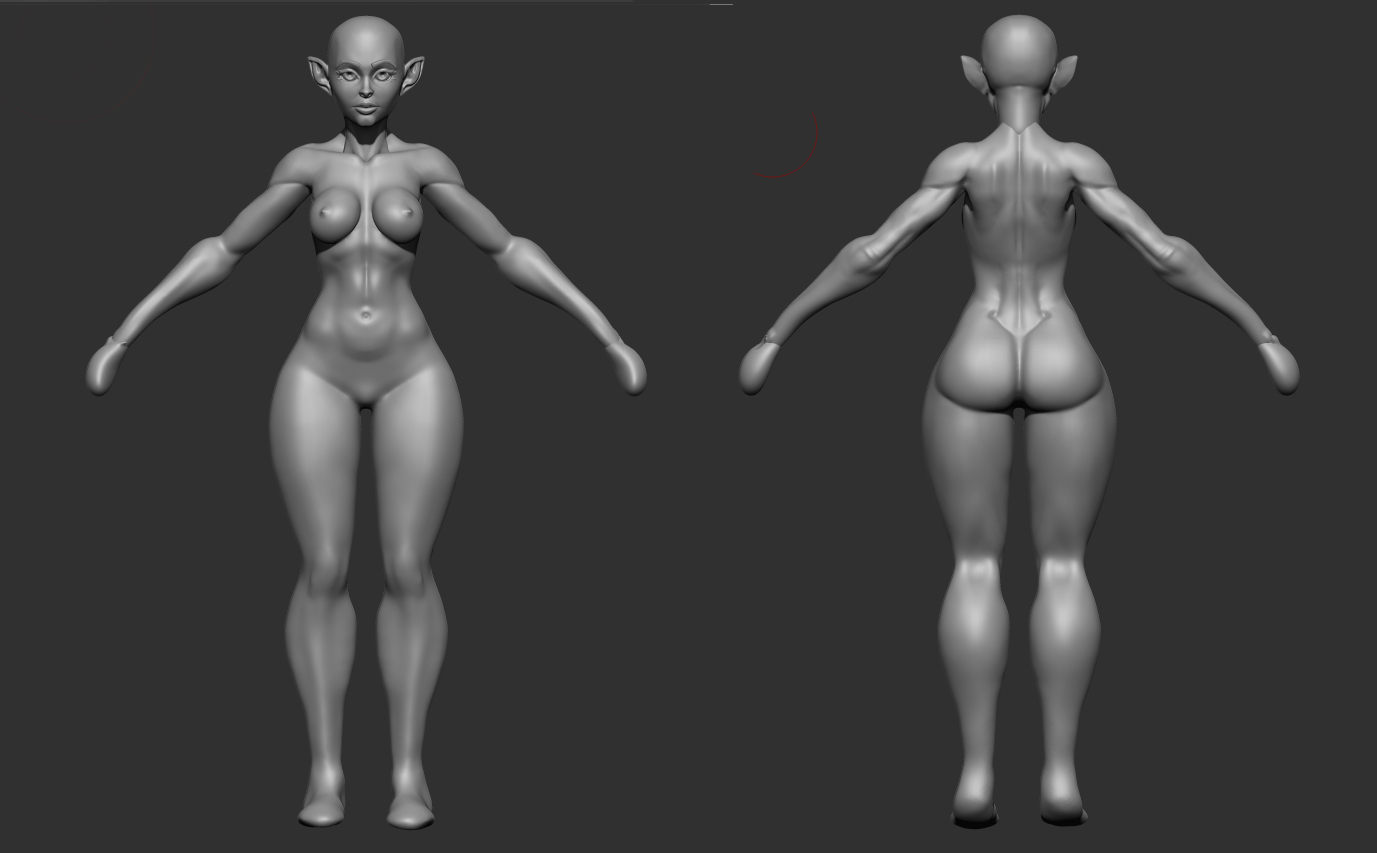
How want`s to go to sleep when you can watch Hugo Martin’s Doom Eternal stream and Zbrush… you know things… Any how: Body pretty far done. Mostly the arms and the back need some more work (oh and the hands but that is separate) thing Arms being the parts of the body that are gonna show once the clothes get made. Gonna try to do one of those “paint overs” in Photoshop, aka paint on the screenshots to quickly see how to improve proportions. But now NEED to go to sleep, peace.
1 Like
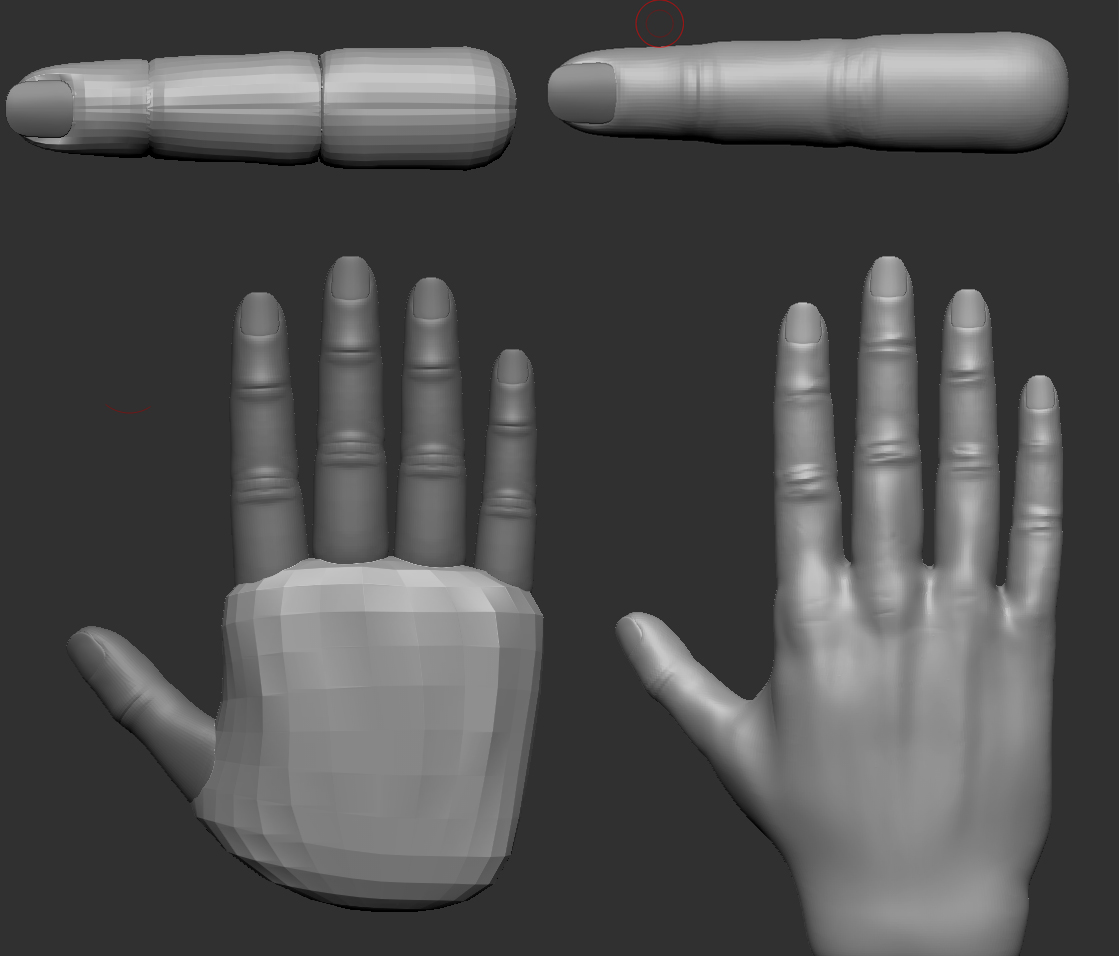
Made the hand separately as i said i would. Here is a quick and dirty breakdown how I did it, which in itself was quick and dirty. First just 3 cylinders in a row to make a finger and a forth one mangled and twisted to a nail. Combine the 3 first and add detail to get a more…well finger locking finger. Duplicate and place up to 5 finger in there places and then from a cube, create rest of the hand. And then just sculpt till it looks pretty handy.
1 Like
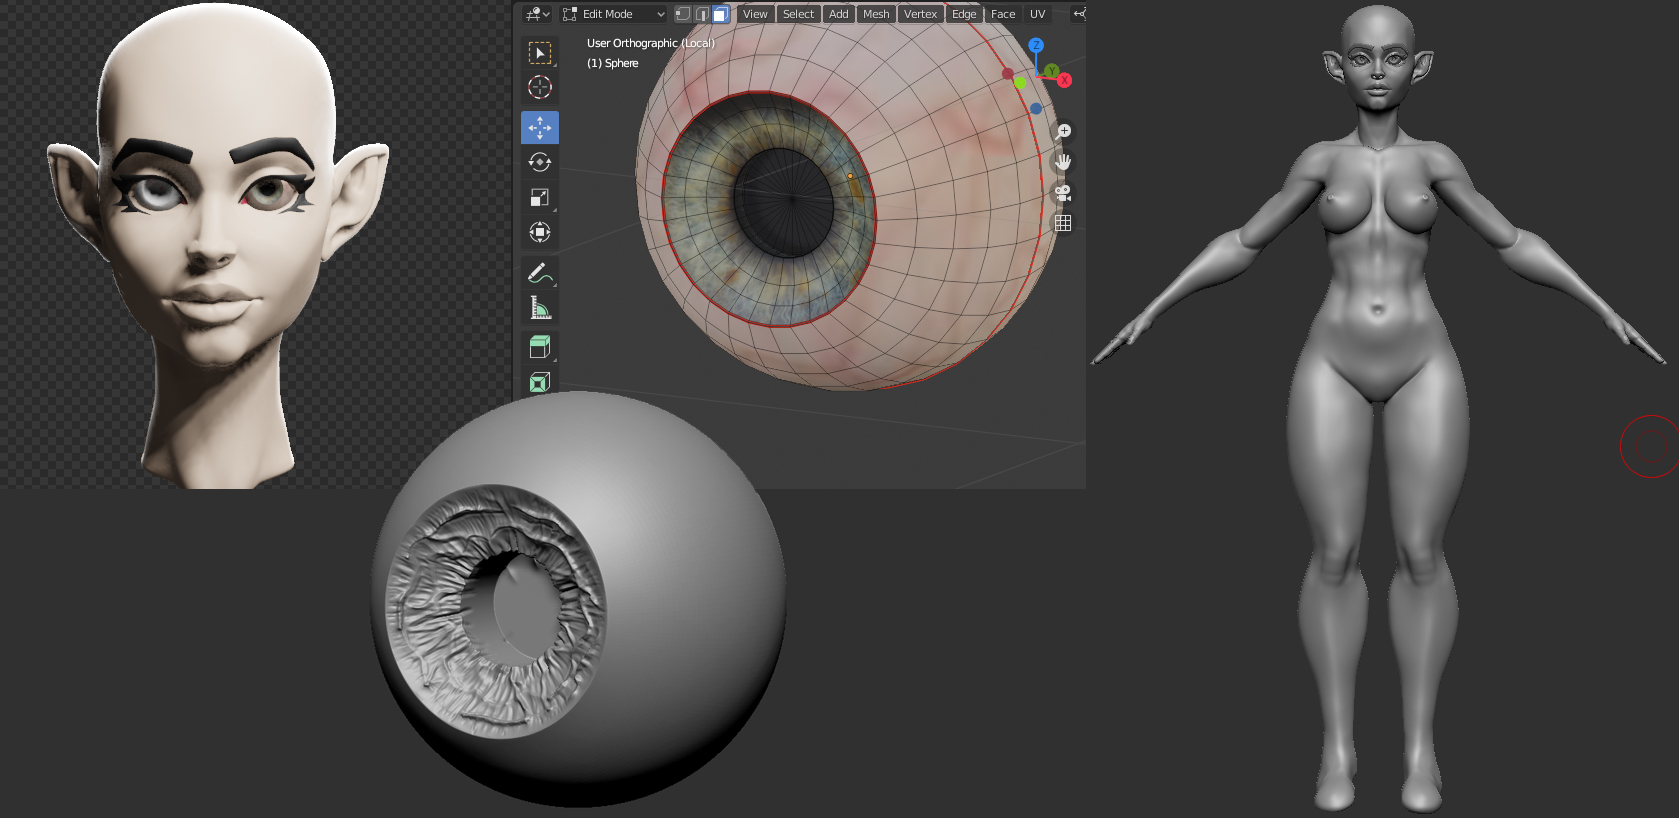
Alright, a took a little brake from Zbrush and imported the face and extra to Blender to make a base mesh for a proper eye, not just a sphere i drilled a hole in with the clay-build-up brush. Took the first google image of a eye and made a fast placeholder texture in Photoshop and then made they eye in blender. Then adjusted the eye until the pupil an iris proportions looked good for the art style. Just for fun set up a basic 3 light set up. Once eye locked good took it back to Zbrush and sculpted detail to the eye. In Blender also modeled more “clean” eyebrows. Once everything was placed right in zbrush attached the hands and the head to the body. Below a some screenshots I mash together in PS.
1 Like
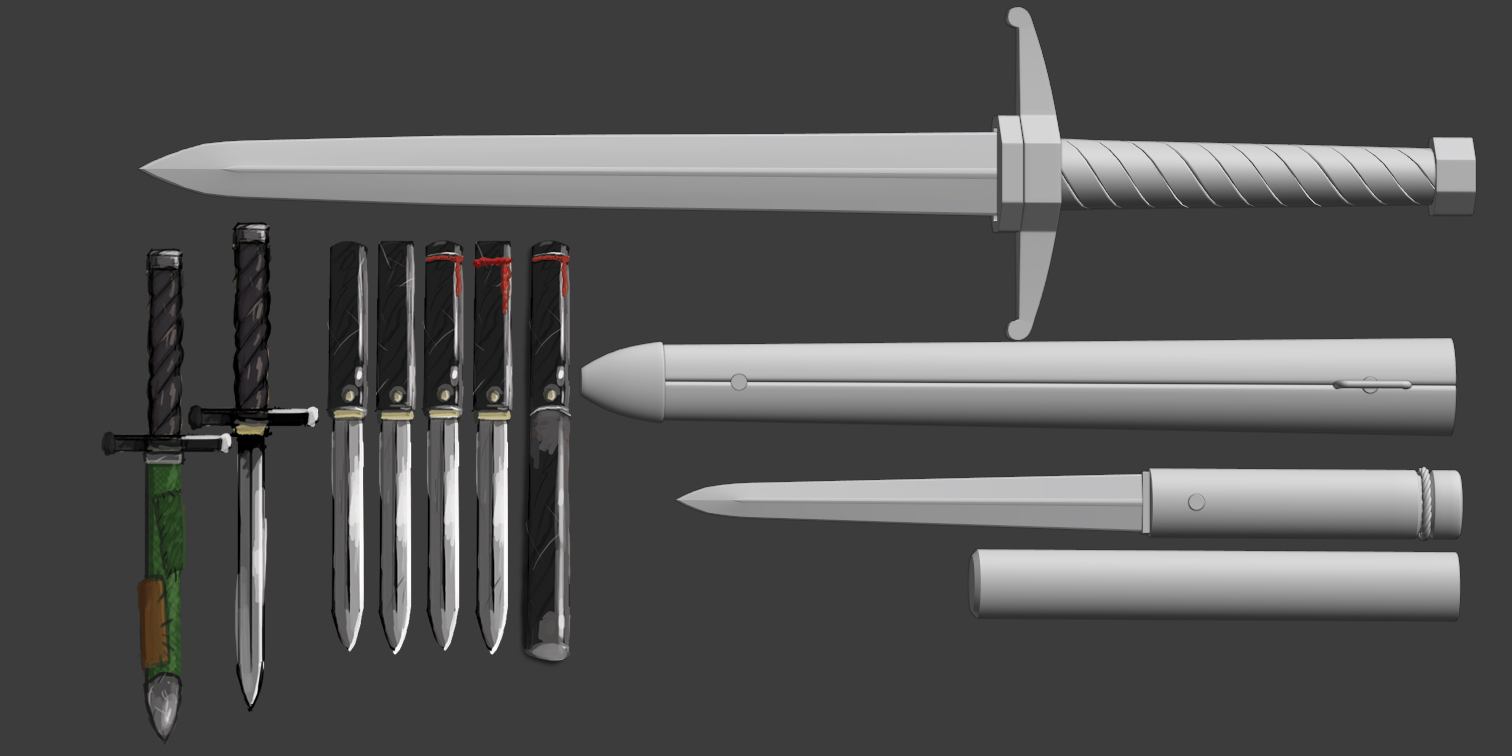
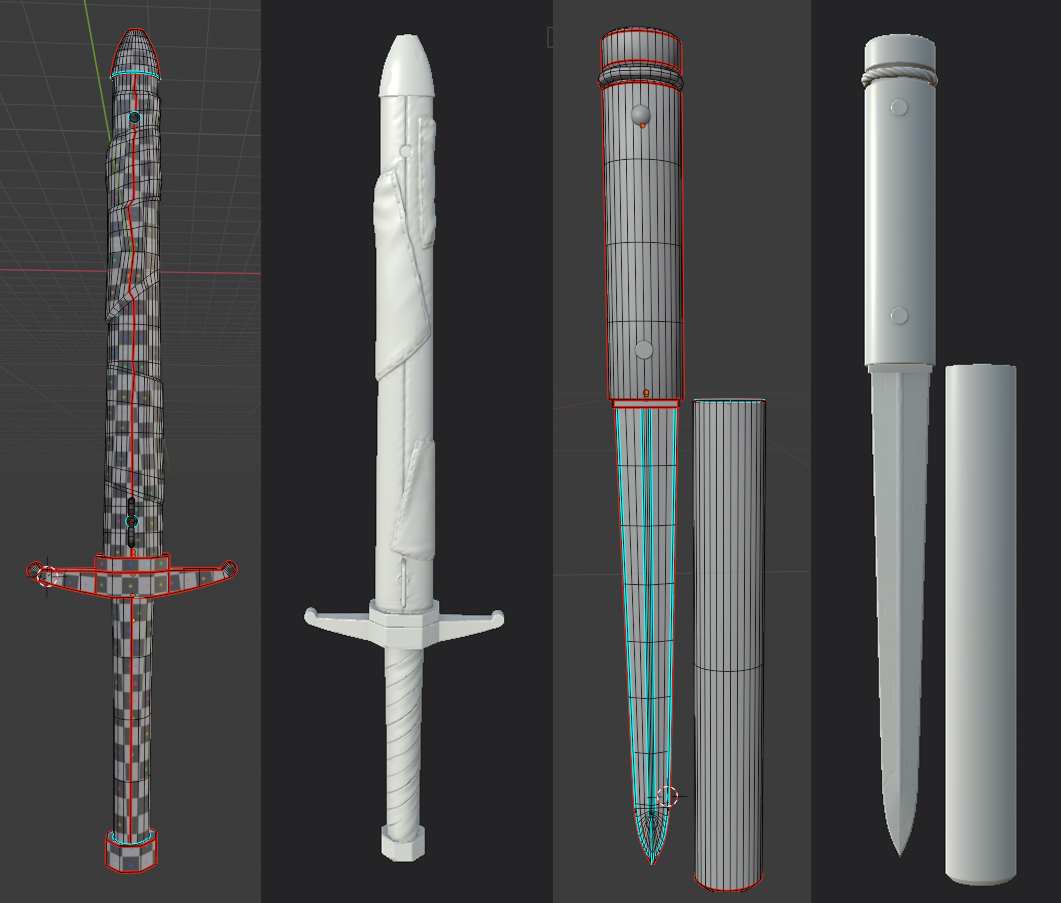
Started with the blocking the cloths, but did start to suspect some problems in converting my 2D drawing to 3D. Had a busy day to begin with so just decided to have a break and make some knife`s. I drew some quick concepts in Photoshop, did not what anything that would stand auto to much, I´m making an assassin after all. Then did some good old fashion hard surface modeling in Blender. Next Gonna give the some wear and tear in Zbrush.
1 Like
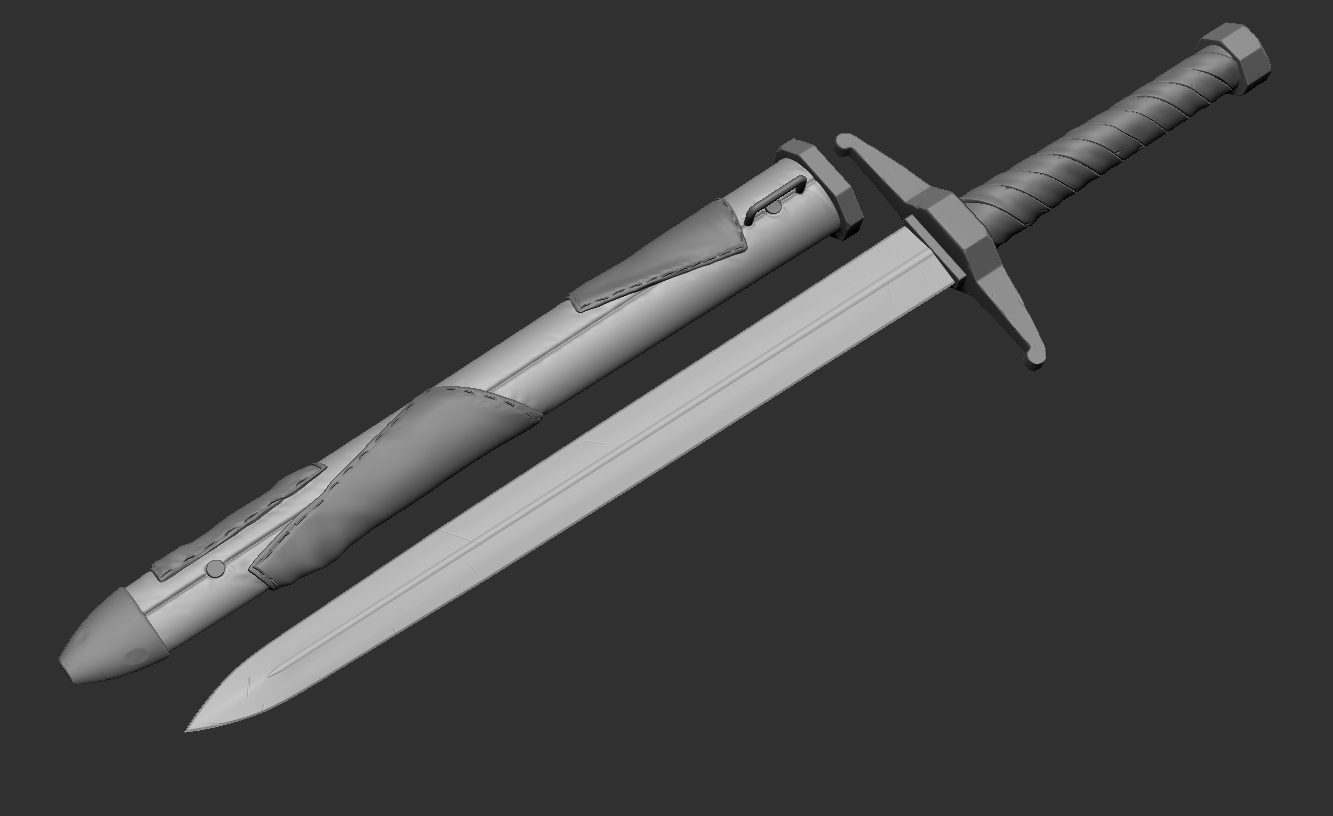
A little progress, and by that i mean adding detail to the knife that (might be an short sword). Spent way to much time on the fabric and stitches, not a good idea to get caught in side things, considering the deadline, but at least I like how it turned out.
1 Like
So to make sure the clothes of my concept would work in 3D I painted over a render of the charterer. A littel clumsy to do it now but like where this is going. Also slightly increased the size of the body, having takecke a lock att the model with fresh eyes i noticed the head looking to big.
Here is the original consept re-posted. Remove it from the original post to keep the thumbnail up to date. It seams i wroth the year wrong oh well.
edit: did not need to that ou well, one learns by mistakes
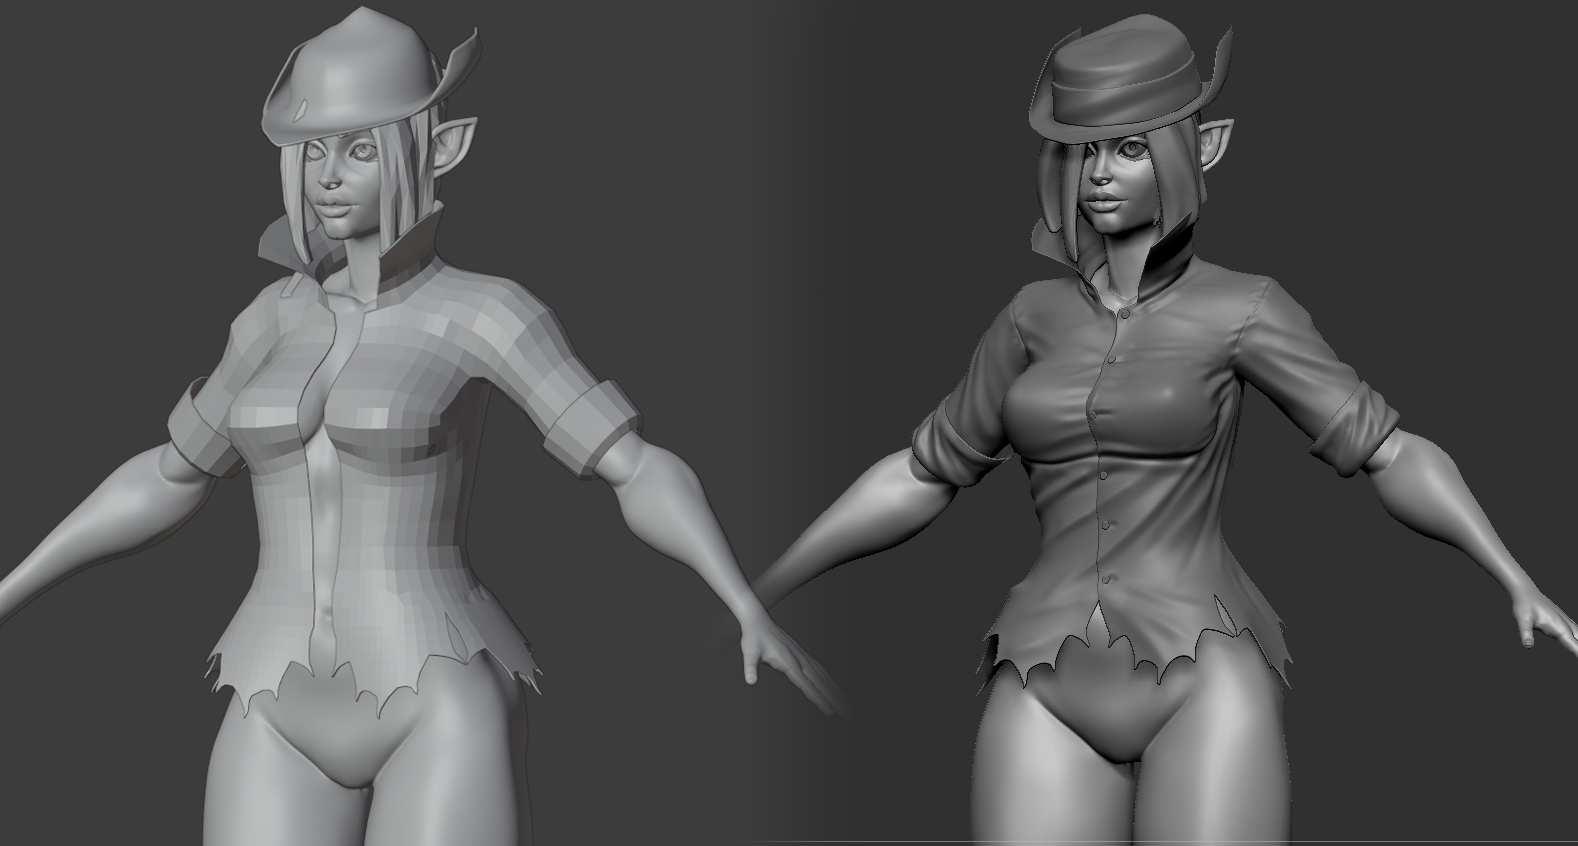
First made base for hat and shirt in blender and then in Zbrush added detail. “I may have gone too far in a few places,” and “…but we can try diminish the effects of it.”
1 Like
You can change your thumbnail picture by clicking on the pencil just after the title of your thread, don’t have to put your last picture in your first post 
Thanks dude!!!  I`ll try that once i have something to post.
1 Like
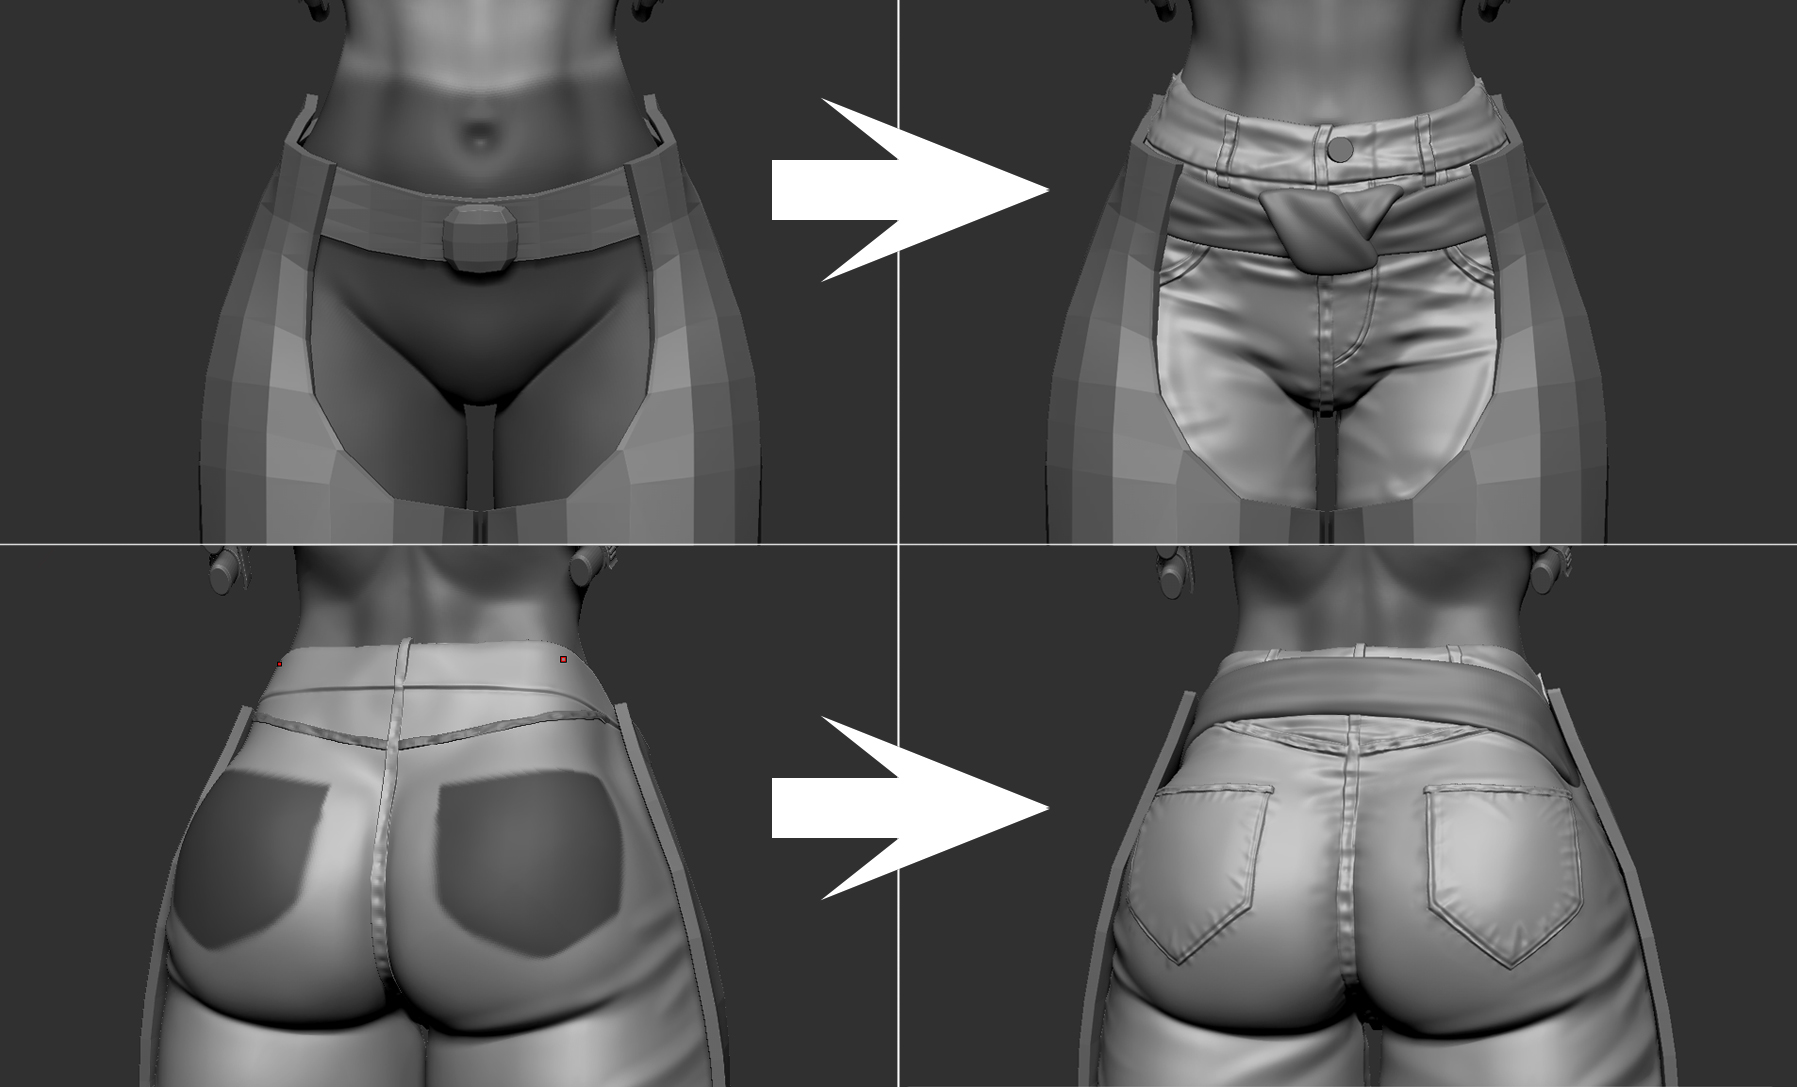
Back after a far to long of a break. Made more blockouts/basemesh of the cloths in Blender, more one thous later. Because first Wanted to make the lowest layer of cloths to build on, plus she needed some pants to keep this a little classy… to late for that I`m afraid. Was No need to have a base when the pants are about skin tight so masked the “pants area” and extracted it and then started sculpting. Used some basic shapes that i distorted with scale and move tool for the belt holder things on the jeans and the bigger seems. On the back pockets, used the same masking and extraction technique. Sculpted a bit on the belt basemesh to have it as an reference point for the folds in the pants. Gonna finish the belt after I have changed the characters pose, so gonna take a while for that. Next: more cloths.
1 Like
Nice folds, look so true! And its cool that you can draw concept !
Alright, More of the cloths. Made bases first in blender and details added in Zbrush. It it might seem that I could just extract the chap pants, however they are basically two layers of cloth,the top on overlaps on the under so easier this way, for me at least. Glows could have been done either way.
2 Likes
This is a real time charterer challenge, so time to start thinking of getting the poly count down, time is ticking. What way for what part. Not gonna rig it so some things can be done more "sloppily ". Have to think about it. As an warm up, made the low poly versions of the knifes. In blender modified the “original” pre zbrush hard surface models to become the low versions. Removed some detail and in some places added detail, and the UV mapped them. There is still some loops that might still be removable but occasionally it seems to help in the backing progress to have extra geometry, definitely not an expert. Speaking of Backing did a “quick” test backing in substance painter, a side by side of the low poly models in Blender and the same one backed in SP below. Lots of unforeseen problems, so spent waaayyyyyy to much time troubleshooting. On a grand scale of my “backing career” it went pretty well… but still frustrating but needed to be done. There is a reason i usually get drunk when backing.