So I figure out an solution on how to make this a real time piece smartest/easiest. However it could seen as on the gray area of the rules of challenges like this so had to ask is it was okay, it was. More on that in the next post probably. Anyhow, when was waiting for the answer I started to work on the last prop: Tinker Bell. He is a little small in the concept art but the idea is that he basically is Urien from Street Fighter, if drawn by Joe Madureira. Being a big fan of Joe, I have a ton of good references on my computer. Started with the face in Zbrush, but felt it would be to much work considering the end result. So instead just started making him ans a low poly in blender. While mostly listening MANOWAR to get the right fell. Juststarted wit a six sided cylinder and extracted and moved stuff. Did make the hands separately to make it easier. When got to the face (almost the last part, so opposite of how i made Pan) it did not go well and my derision to make the face screaming made it worse. So returned to my zbrush head an zremeshed it to be super low poly, brought it to blender and fixed some stuff and attached it to the body. Then added a glowing material and about done, just needs a re-pose. And the strength of the glow might adjust, but depends how it looks next to Pan.
Okay, my problem was that my computer could not handle the Pan model when trying to use transpose master to re-pose her. So i had to it in parts, sigh. But would be a bit of a mess to know what I was doing, even if i started with the body would be difficult to get a god idea of the poses feel. So I figured i could used one of my old already rigged characters, the Glam Metal Elf to pose her in the pose I wanted for pan, and then use it as a base. Was not sure if this was okay, using a old work, so had to ask, luckily it was okay 
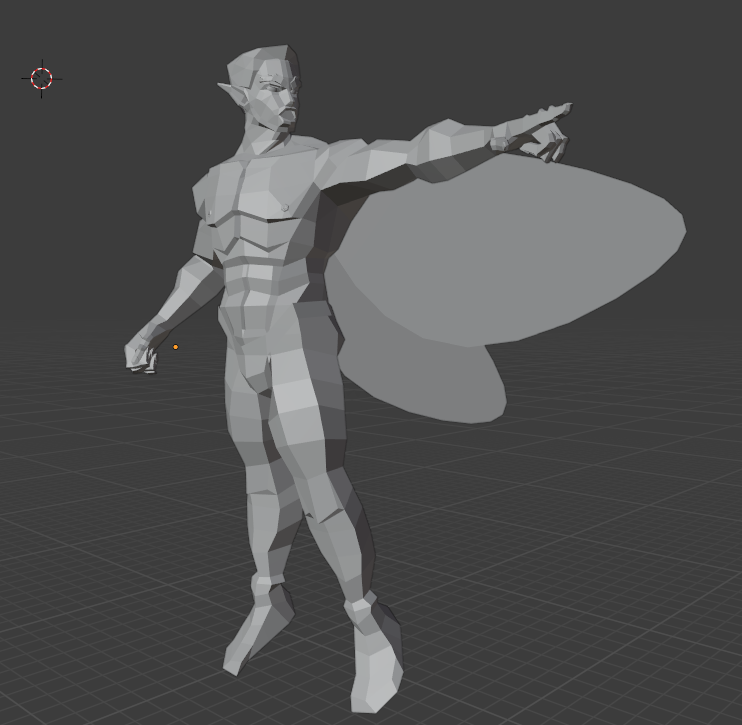
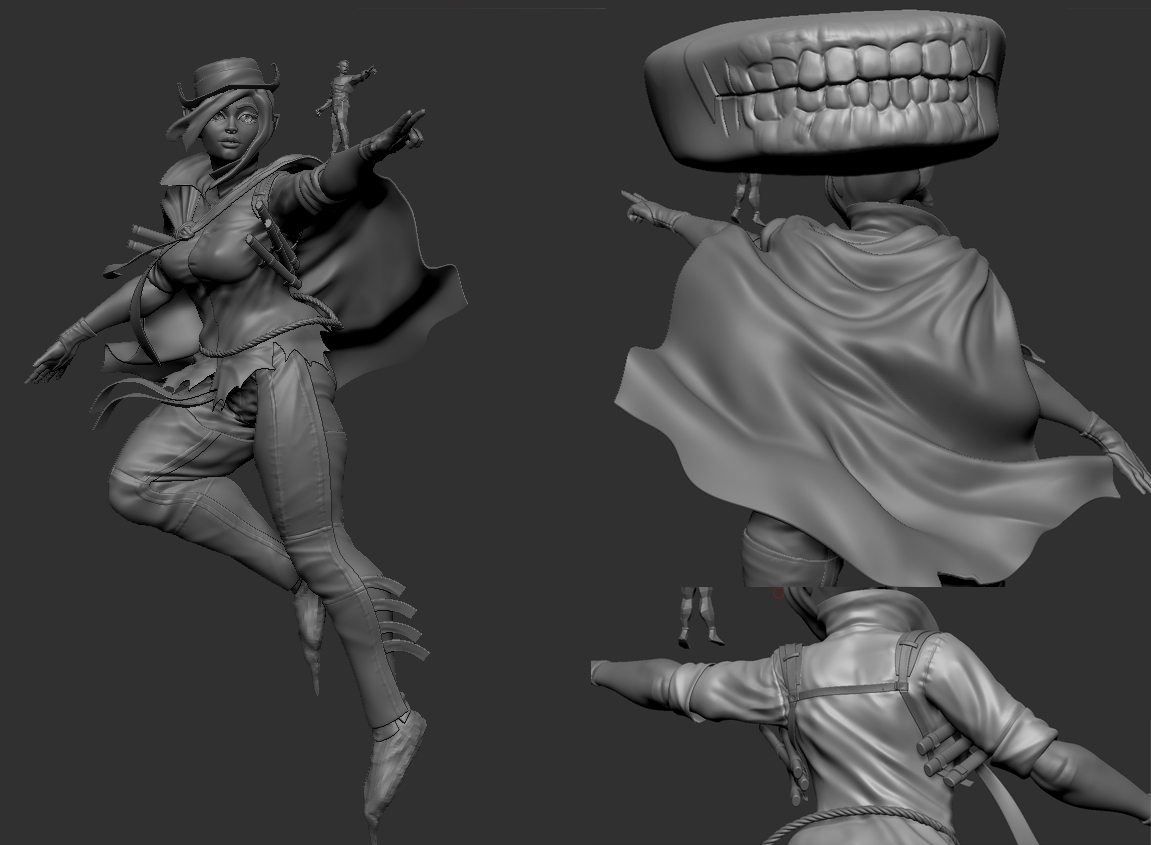
So in blender pose the Glam Elf similar to one of the concept art drawings. Posed tinker bell as well, witch was easy and fast considering hes poly count. Got a good block out, added some of Pans props like the hat and some knifes and just for fun some light (man I love Eevee). Then exported the charterer to Zbrush and started re posing Pan to mach the pose. It was a bloody mess of clipping, move tooling, transpose mastering and re sculpt some things. But got it done. Still need to change her facial expression and some tings need tweaking, but most of posing done.
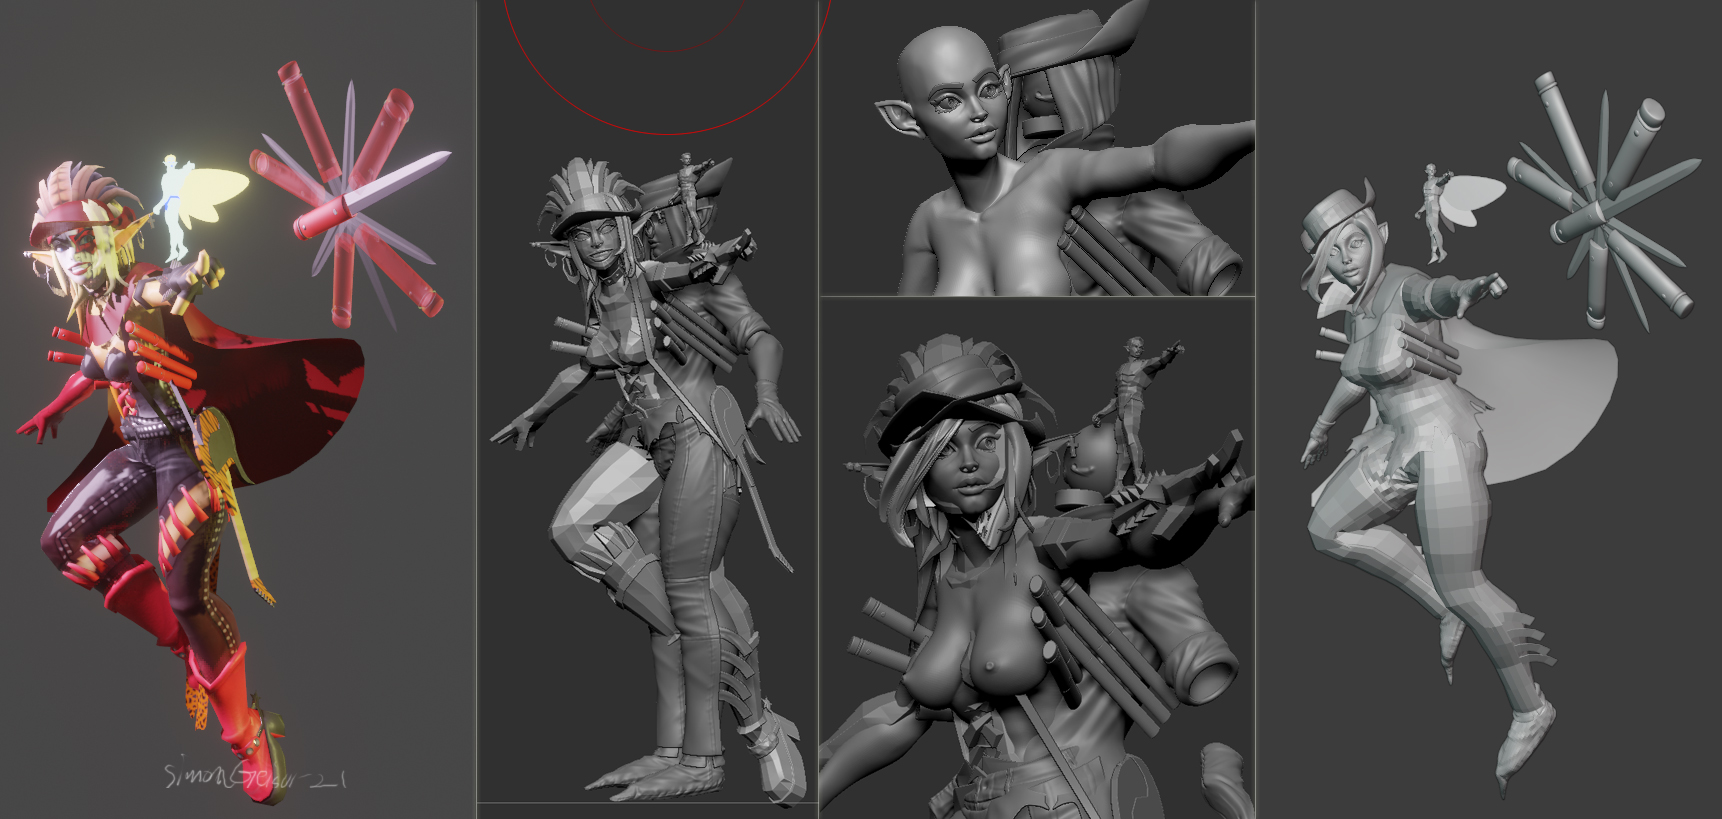
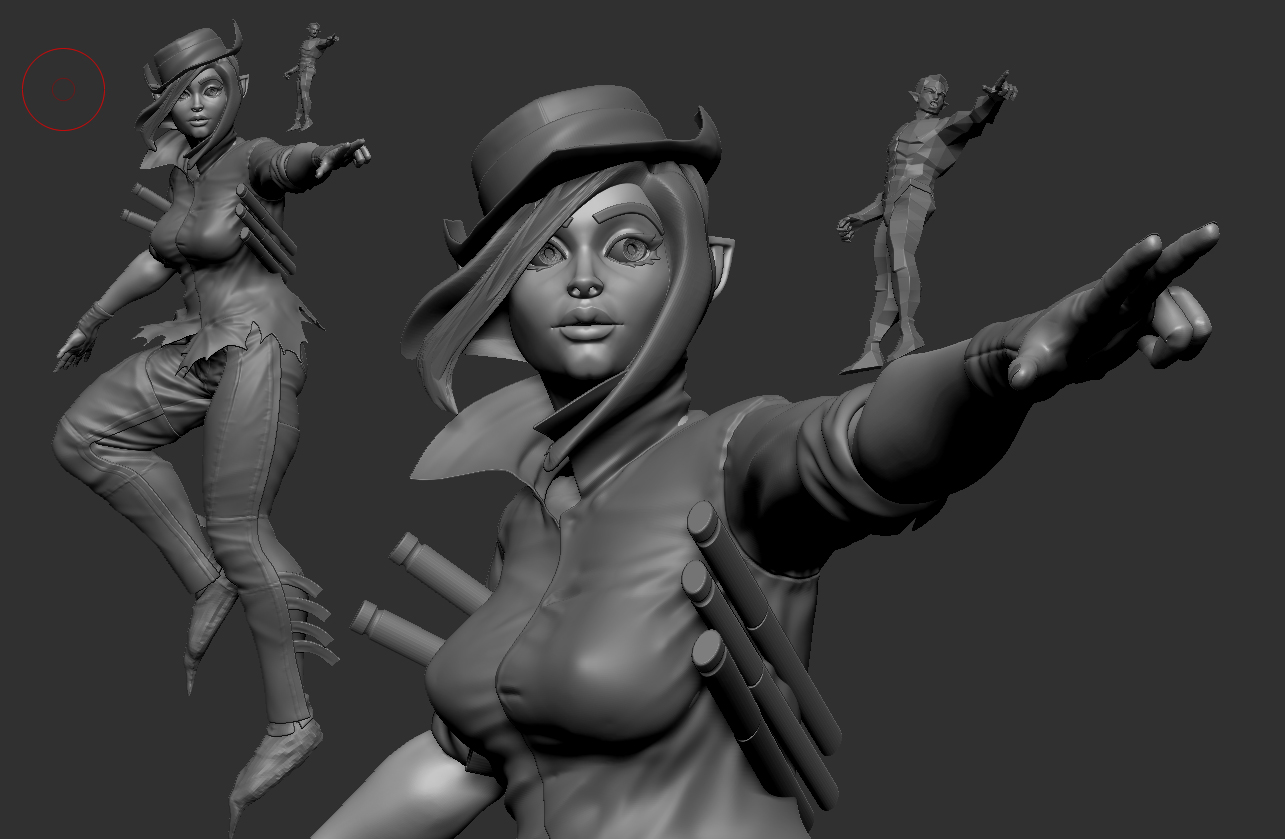
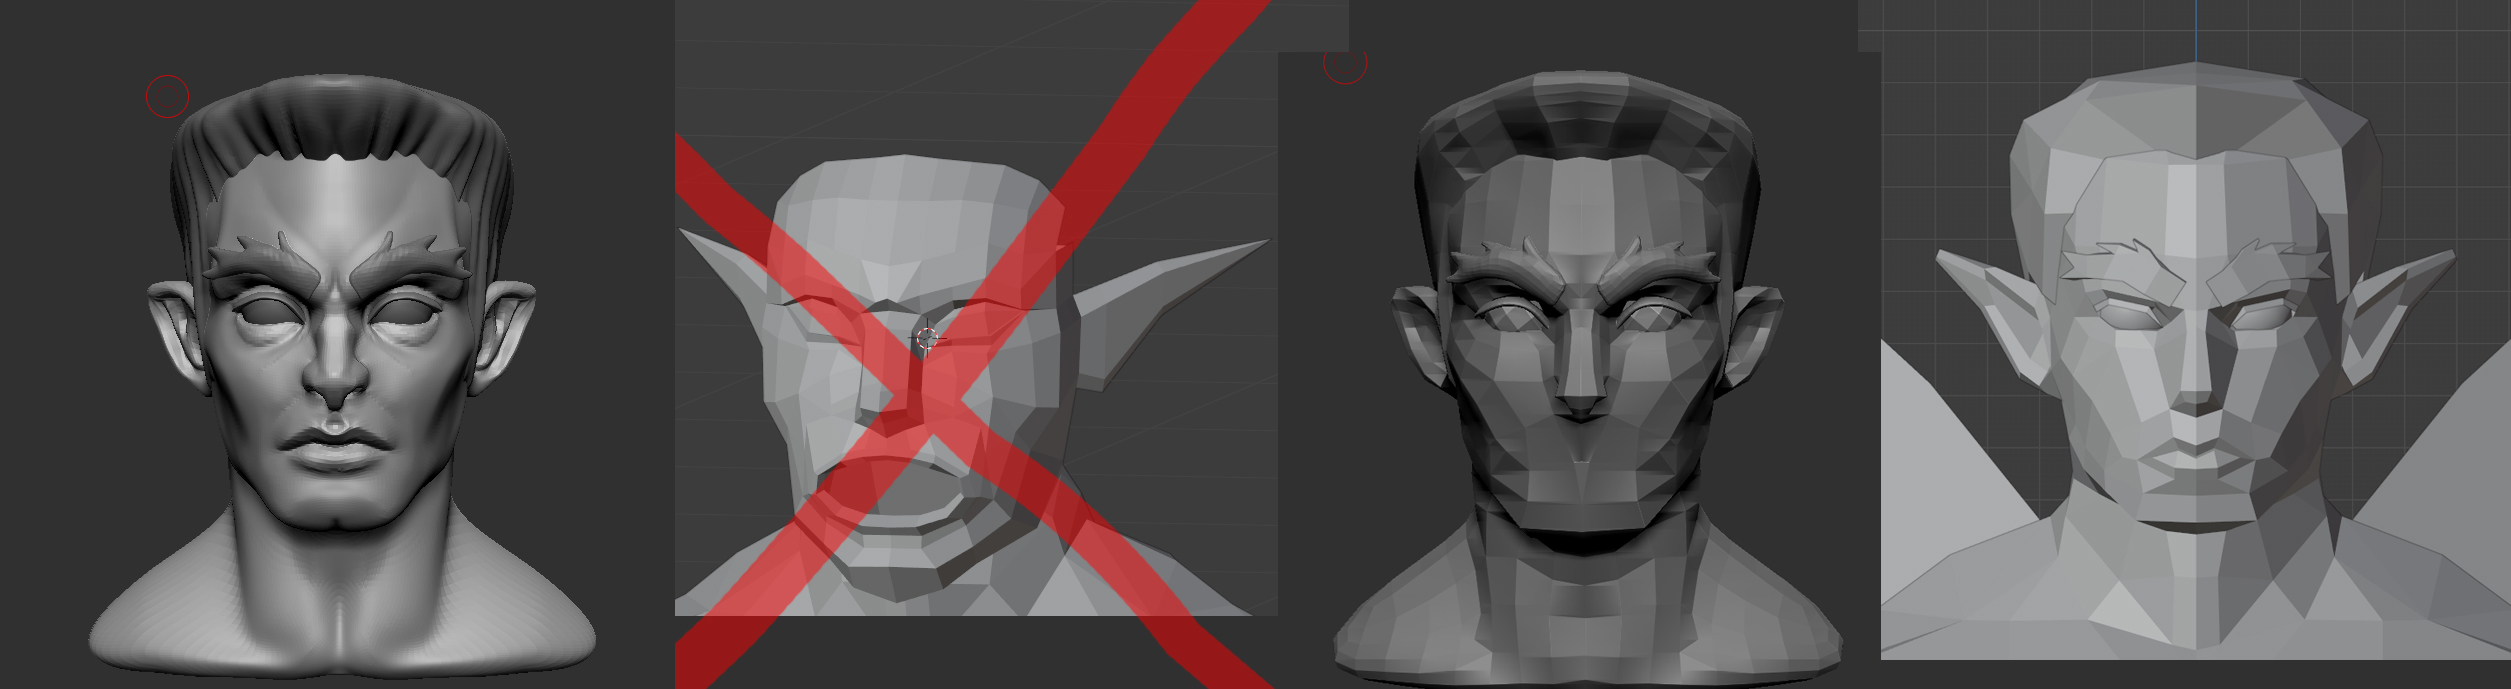
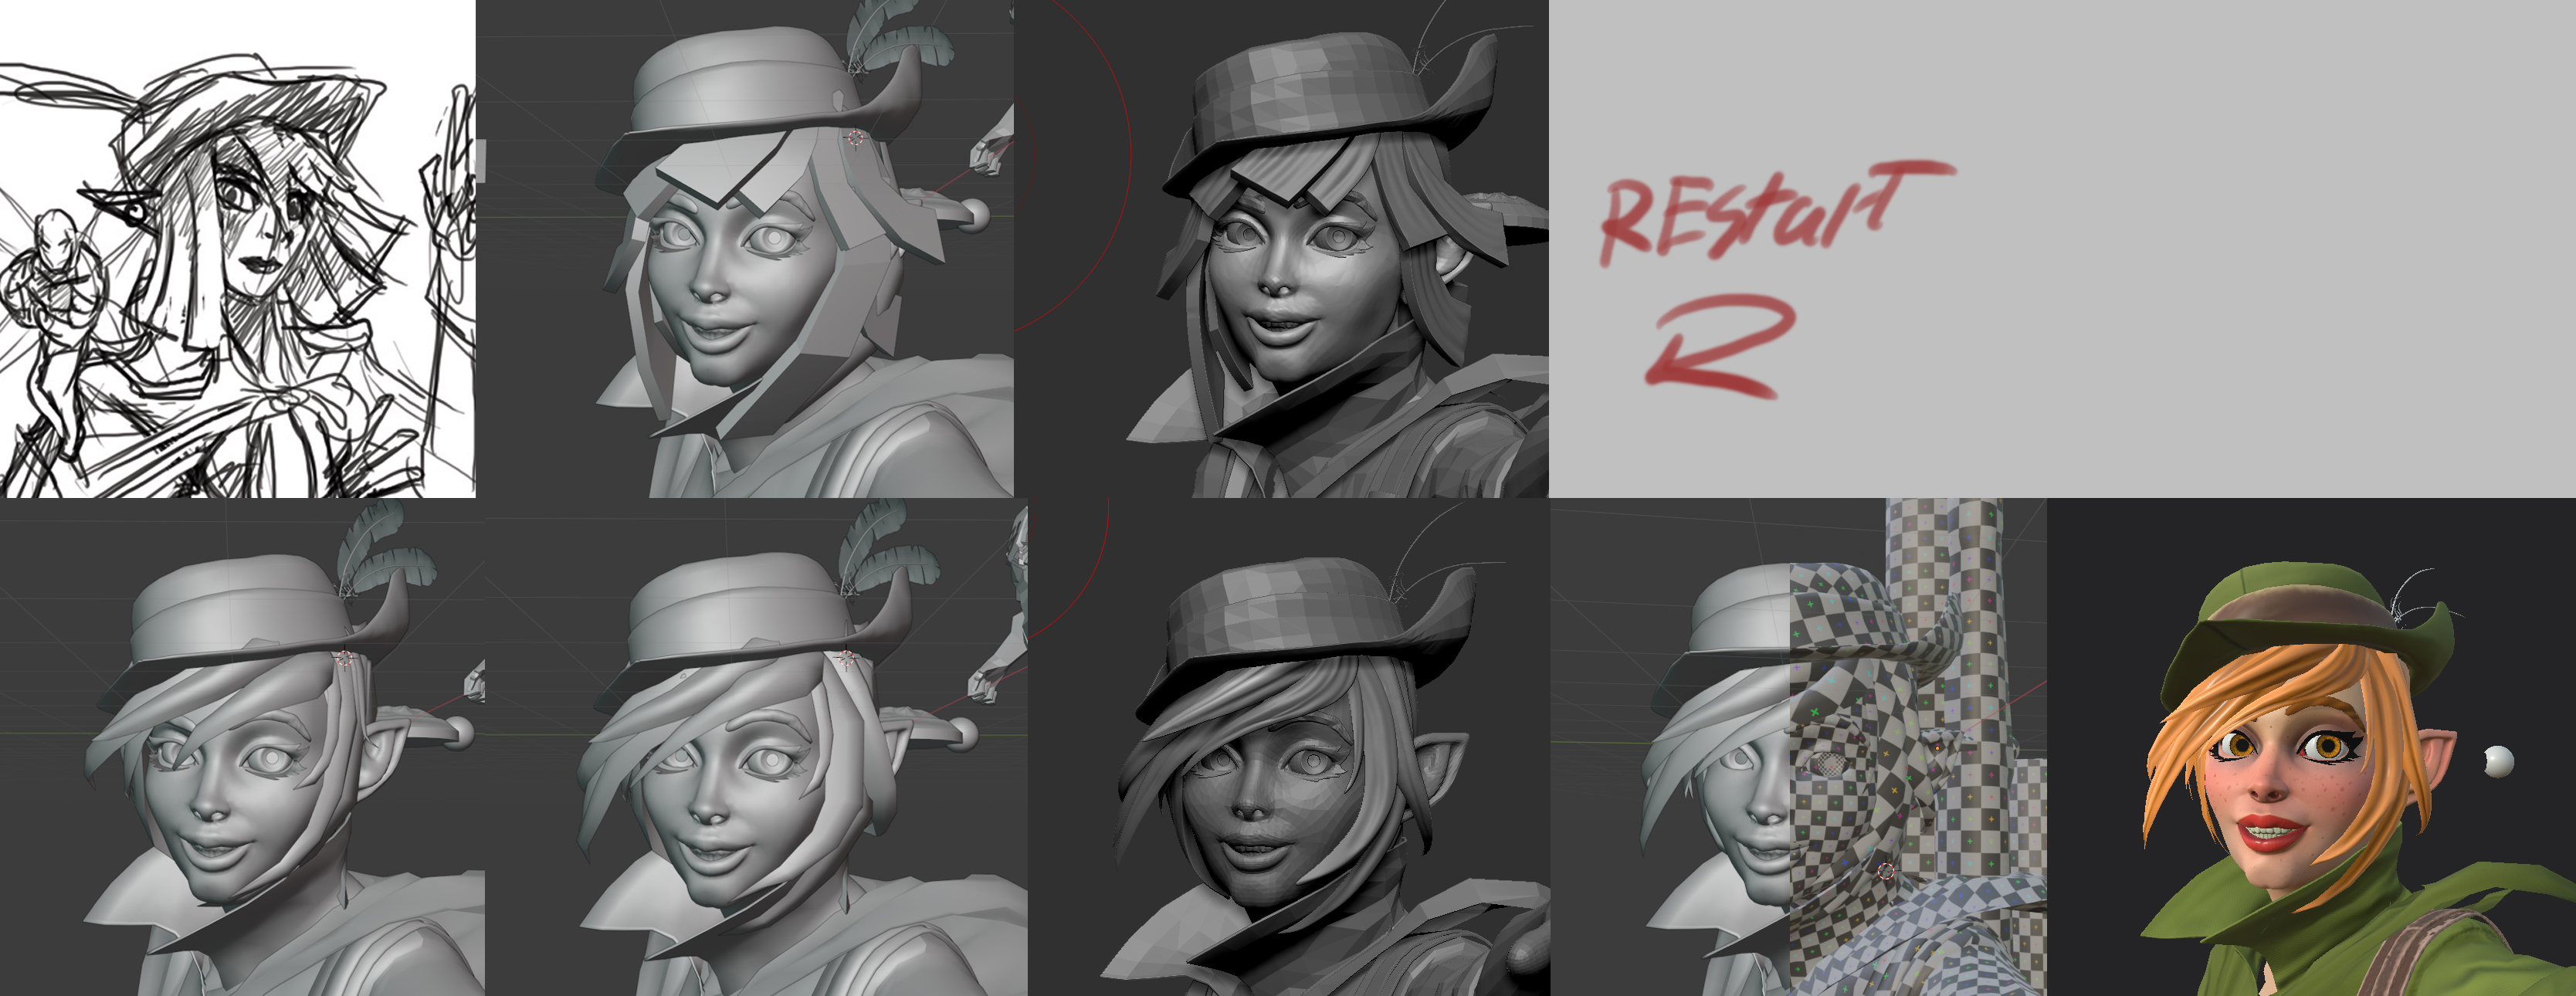
Tweaked the pose a bit, finale added and improved the knife holsters in Zbrsuh, have had the base for them in Blender for a long time. Made a cape and finished the belt, now that I can see how they will flow when the charterer is in her pose. Made the same low in Blender and high in Zbrush way. The started to work on an expression and noticed i had forgot to make the teeth so just start with a cylinder and sculpted some teeth. The spent the rest of the day trying to make a smile or something. I usually “make” (?) (to late at night for English to work) the facial expressions when the character is ringed and doing now in zbrush was unexpectedly changing. Started over may times and may do it again.
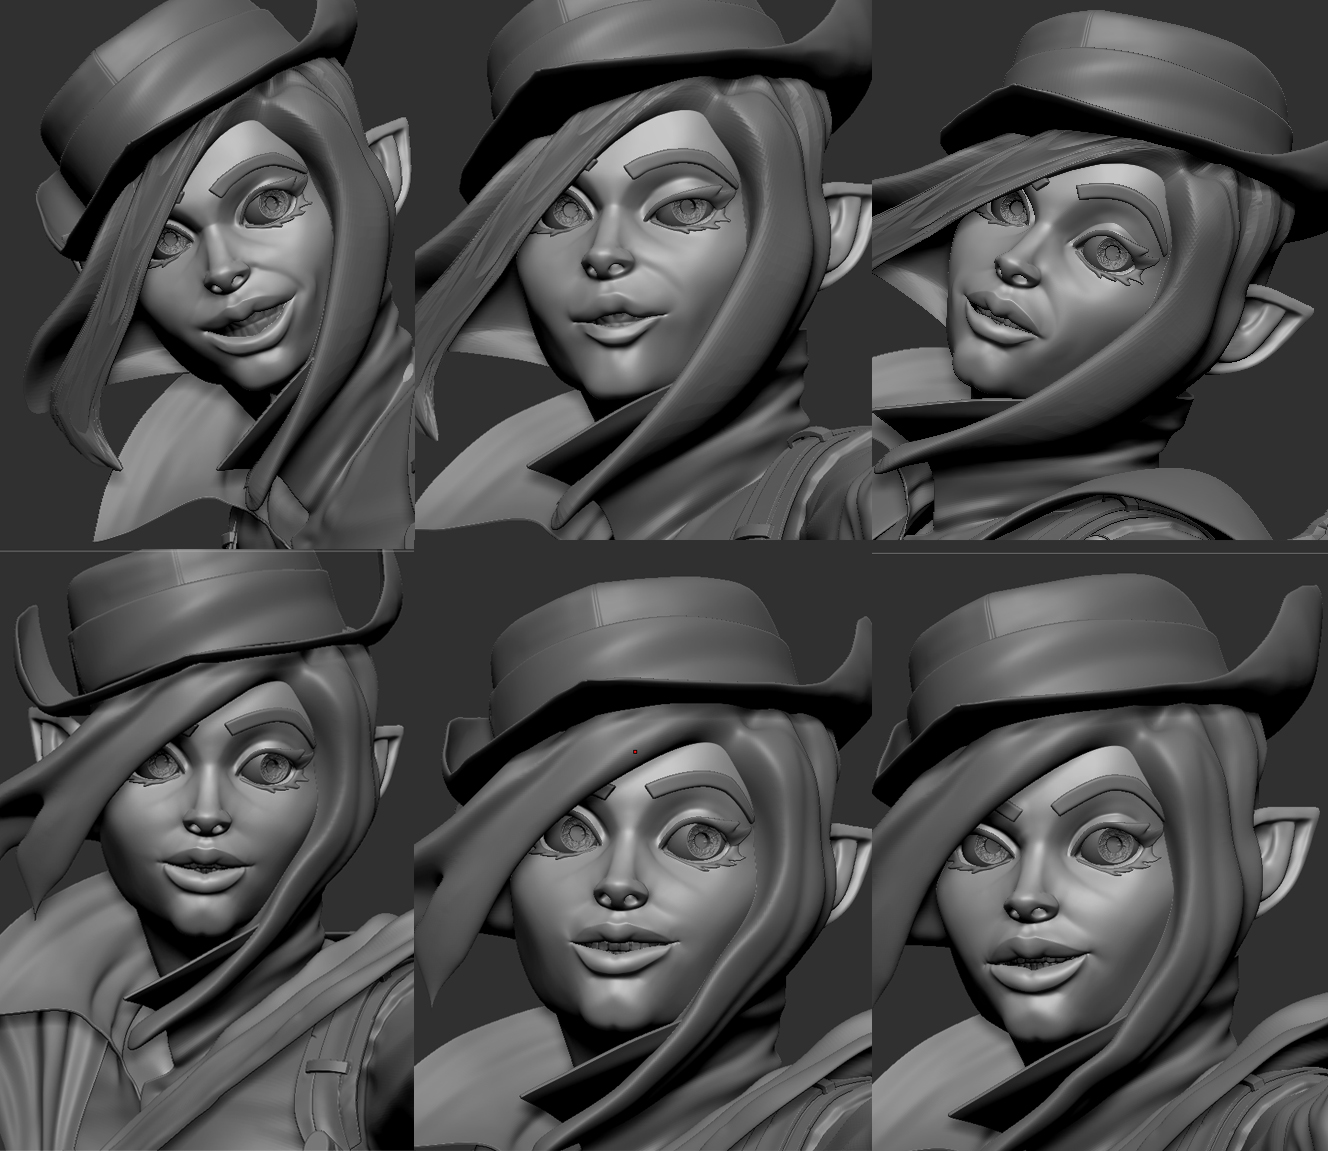
Maan that boobs just turned out well! And I think your best face expression is 2nd
Thanks! XD Glad you like them. Had kind of gotten blind to them myself, now I can`t stop noticing. Never thought I would be “self conscious” about boobs, despite you only giving me a compliment XD. One lives and learns.
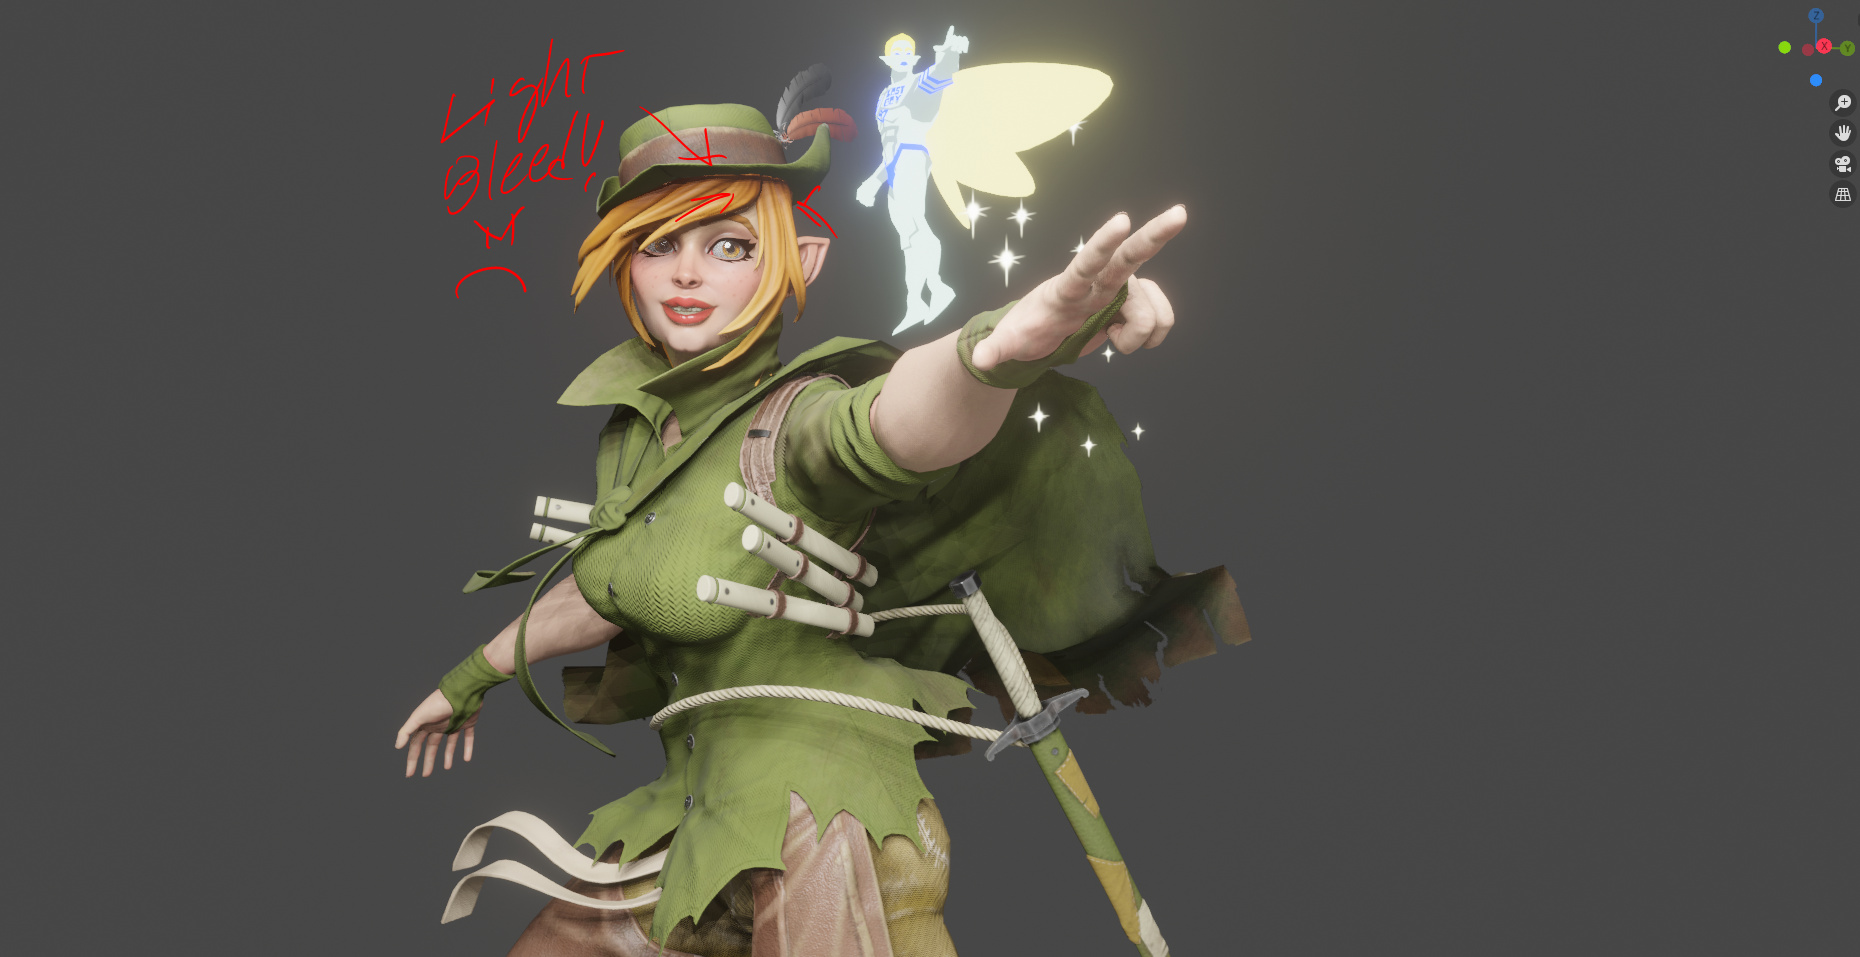
And thanks for the info, your right, the second face is probably the best one, at least in that actually works. However its a little to unhinged for what i had in mind. The idea being that Tinker bell is the blood thirsty one, and Pan is more adventurous. We`l see what I do with it.
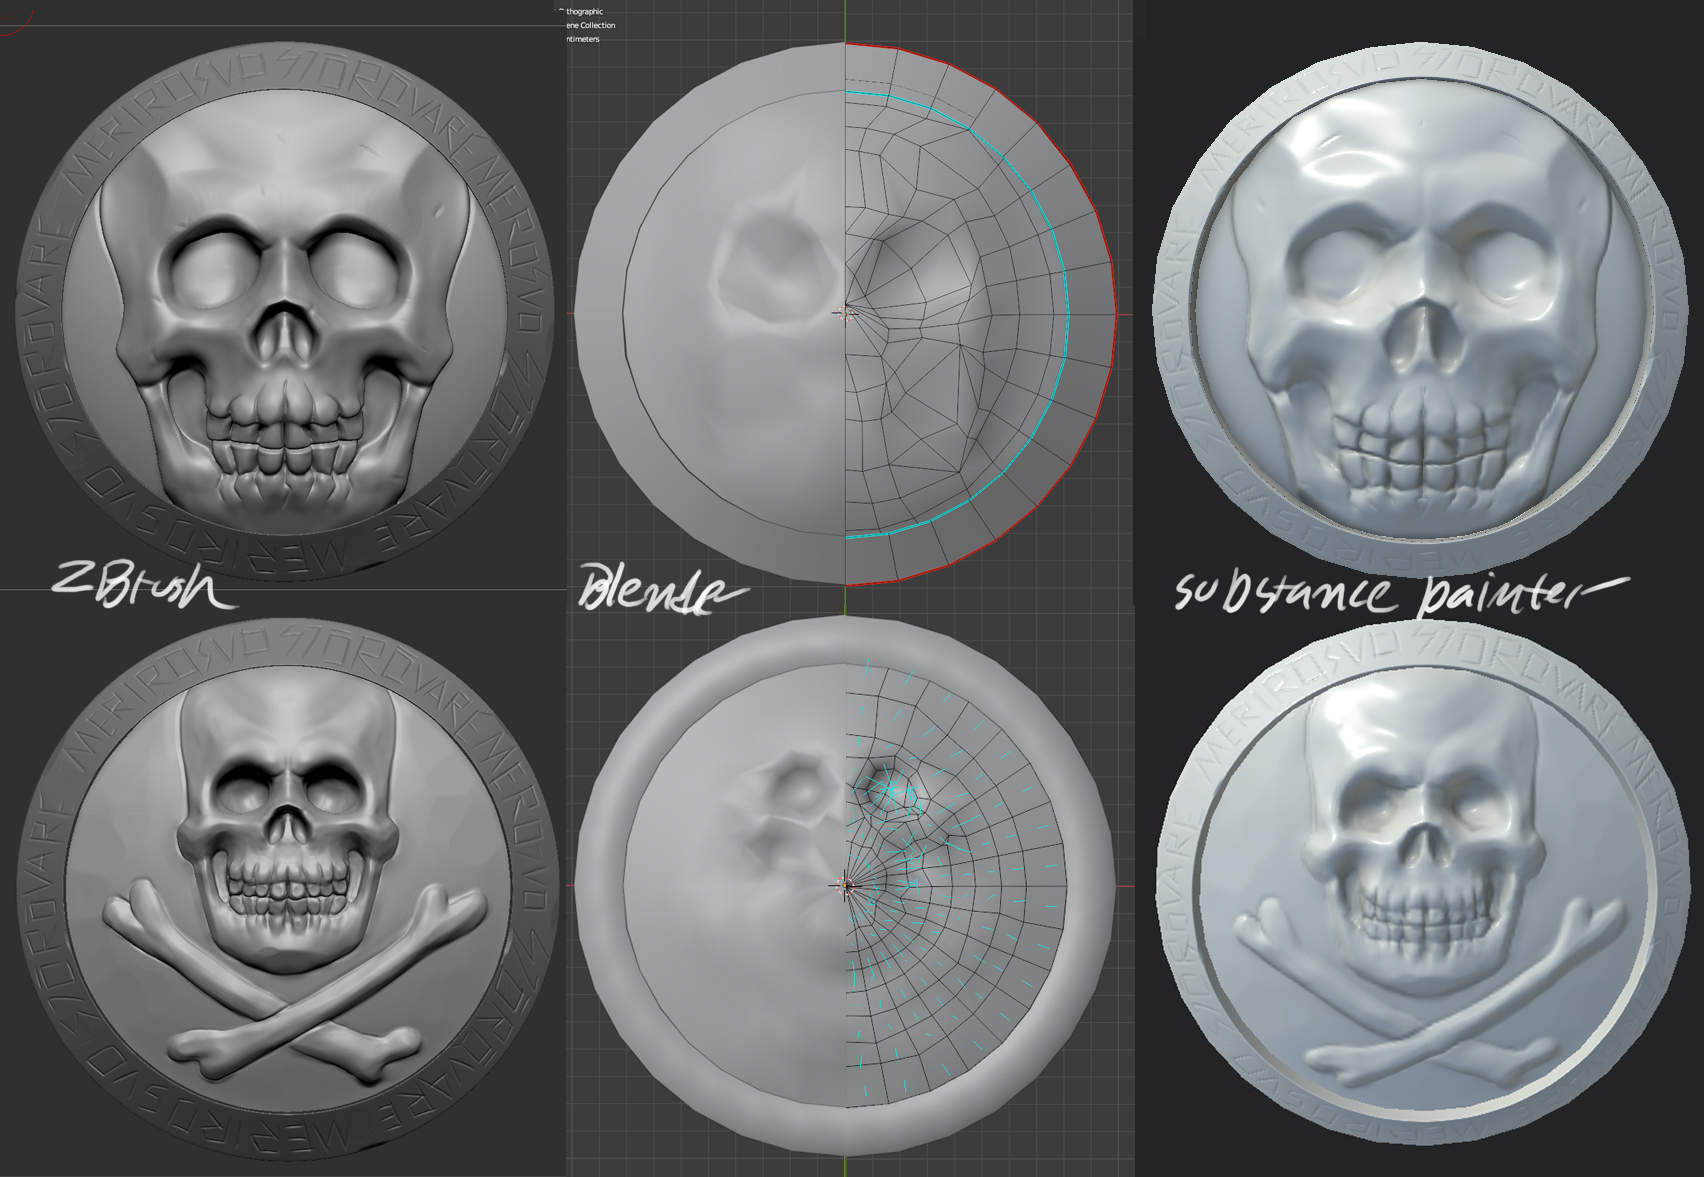
Took a brake from the face to be able to make a fresh eyed decision on how to move forward. So spend time om some of the last props. Starting with the buttons for the shirt and the pants. Might be the most waste of UV space but wanted some fun detail, .this work needed more references to the swashbuckling on the high seas, so wanted to make pirate skull buttons. Had no desire to make boring old wooden ones. So the old dance: low in Blender-> high in blender-> retopo in blender-> backed in substance painter. However the backing was just a test and for practice, sense can`t make the final one without knowing how the rest of the models UV are gonna be.
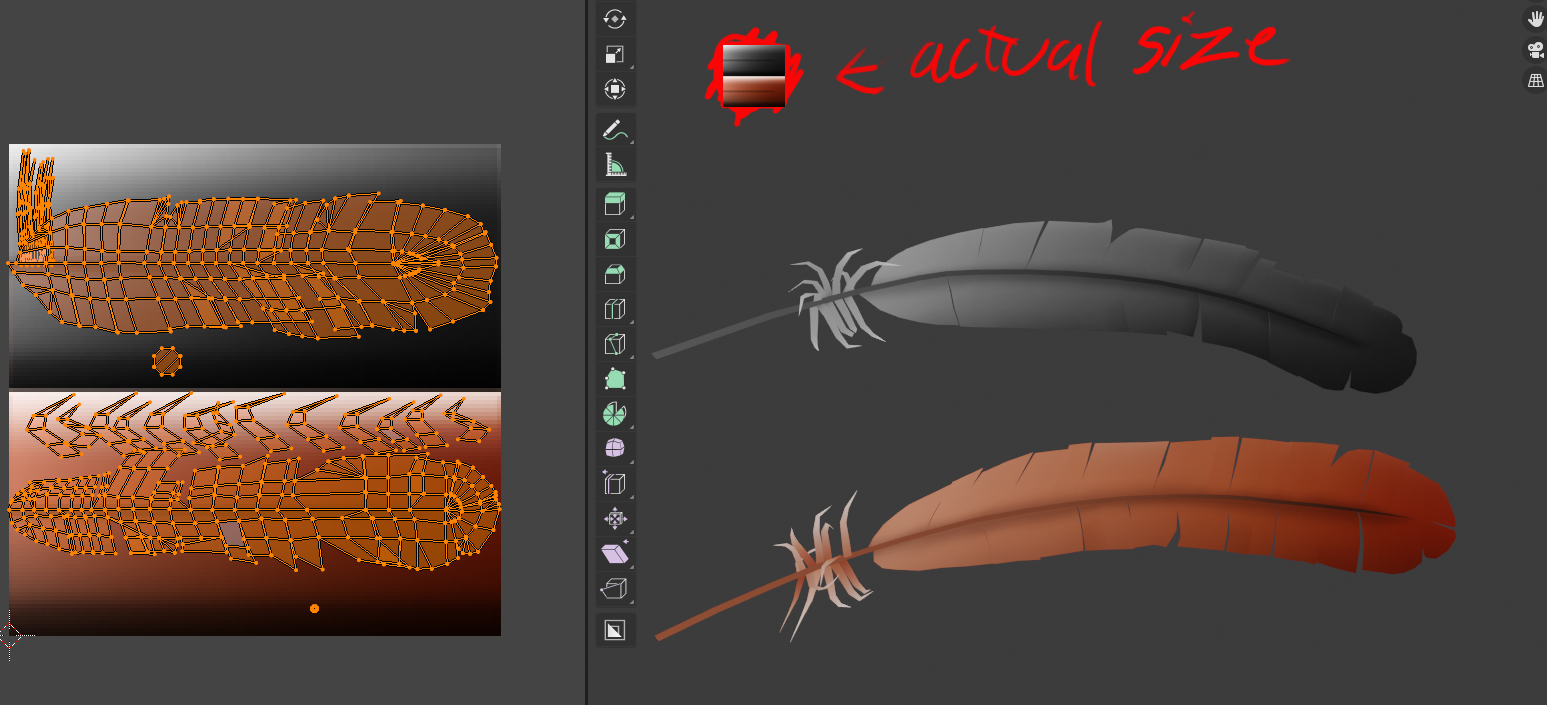
Then made the feather for the cap/hat, being wordy about UV space I decided to go as low as I could while still keeping the quality okay. It will be a small part of the final render, so not the most important things. Got it down to a 62x62 pixels texture, and wanna point out in the screenshot, I am using a emission material, so (hopefully) will look better with shadows.
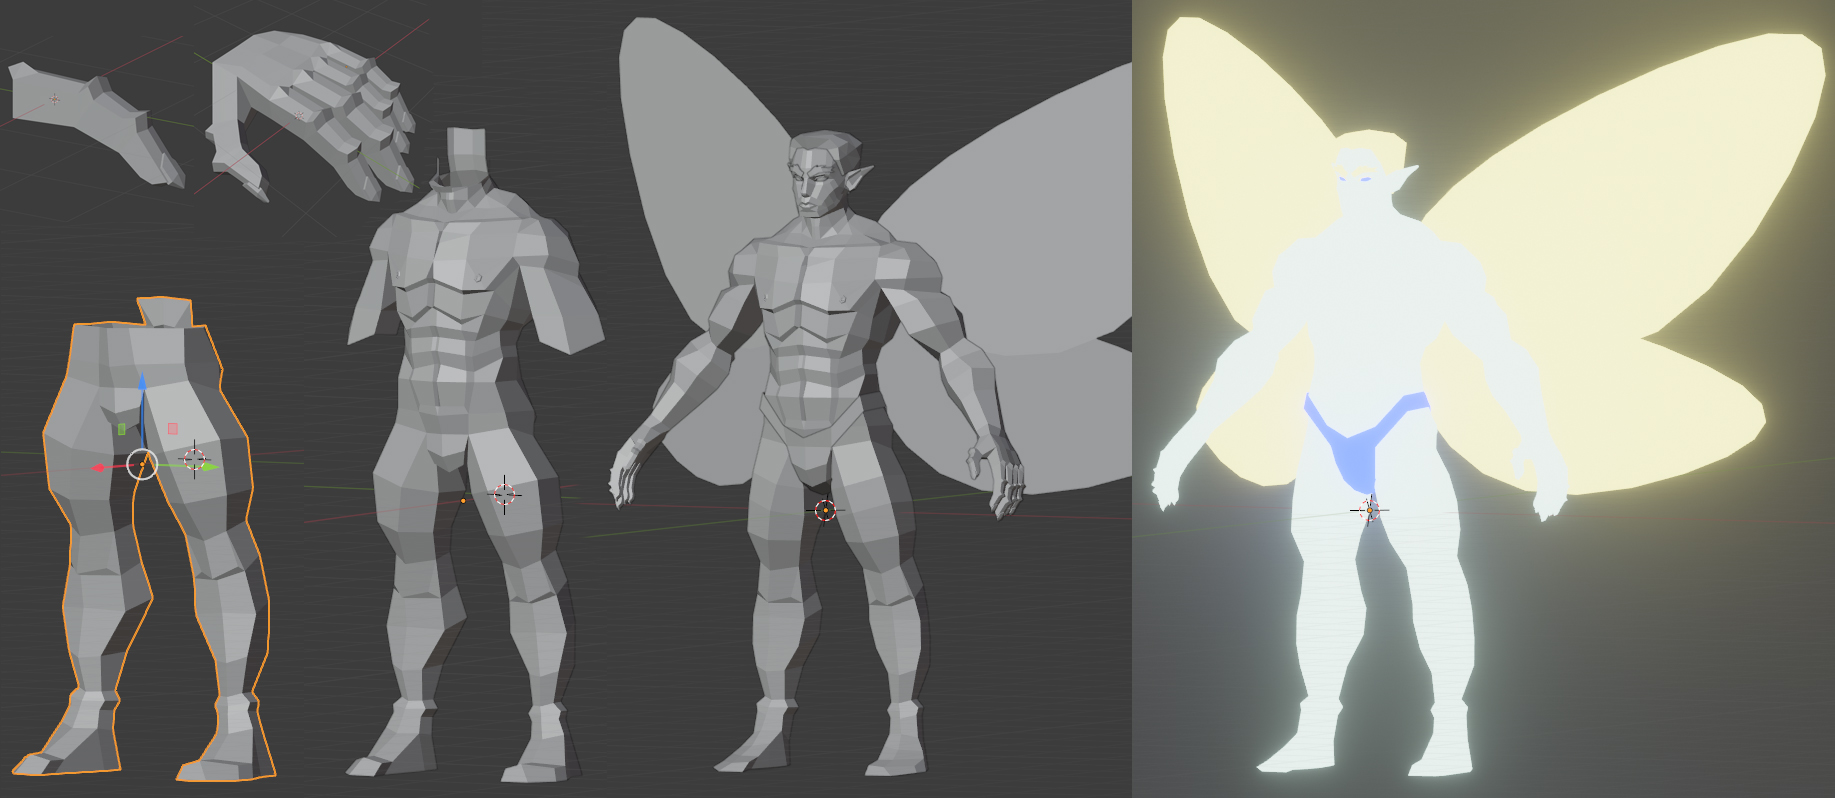
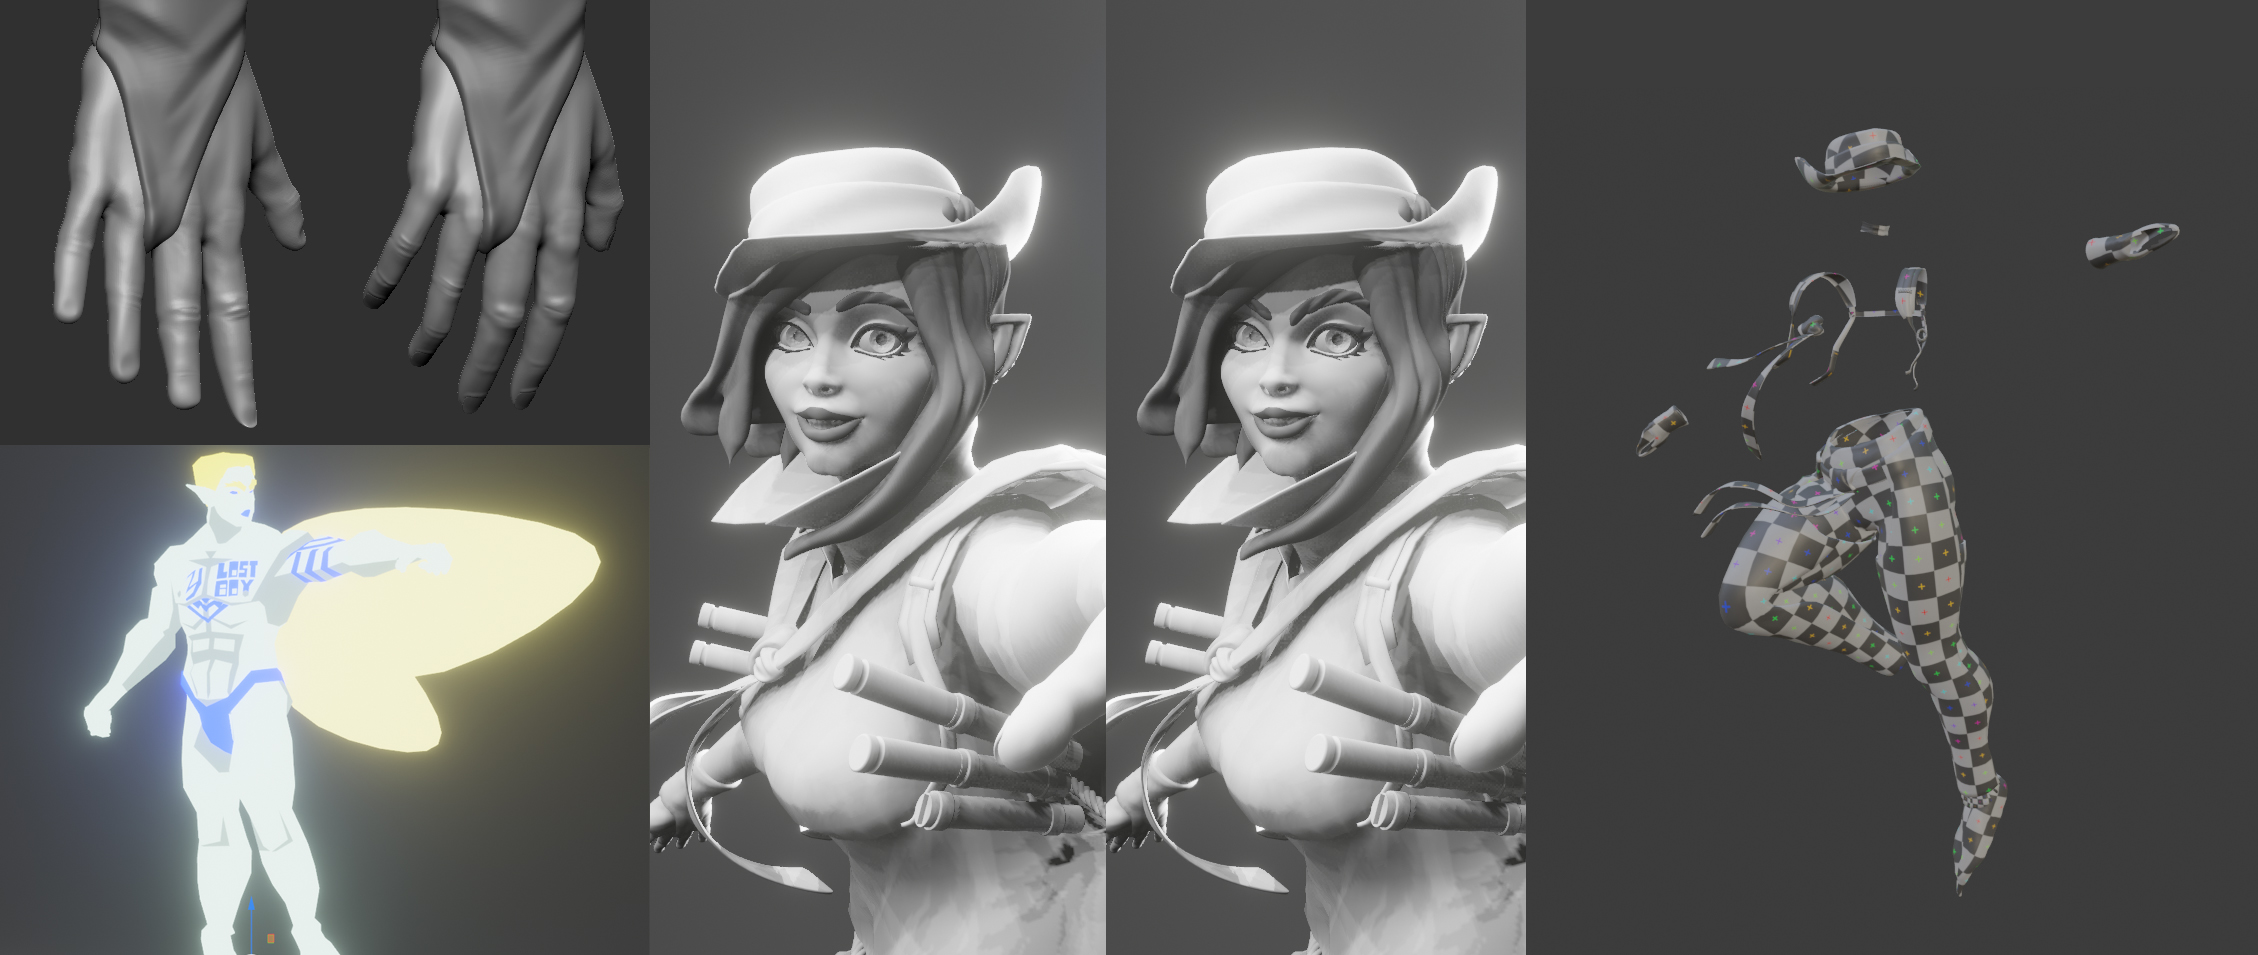
So noticed that one of the hands had been deformed in the re-posing, so had to re sculpt almost all the fingers, that sure was fun and timely… sigh. Played around with materials on Tinker Bell and added some tattoos by adding gemoetery. This to more bring out hes personality. Tested some faces in blender, and had some friend give feedback (going with the one on left). Then started retopo/uv maping, about half way done with that. Mostly using lowpoly models made with zremesher or low level versions of the high once, but almost all parts have gotten some manual attentions.
Bro I`ve got an advice for you - you can make feather from alpha map on a plane, will save lots of polycount and UV space
Thanks for helping. I have done similar things in the past. However wont that alpha still be part of the map sets? So I dont get what you mean. Even if ti would not be, I still needs UVs for a base color/albedo, right? Or are you suggesting I get the colors from like a color ramp in the node editor? (I don`t feel to learn how to do that in the limited time left )
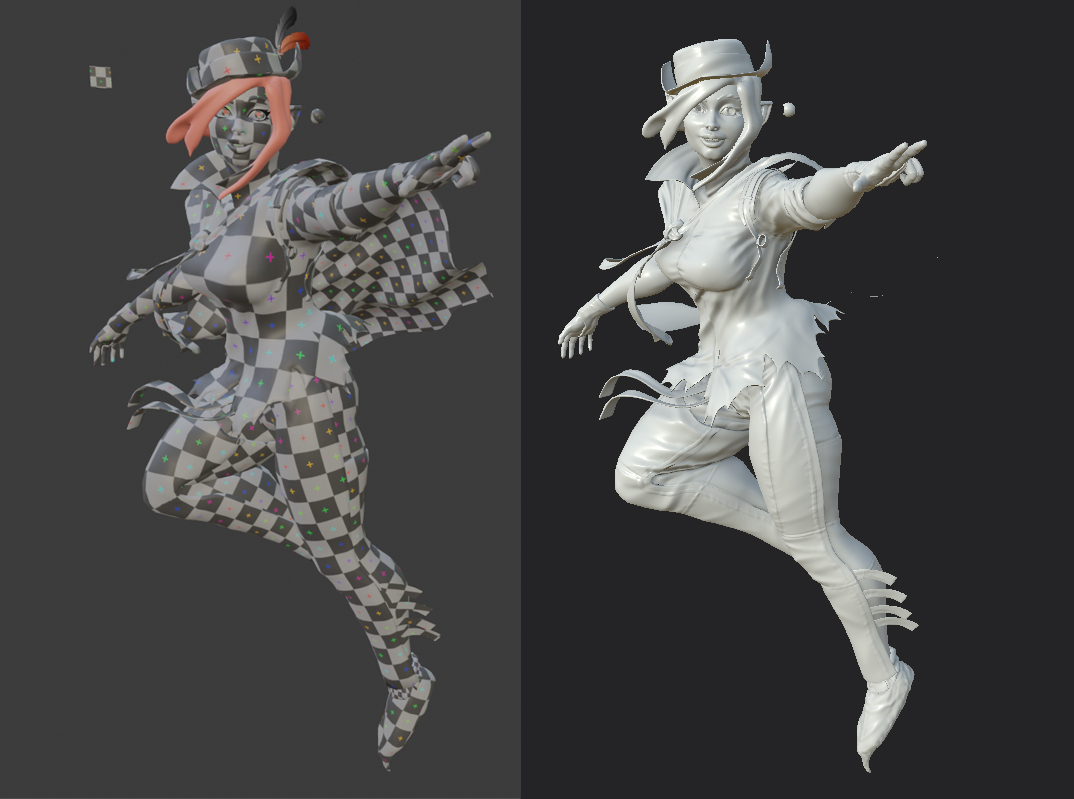
quick update. UV done for Pan, have started backing. It locks okay from far away but a little closer it needs some work in some areas. Done some troubleshooting (lots of wrong spelled and wrong labeled meshes), gonna do some more, then probably some manual fixing. That deadline is creeping in, and Im a day or two after my “planed” scheduled, with is annoying.
Finally started texturing, after spent surprisingly long on fixing the bake. It’s been a little while since I used Substance painter, so took some time to get going, witch is unfortunate considering the deadline, but what can you do. Lets see what becomes of this.
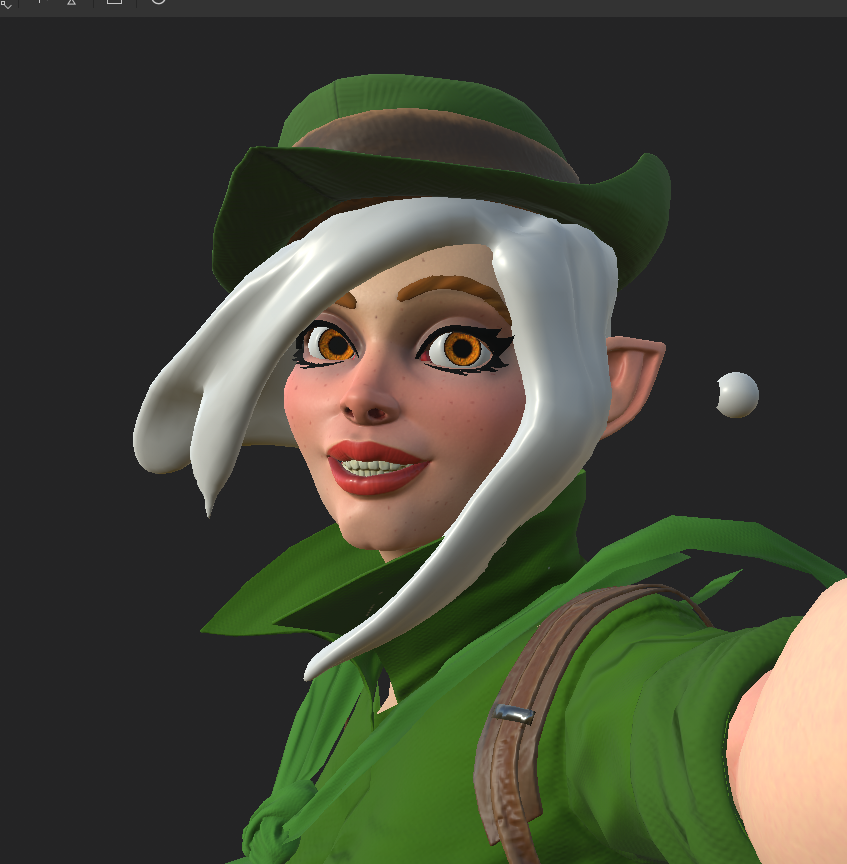
Skin done (for now). The eyes look a little crossed, might be the “lens” but not a problem, easily fixed.
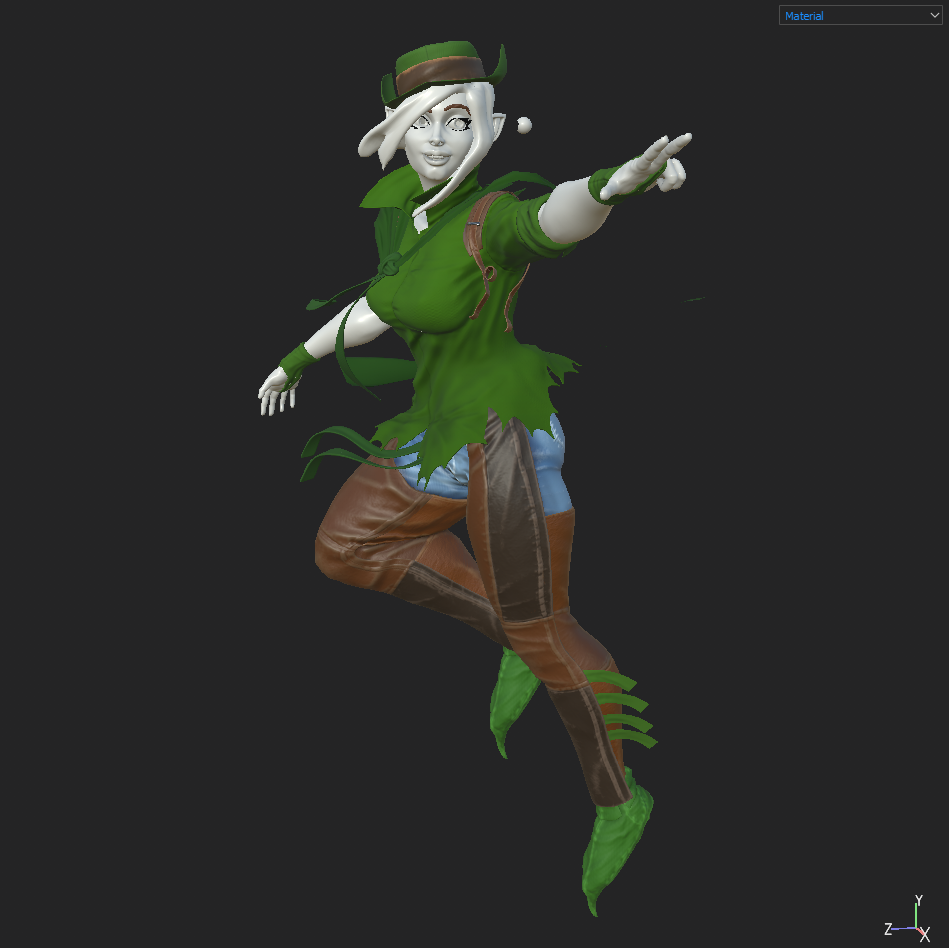
However my colors are not working, (are about same as last post just added some height maps and such), the green being to over the top and feels overall like its clashing, so asked my friend who is relay good at painting miniatures for some tips, think it will help, will start adjusting the colors tomorrow.
Then hopefully gonna start on the final hair.
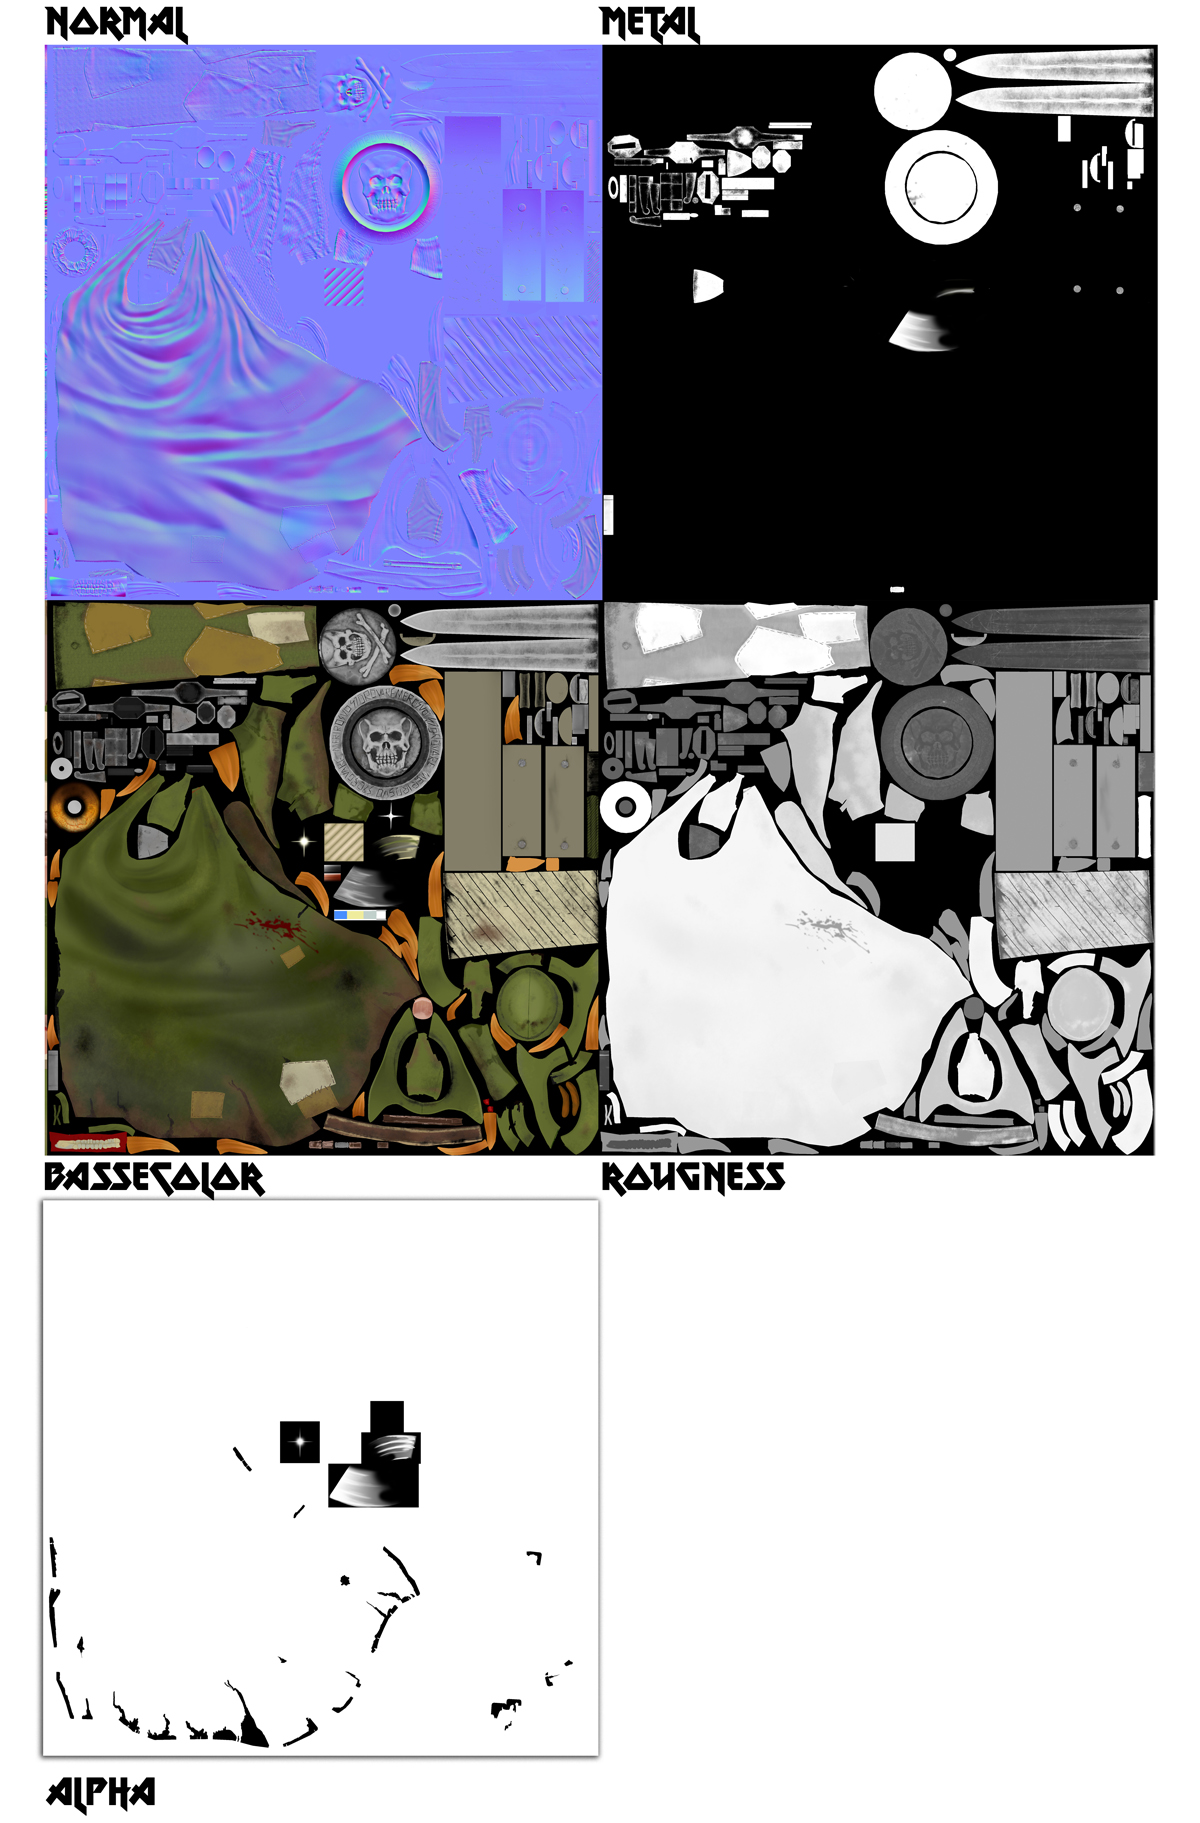
edit: forgot the image:
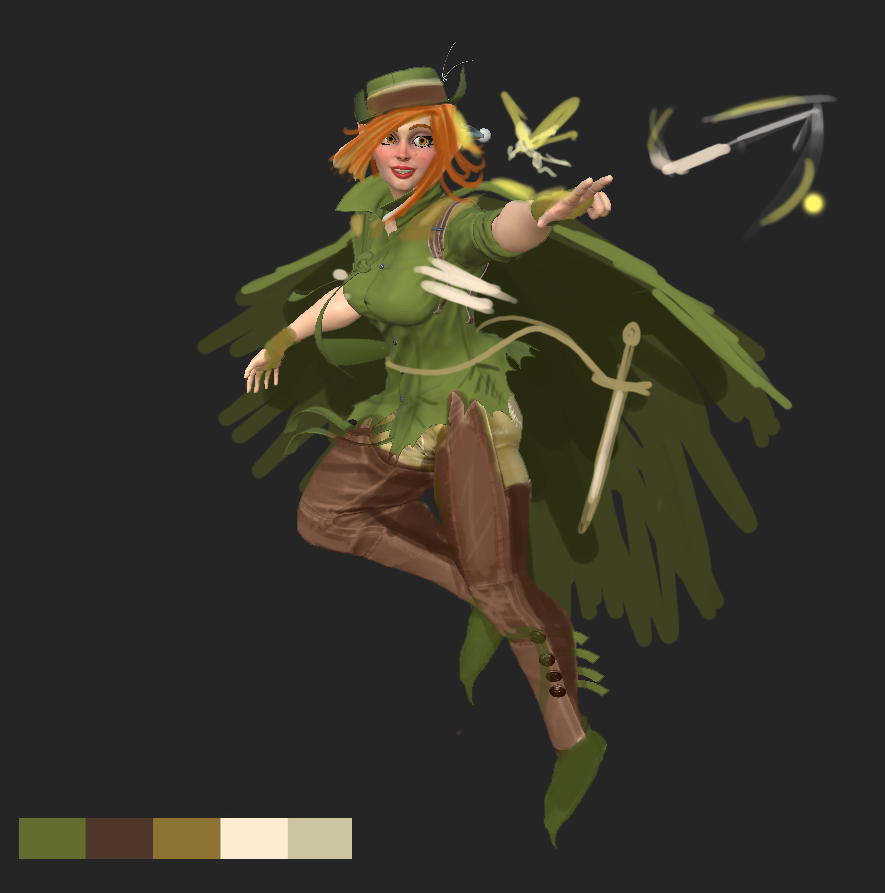
With the tips from my friend I started to adjust the colors, however went a little to far with the yellow-ish tones, so when halfway done did a color test by painting over a screenshot in Photoshop. It helped to guide me the rest of the way. May still adjust something, it is way easier on the eyes now, but has lost a little of the original flavor. Probably gonna separate the cape from the shirt with a hue change. we`ll see what looks good when I get the hair. And for thous wondering why I save the hair for last. Well the idea was to make the hair last using blenders curves and just go bananas using up ALL of the last of the polys. Worked last time i had a limit, might be to tight of a poly budget now to make something crazy.
Also textured the knifes dont expect them to change except for maybe some dirt. And the stuff floating next to her head is there for baking related purposes.
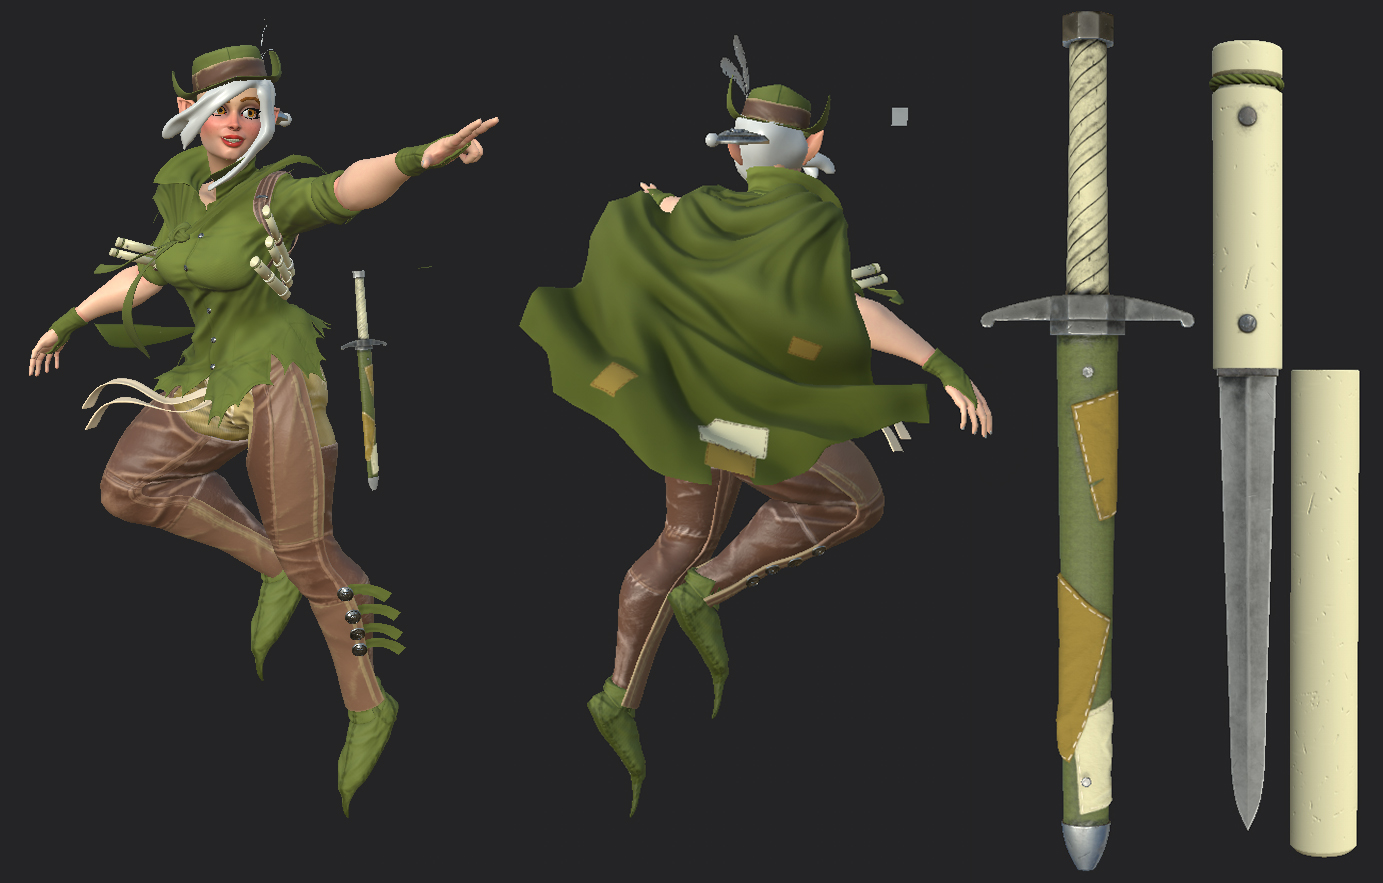
Hair about done, textures need some more attentions. Started to make it like in the first concept but, did not like how it was going so started over.
Blocked it out kind of like the placeholder one, juts from how I remembered it. Looked a little boring so then I actually used the placeholder as an reference. Was then the usual dance, Blender, Zbrush, Blender and Substance Painter.
Next: I have a literal list of small tweaks that I still need to do. Also one final run of color ballsing and adding dirt in Substanse Painter. Time is ruining out, before stating to write this had a more positive attitude of making it in time, i still know (think) I will, but…
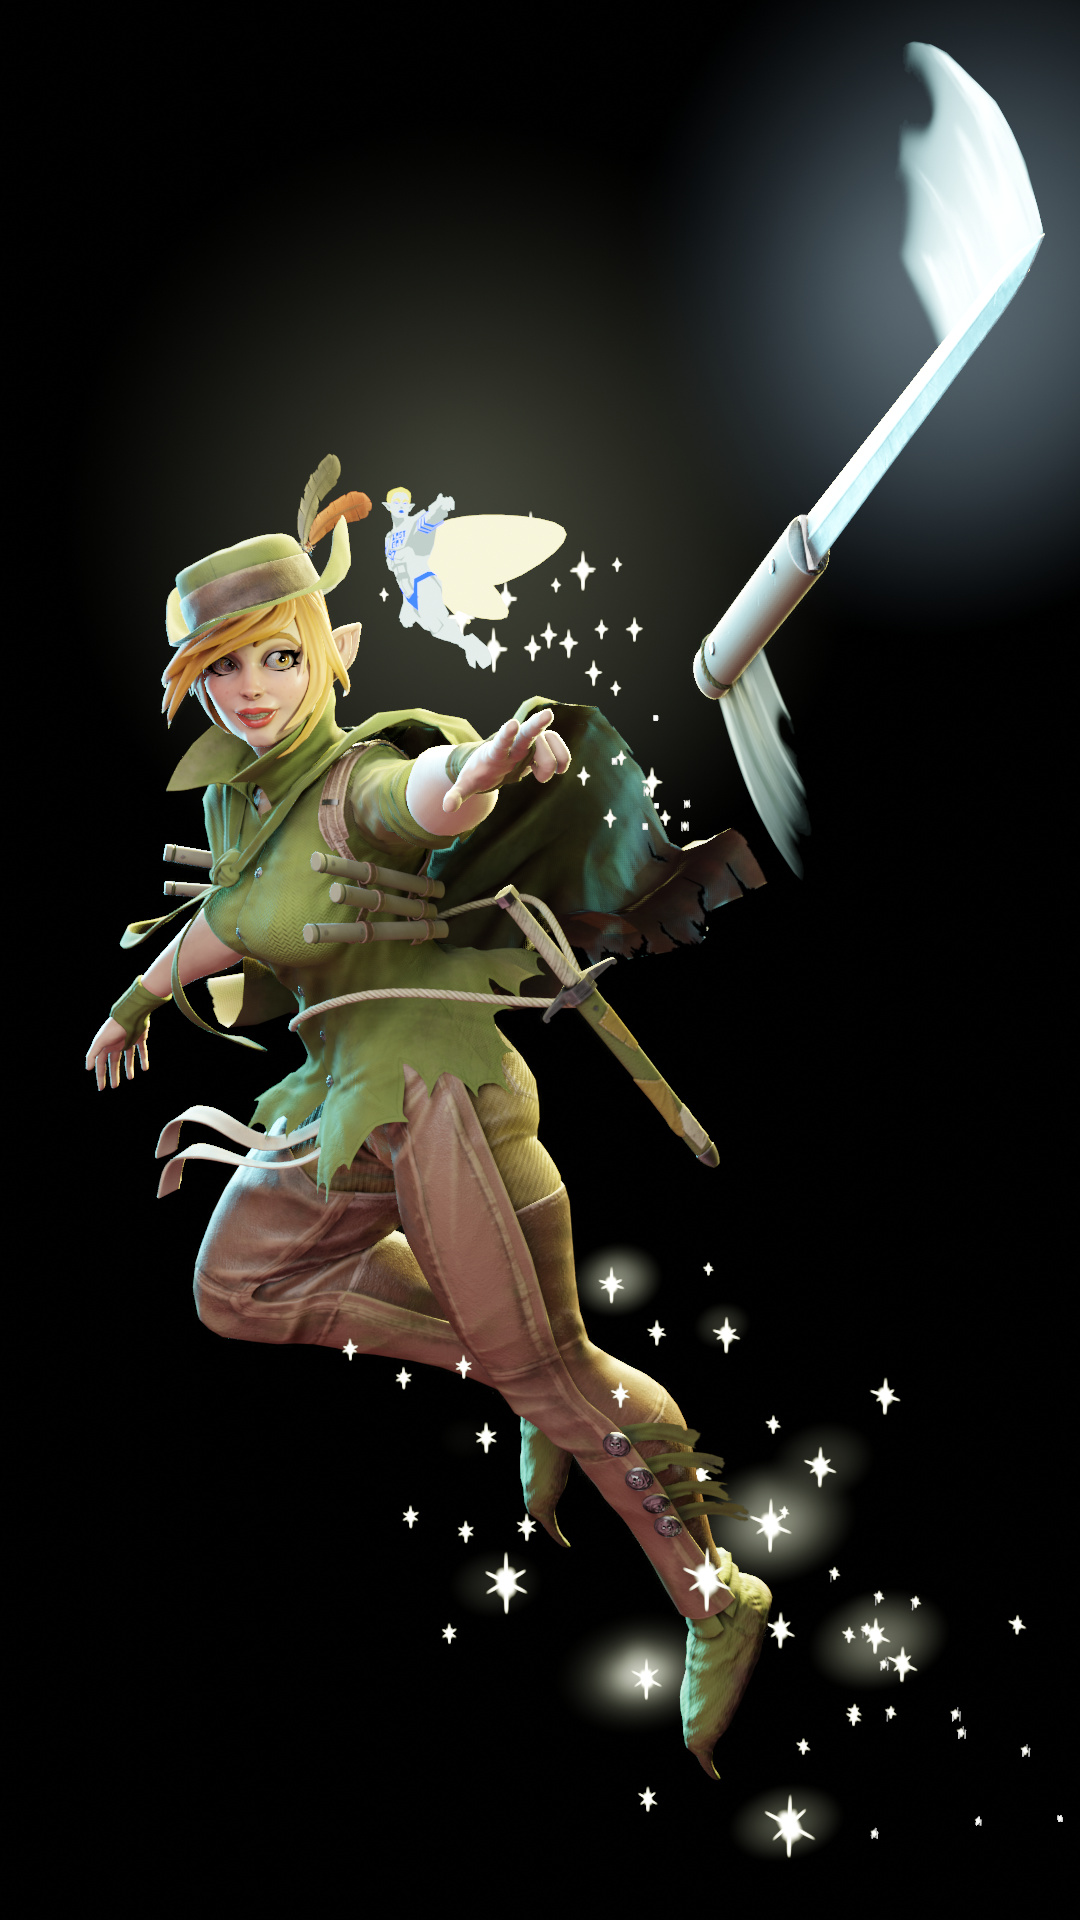
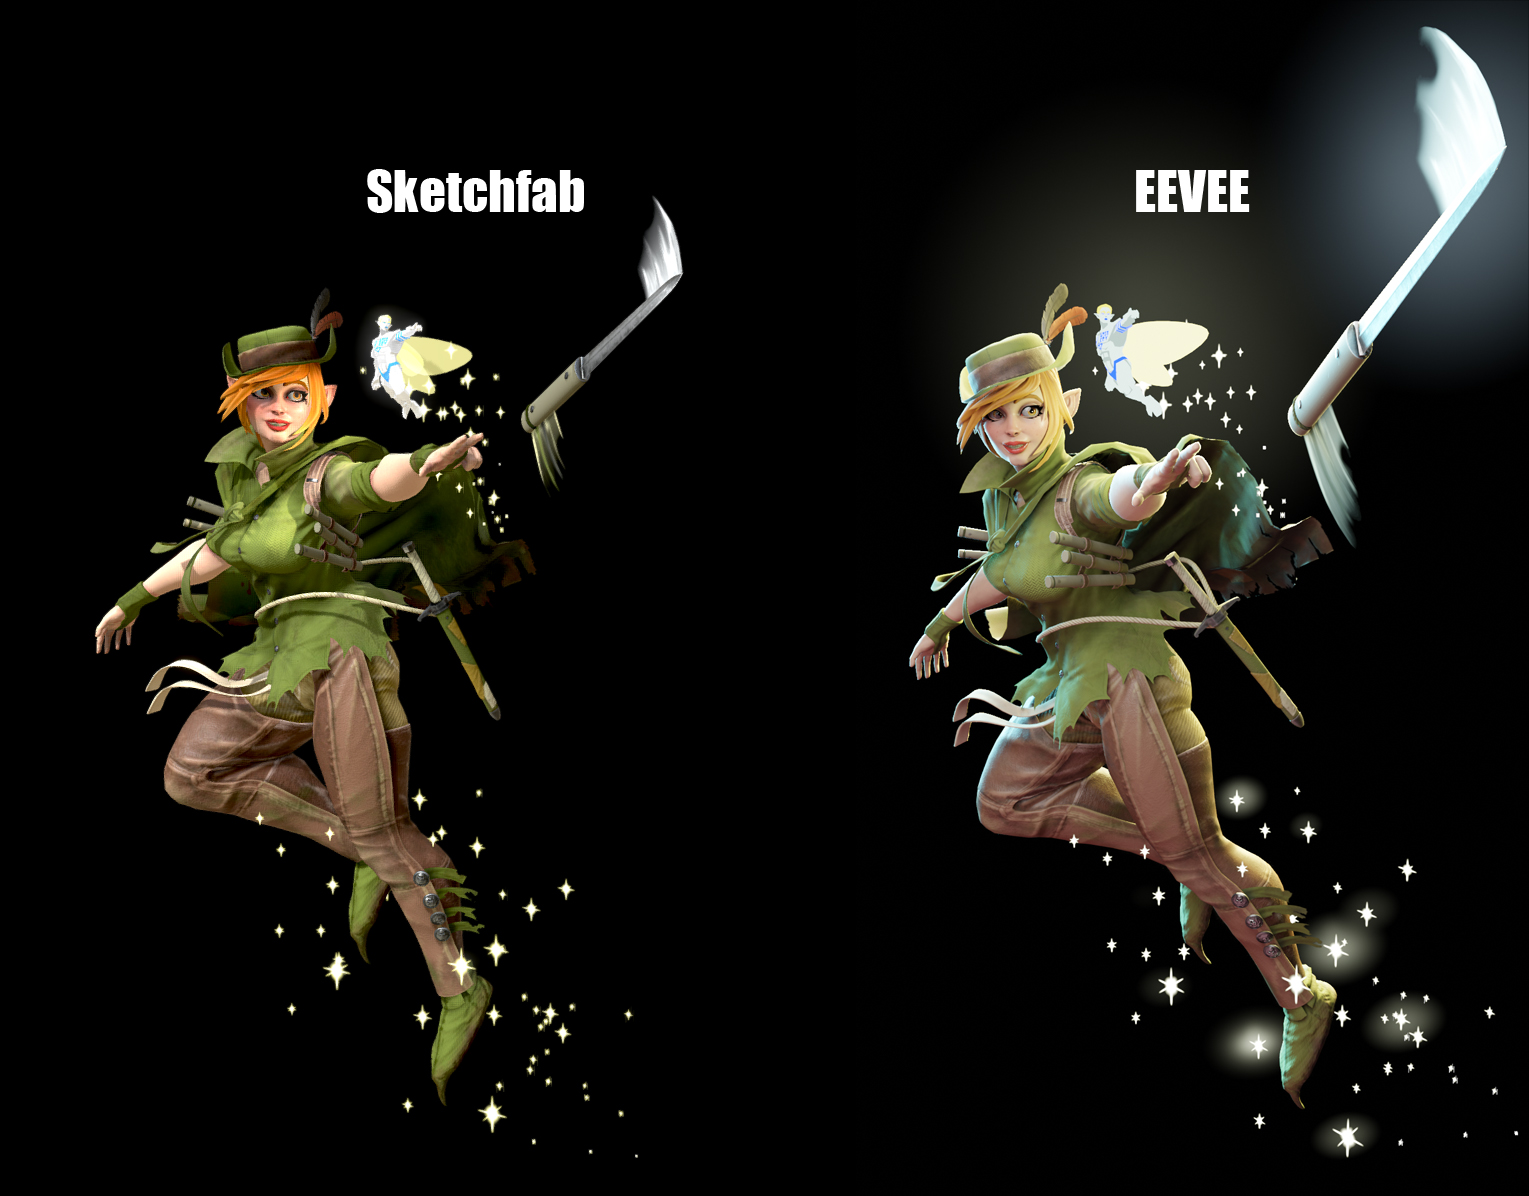
Stumbled a little on the finish line, do to sleep deprivation but final render turned out pretty well, without bloom and all. But one of this days gonna have a week of time for rendering, it has in every challenge/competition/school assignment been a goal of mine, but i always end up doing it at the last minute. Man I so love real time and EEVEE.
Shout out to my cousin for checking the English spelling in the final-submissions, despite the time of night, To bad he could not check the actual content of the rambling madness, but how could he have known? xD
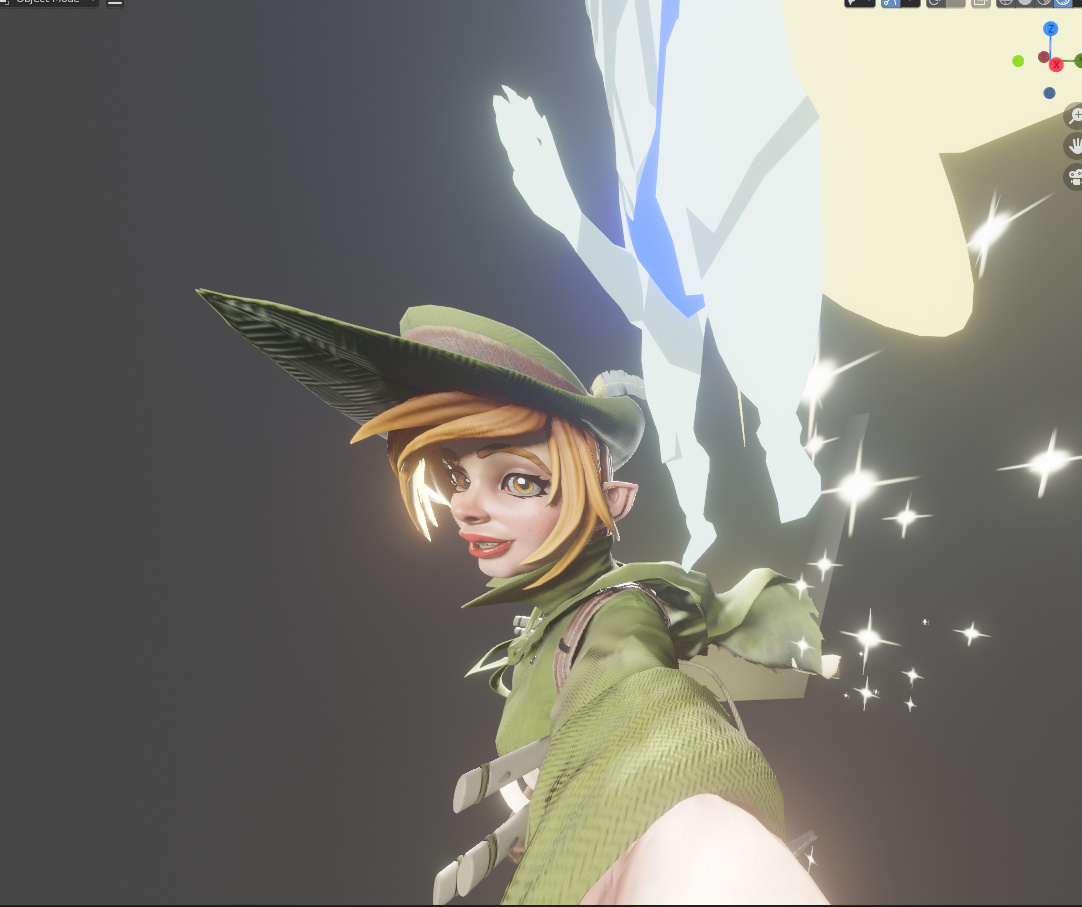
But yeah the final render, started out with the basic 3 light studio set up that I would guess I pretty known, considering I have been taught it several times and places. If not
there is much info on it on the internet. Once the basic light was set up i added light to highlight things like the flying knife and the face. Ou the “swoosh”/animation smear is just some cut planes that have a alpha map. One of the last things i made before staring on the render set up. That and the texture on the nails, had totally forgot to texture them.
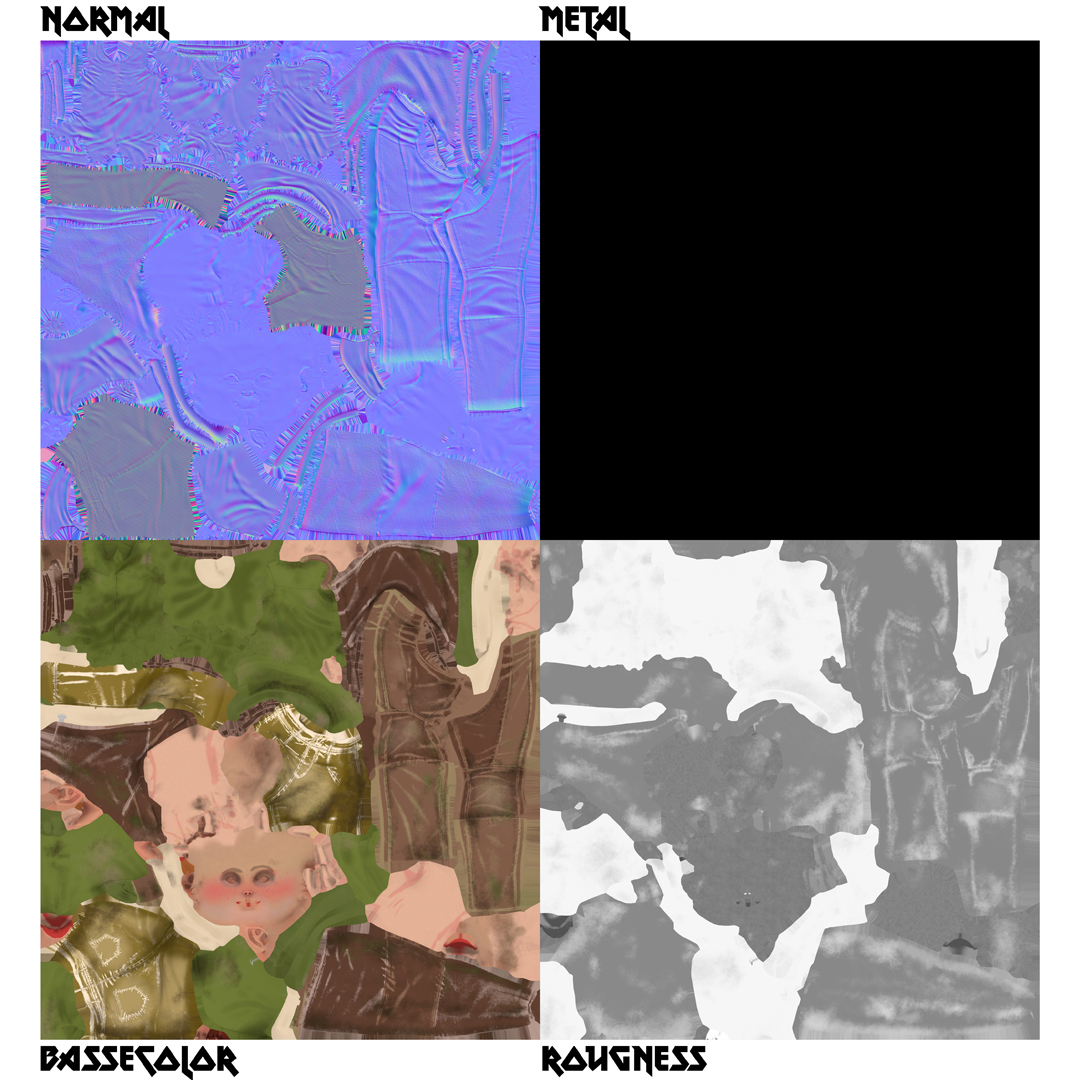
Here are the texture maps,they were being tweaked up till the last minute had no time to share them here, so you get the same ones as in the final. I so enjoy the Iron-madien-logo-rip-of font I used for the different parts of the set, because it was the last font i had used in Photoshop for a dumb joke with my friends. Was just to tired to care at the time XD
Gott the model up on Sketshfab, do to the memory limit had to lower some of the maps resolution , but its about unnoticeable.
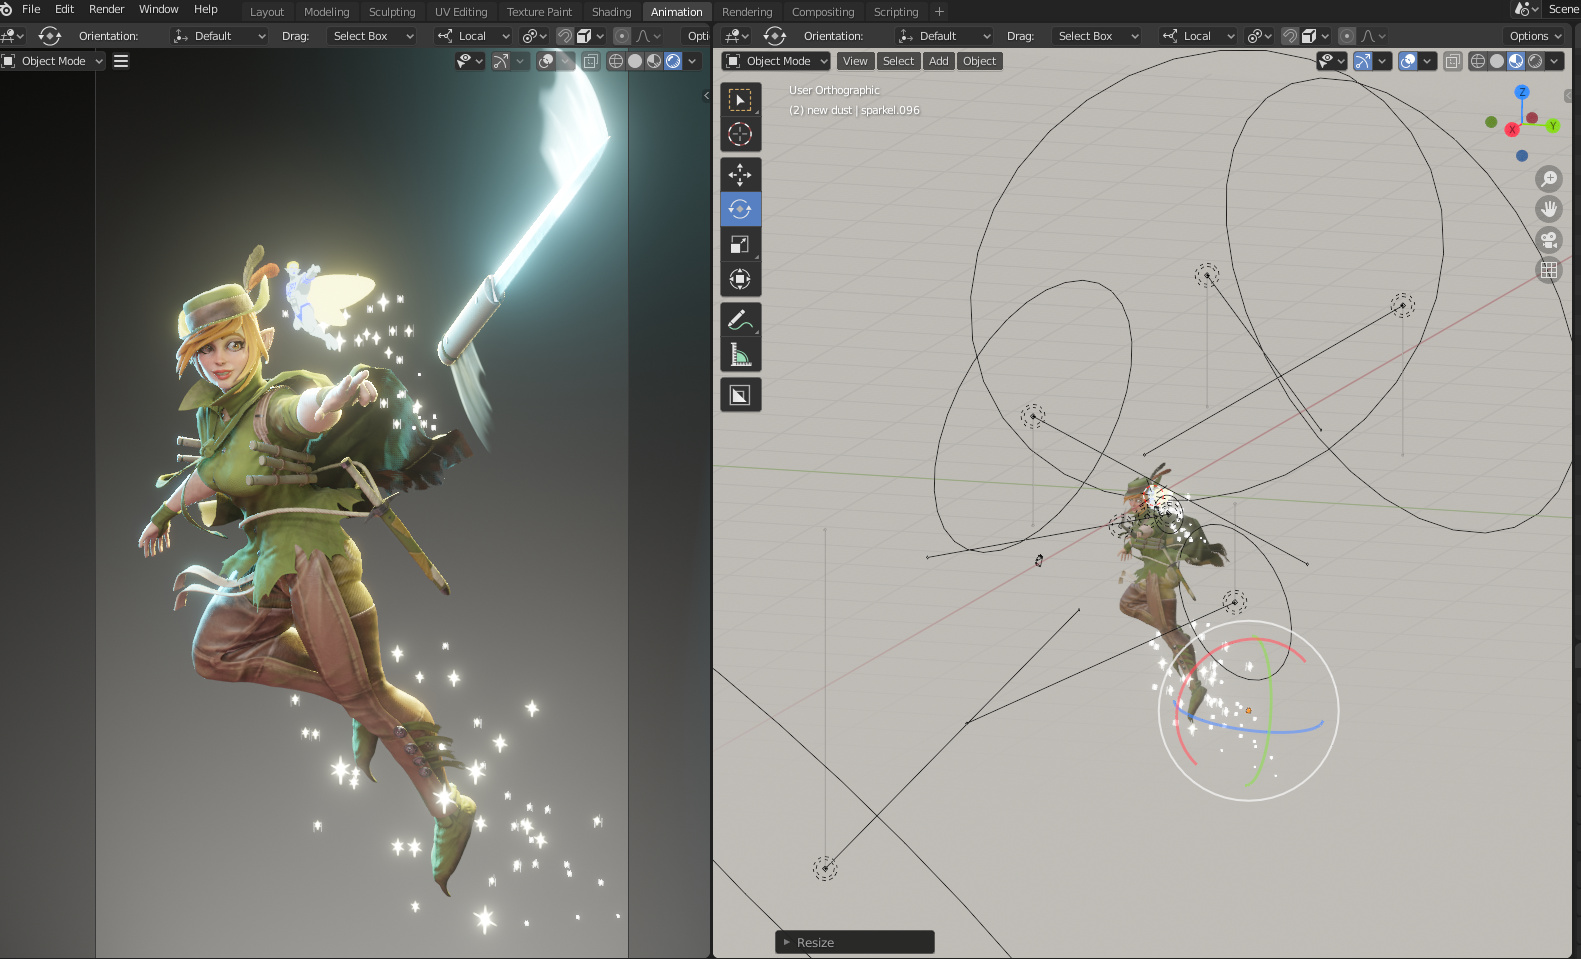
And got the lights pretty close to the final render, surprised myself. Made a comparison picture below.
As a bonus here is what happends when you need to change the vocal length of the camera but dont remember in witch direction the numbers go, so you just put in a extrem number to clearly see the difference.
This Challenger was fun but stressful, however cant complain when joined half way through, keeping an “art diary” WIP as its caled like this dos help keep one on track.
Lastly thanks to everybody for reading my ramblings (or just locking at the pictures, thats what I do) and being part of the challenge. Some relay good stuff people have made. Minor complaint In the next challenge would be nice if there was a countdown to the deadline, now that people are submitting to there local timezone (witch is more fair, i get it) its hard to make bets on the winner with frends. Gonna be interesting to see how wins. take care all!!!