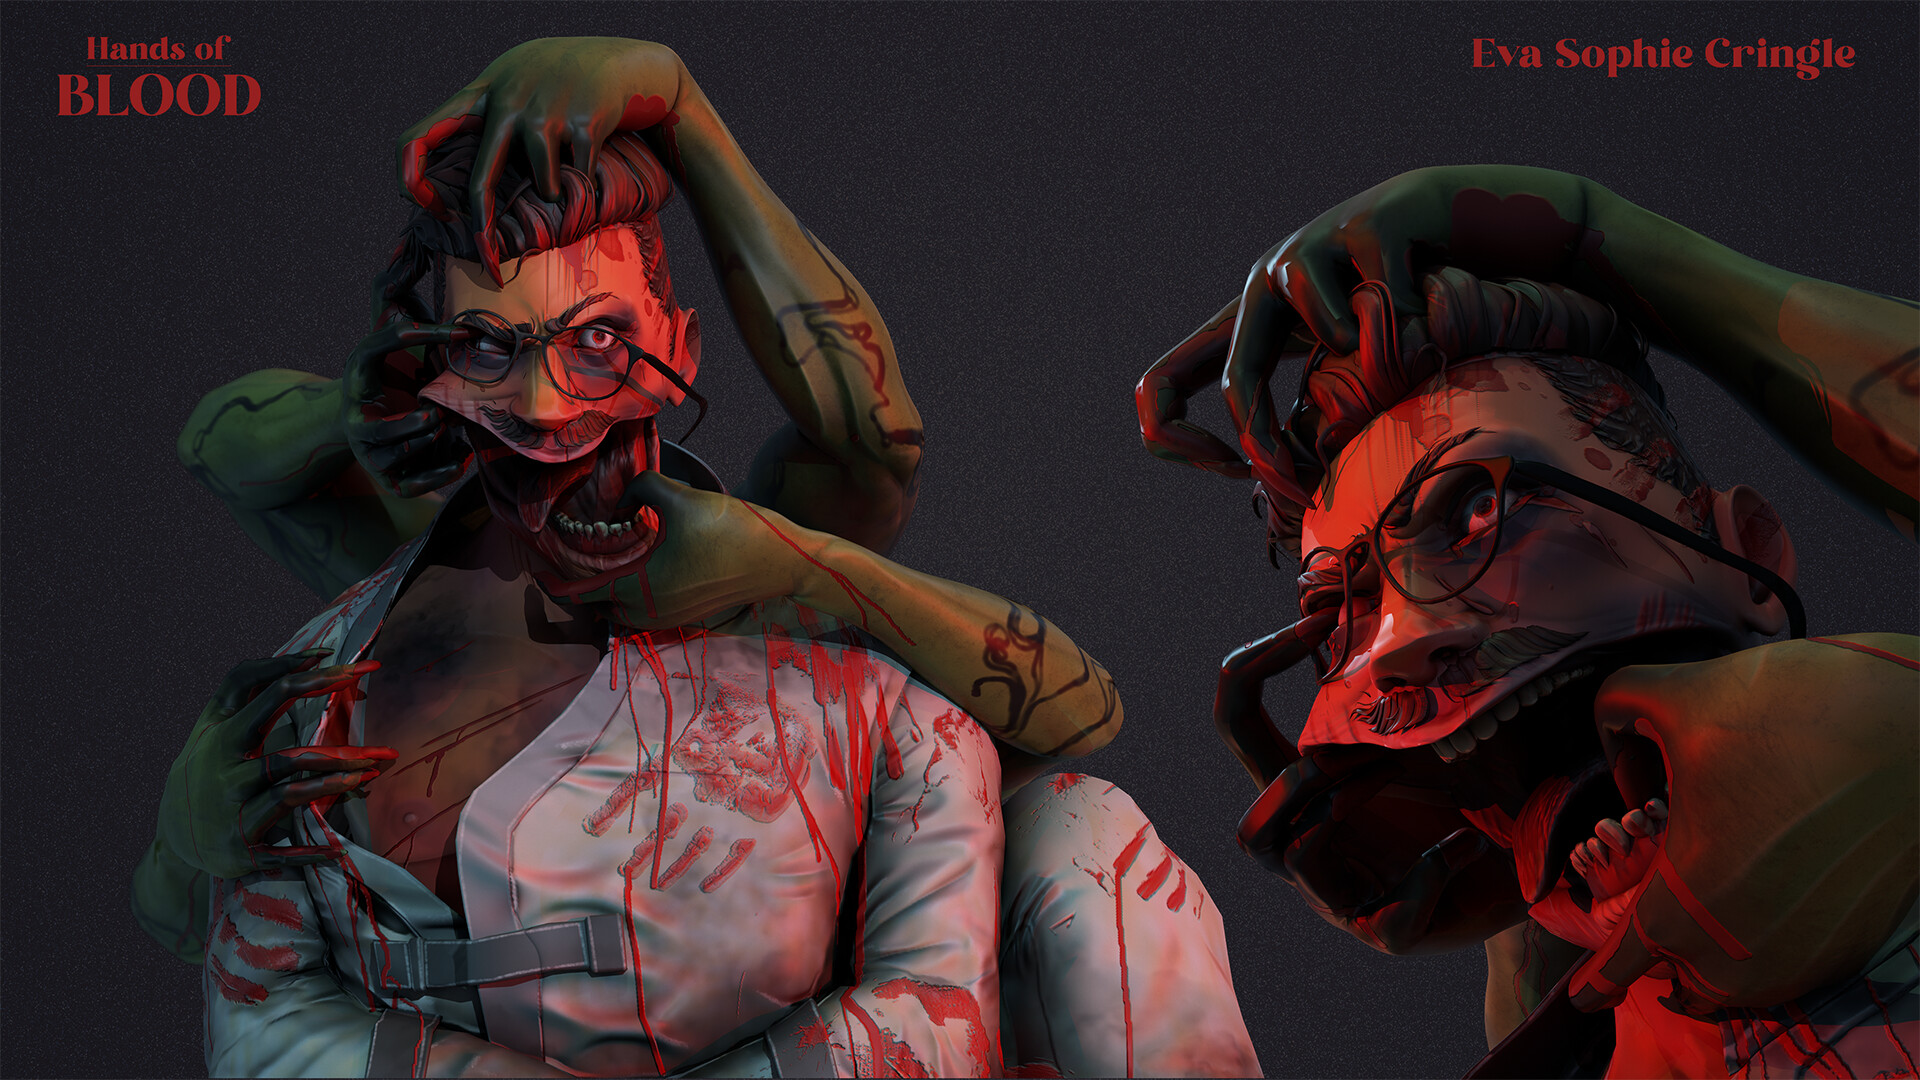
! TRIGGER WARNING BEFORE YOU READ: this thread will contain elements such as body horror, description of illness, disturbing imagery and texts, gore and blood.
Hello there! I’m Eva and I’m here to present you the ideas I have for this lovely challenge. I have always been keen on horror and terror-themed things as I’ve done SFX makeup in the past. So, let’s start!
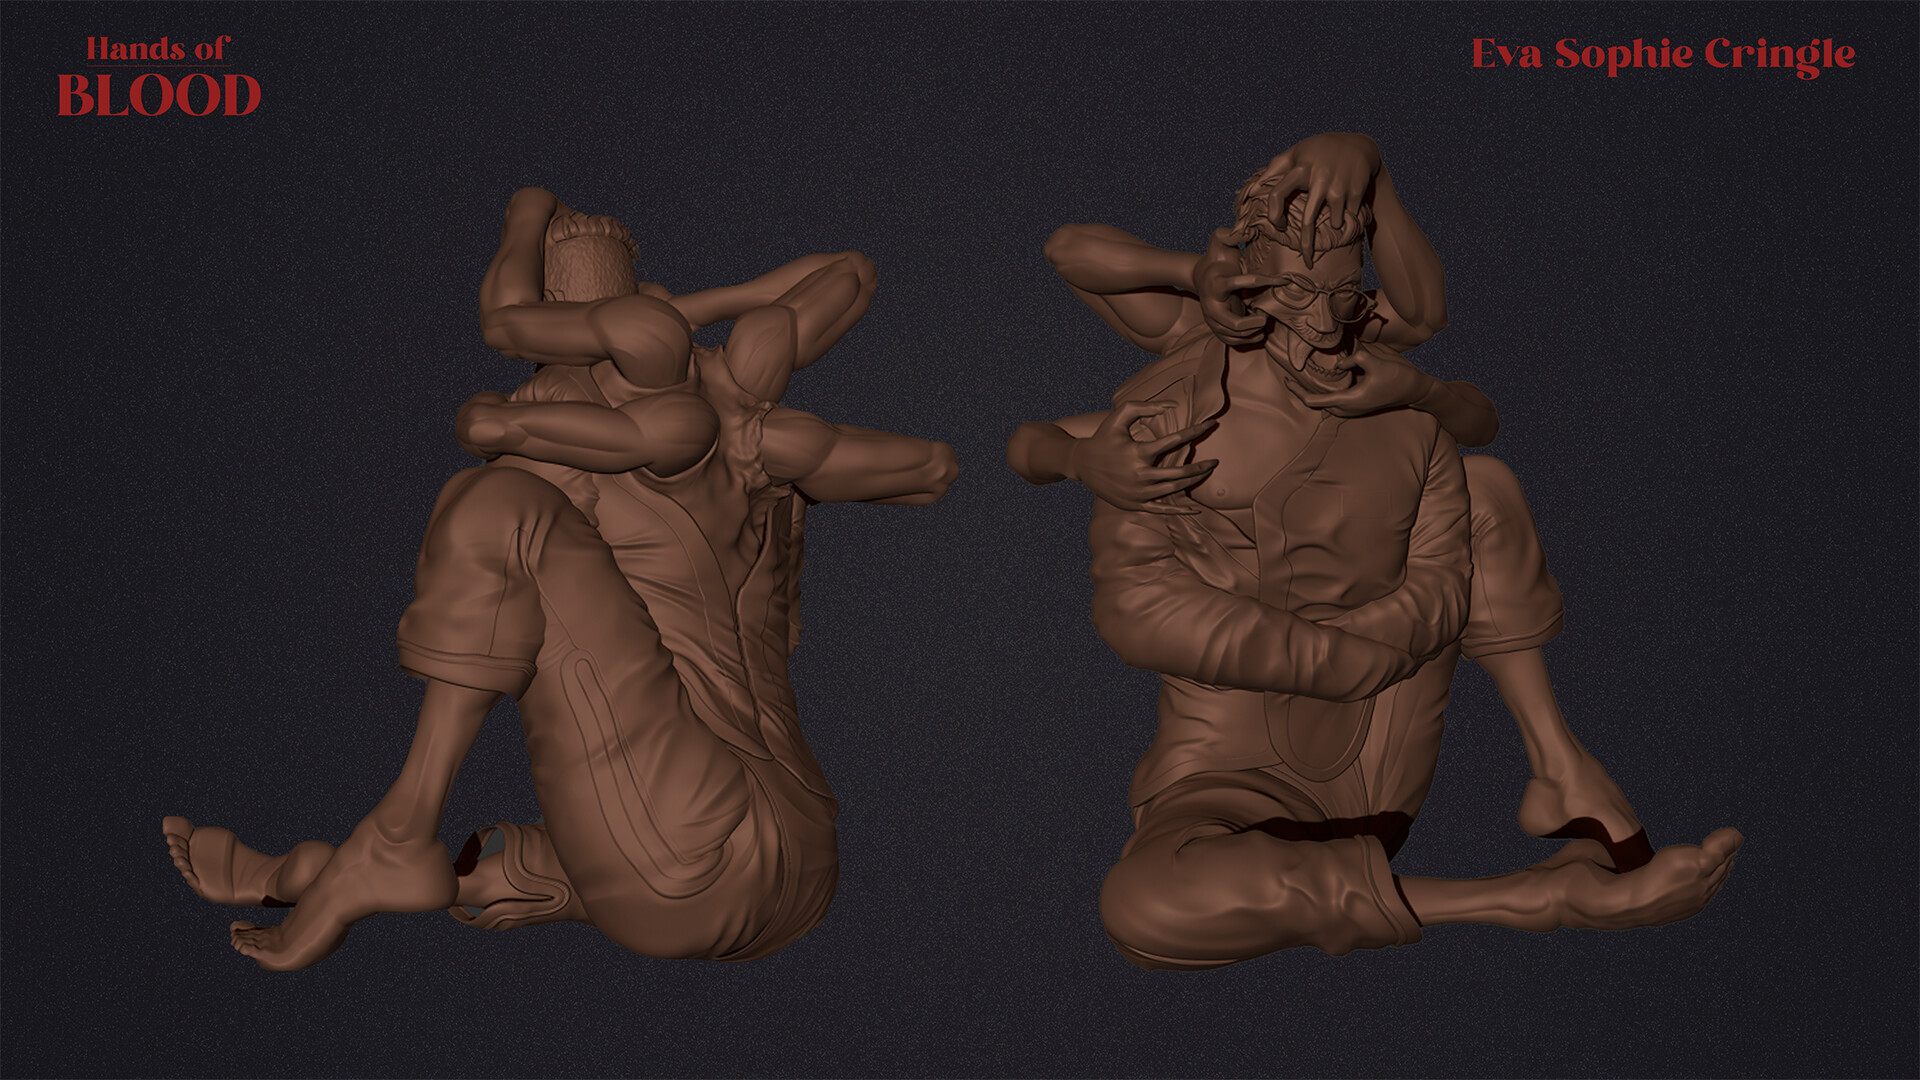
THE HANNO-PARASITE EXPERIMENT
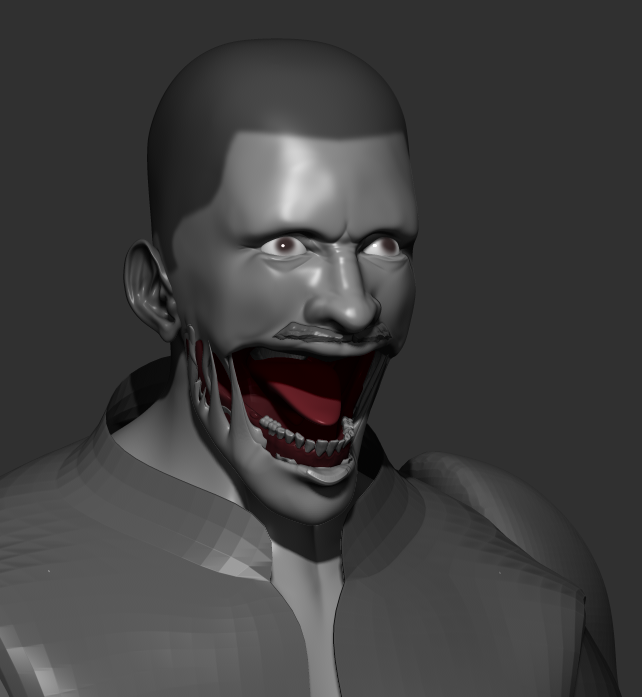
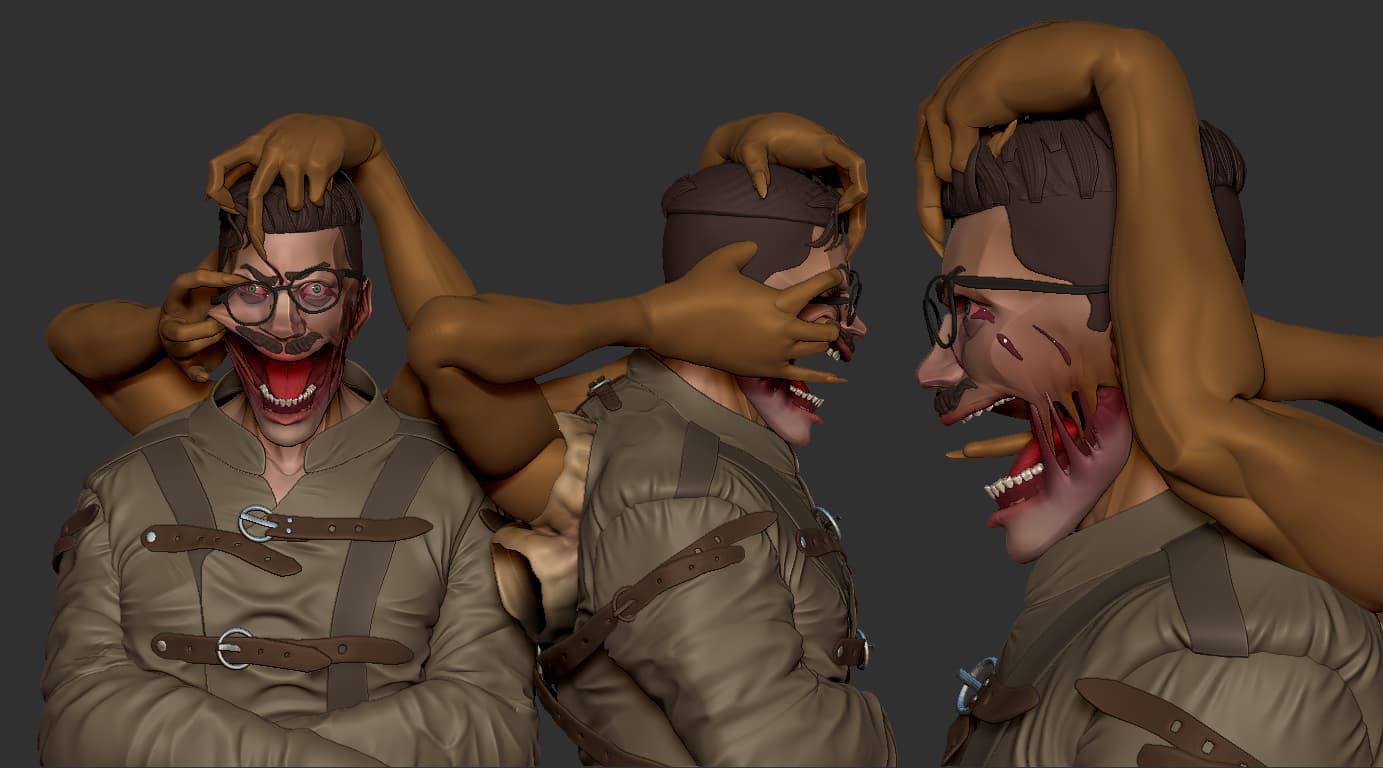
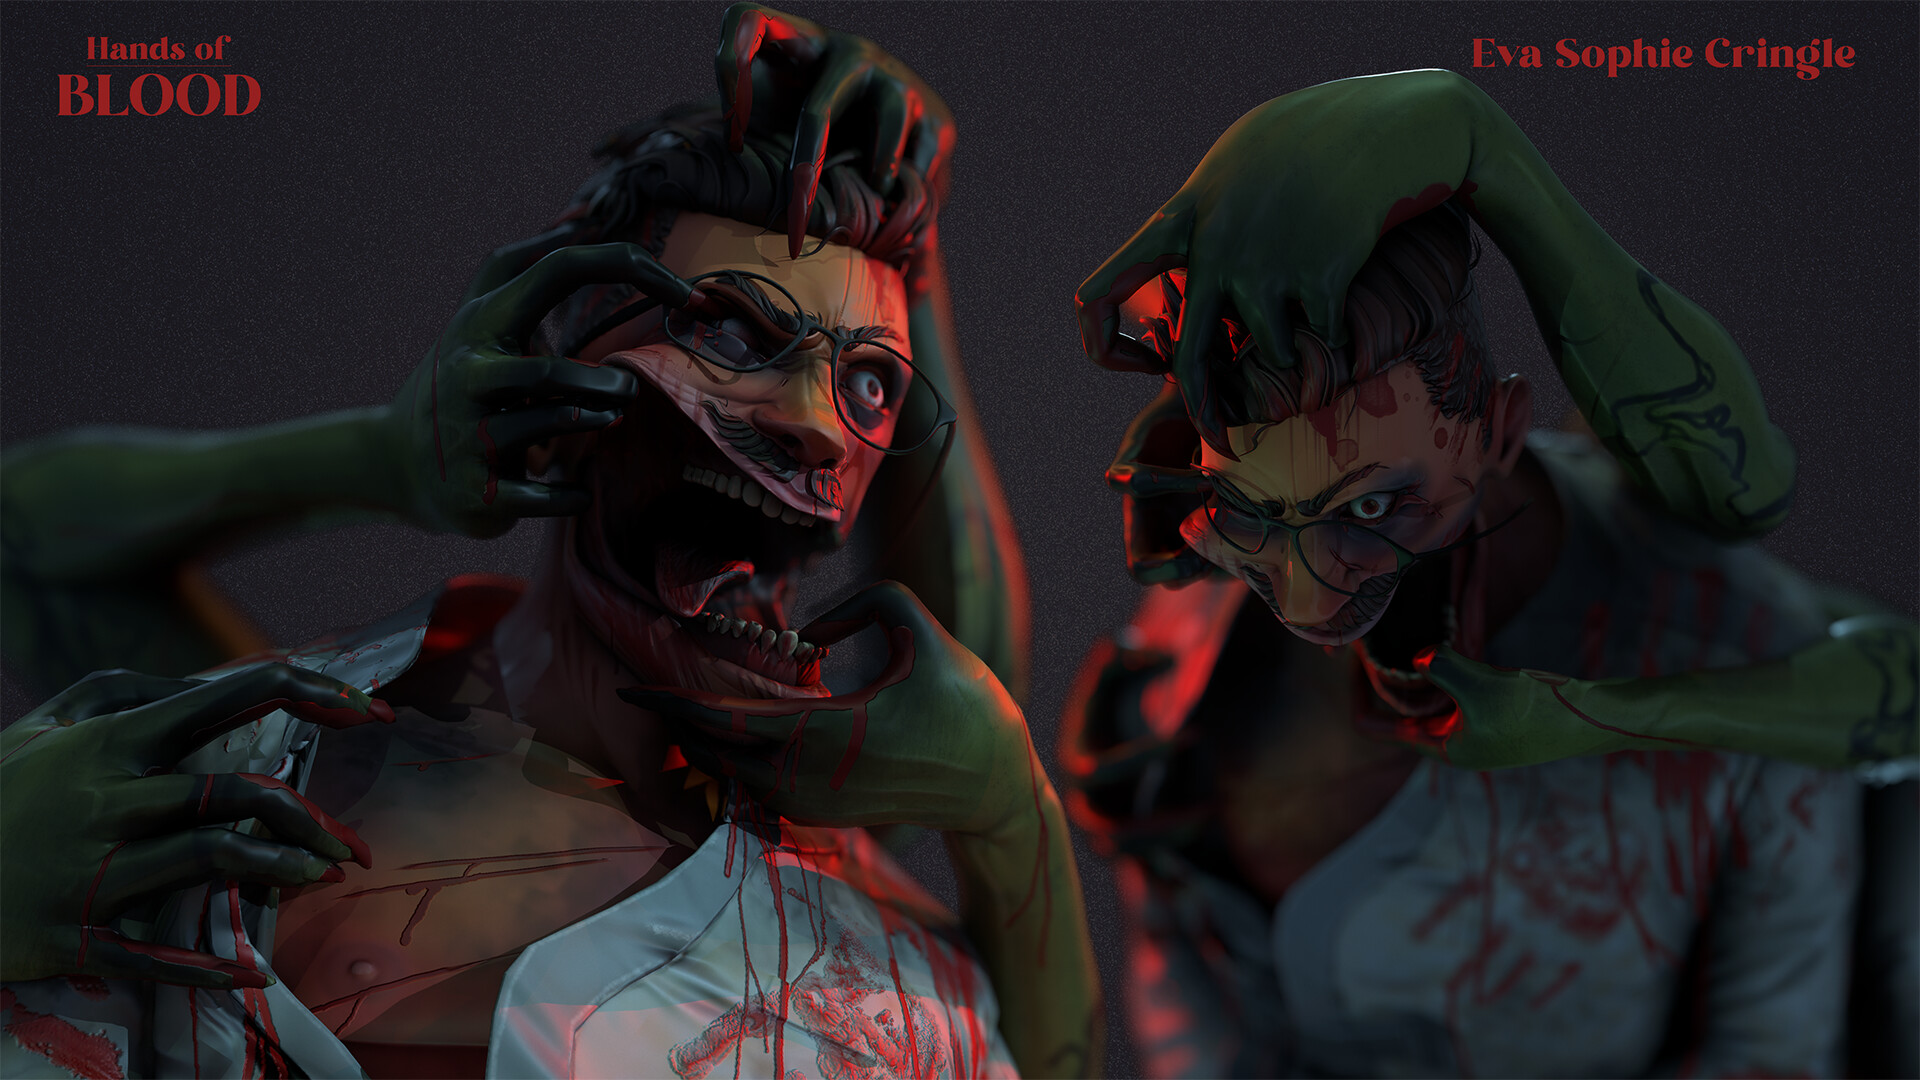
A new strain of parasites has been discovered in [REDACTED] after careful examination of a newly delivered patient in the mental facility of [REDACTED]. The 31-year-old male patient has shown symptoms of Paranoia, insomnia, self-harm and uncontrollable laughter. We decided to start an experiment and mutate the parasite. After some tests we noticed the strain had evolved, resulting in a transformation on the back of the patient. He seemed to be in control of the matter that grew out of him.
The situation has worsened. The mysterious matter formed into elongated arms. We had to restrain the patient as it started to latch out. The arms tried to suffocate the patient several times, leading to lasting brain damage due to oxygen loss. Every attempt to restrain it failed as it kept breaking free, harming the patient by scratching and dislocating joints. What have we done…
Inspired by Parasites and mushrooms that eat into the matter, zombifying them and games like SCP, the Backrooms and a certain person who serves as the face. (You might recognize him)
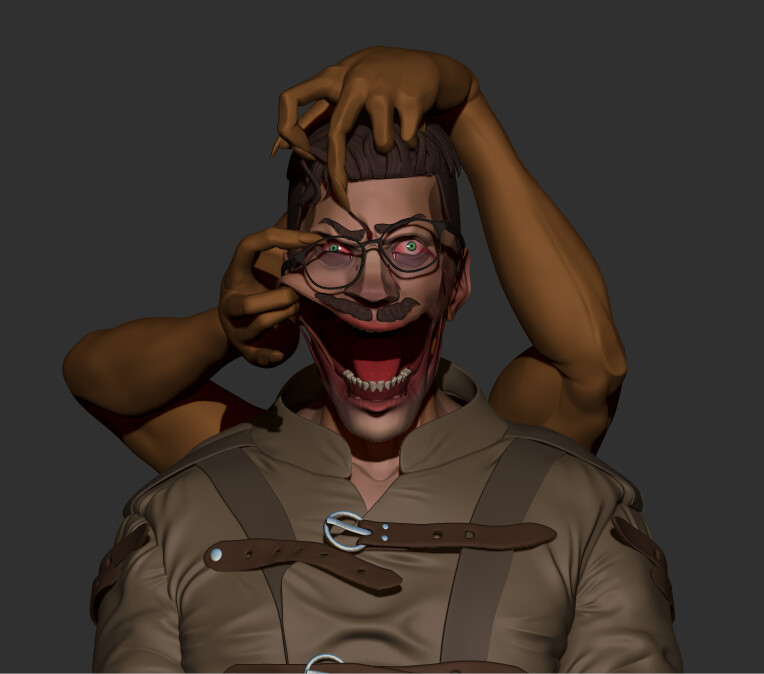
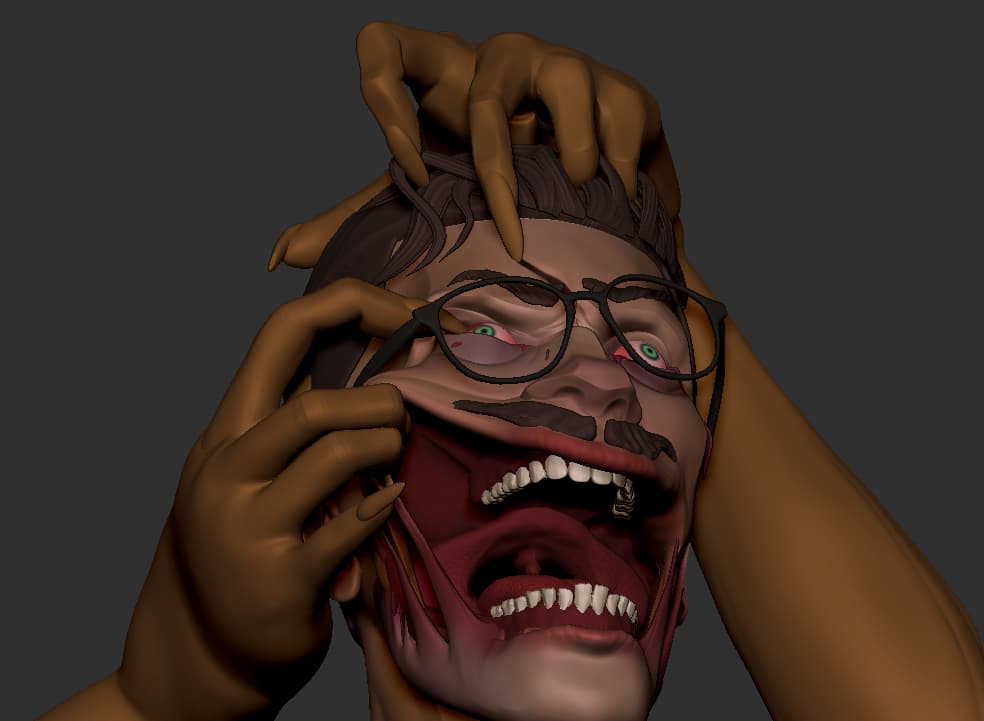
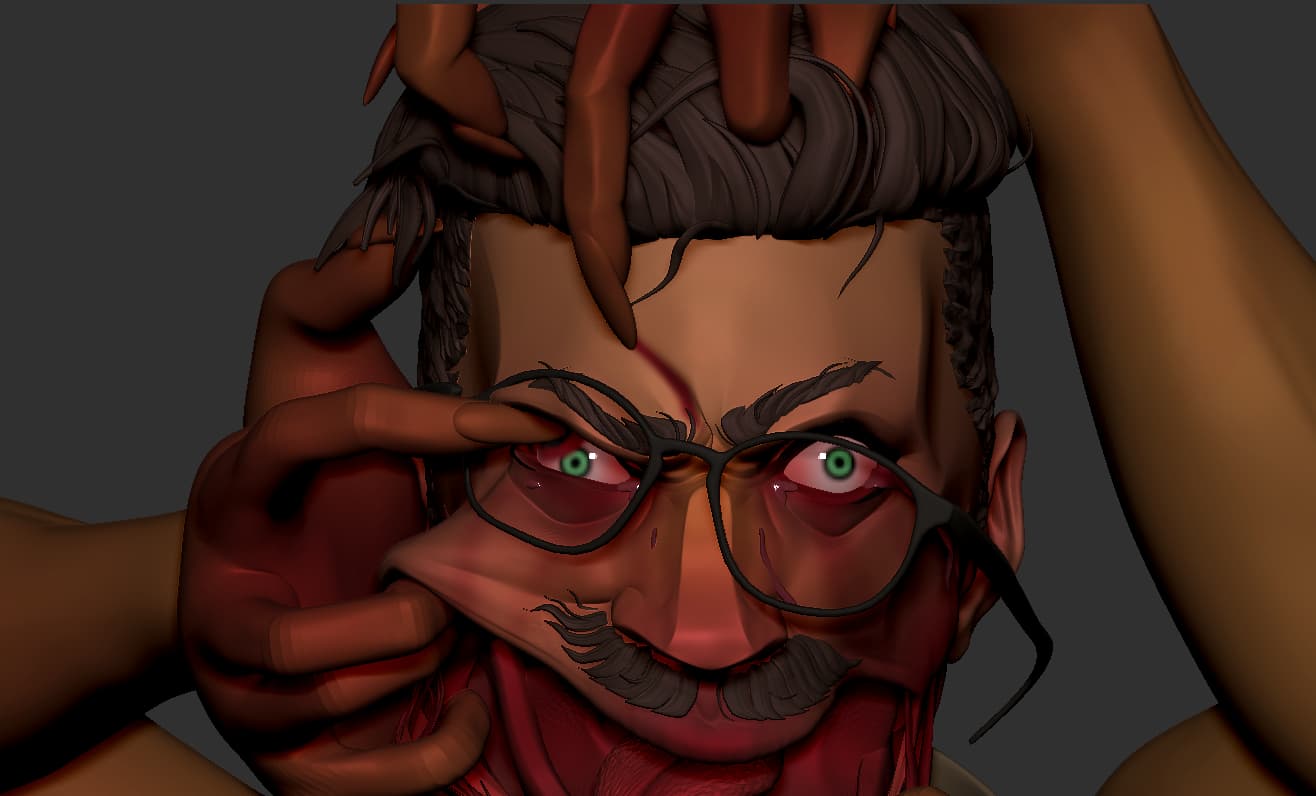
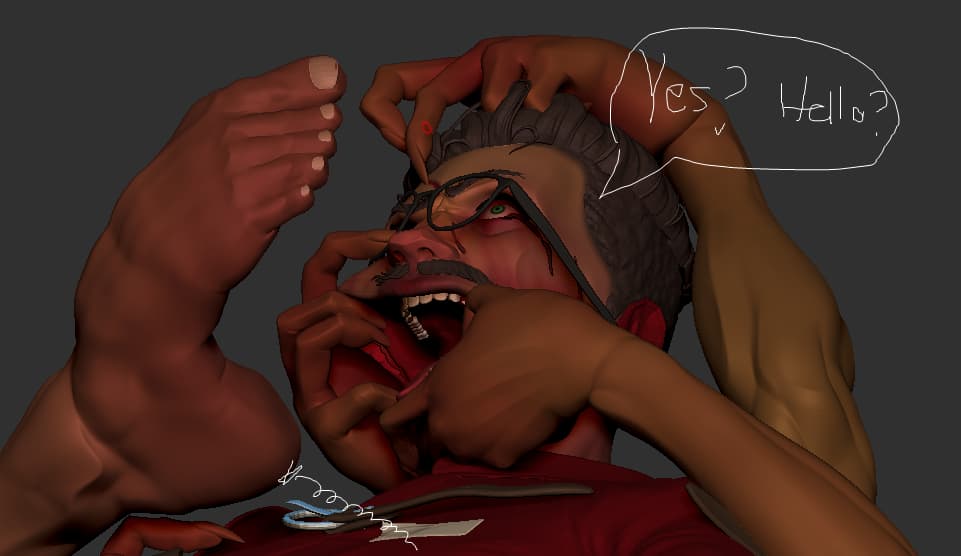
I started by collecting some ideas for the expression, as I wanted it to be horrifying, like the feeling of being mercilessly tickled without a stop in sight. Combined with the theme of “he can’t help himself” (yes I mean that robot) in the sense that even if he’s in control he can’t help himself but to harm. Reaching into the uncanny valley of something that maybe was once human but is no longer.
THE GOAL
To have some fun with horror art and bring you a fun story along with it as well as broaden my portfolio with this cool piece.
Here is some of the inspiration I’ve collected on PureRef - Let’s sculpt!
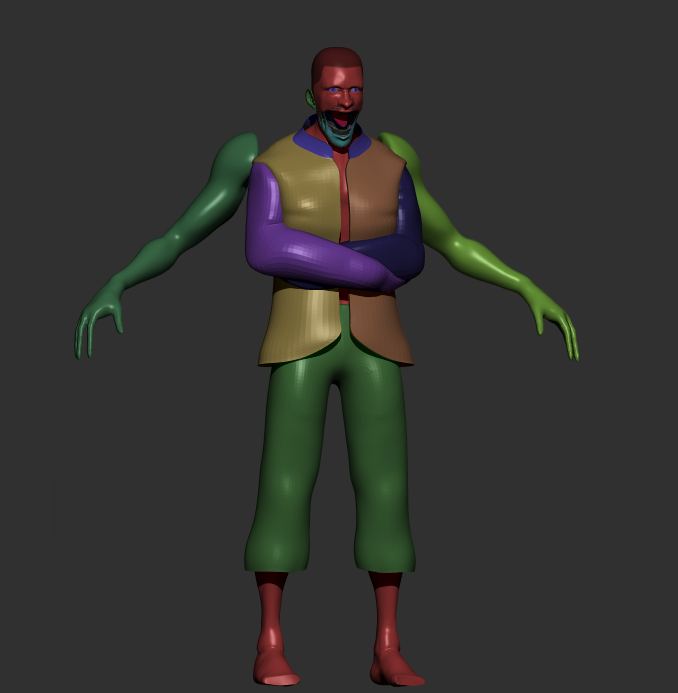
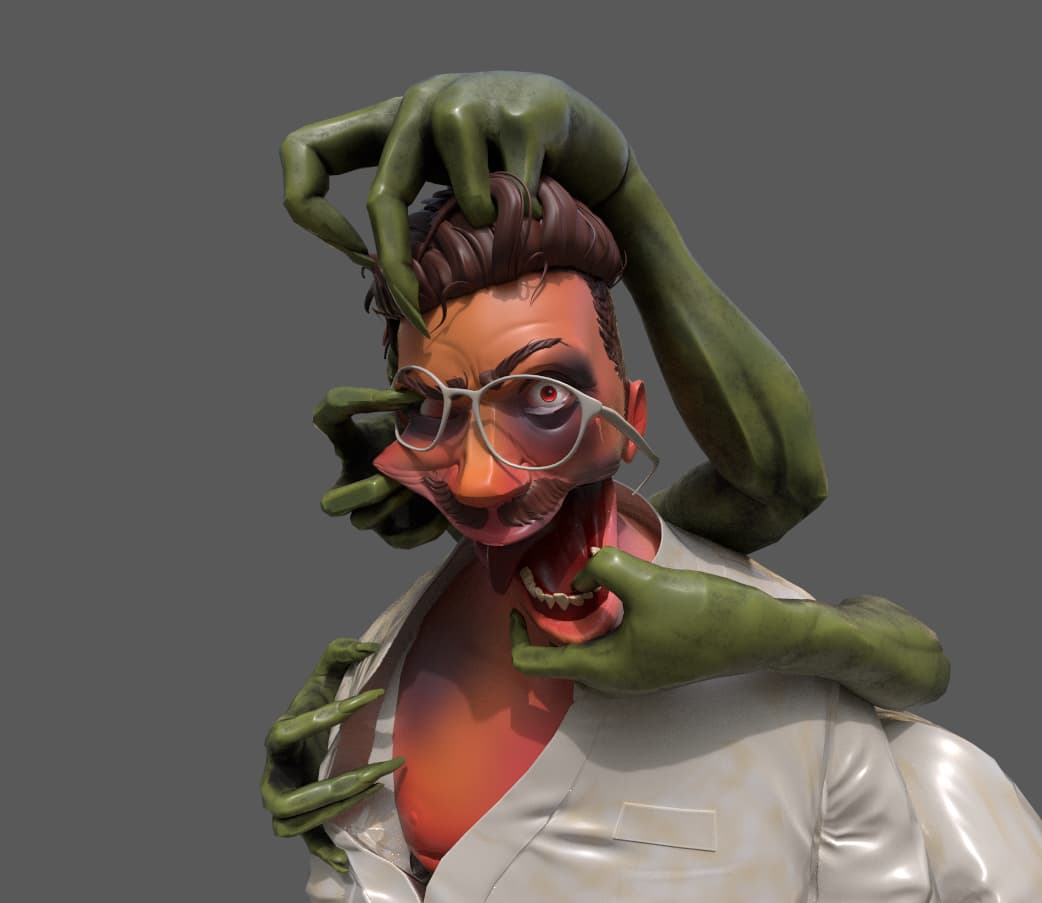
I did some sculpting this afternoon, starting off with manipulating the basement to fit into the unreal Engine rig. I customized the body to be skinny and lanky and added some arms and the base clothes.
I’m planning on using Maya to create a set of glasses and some other accessories that need modelling. Not quite sure if I want to do it 100% realistic or more stylized.
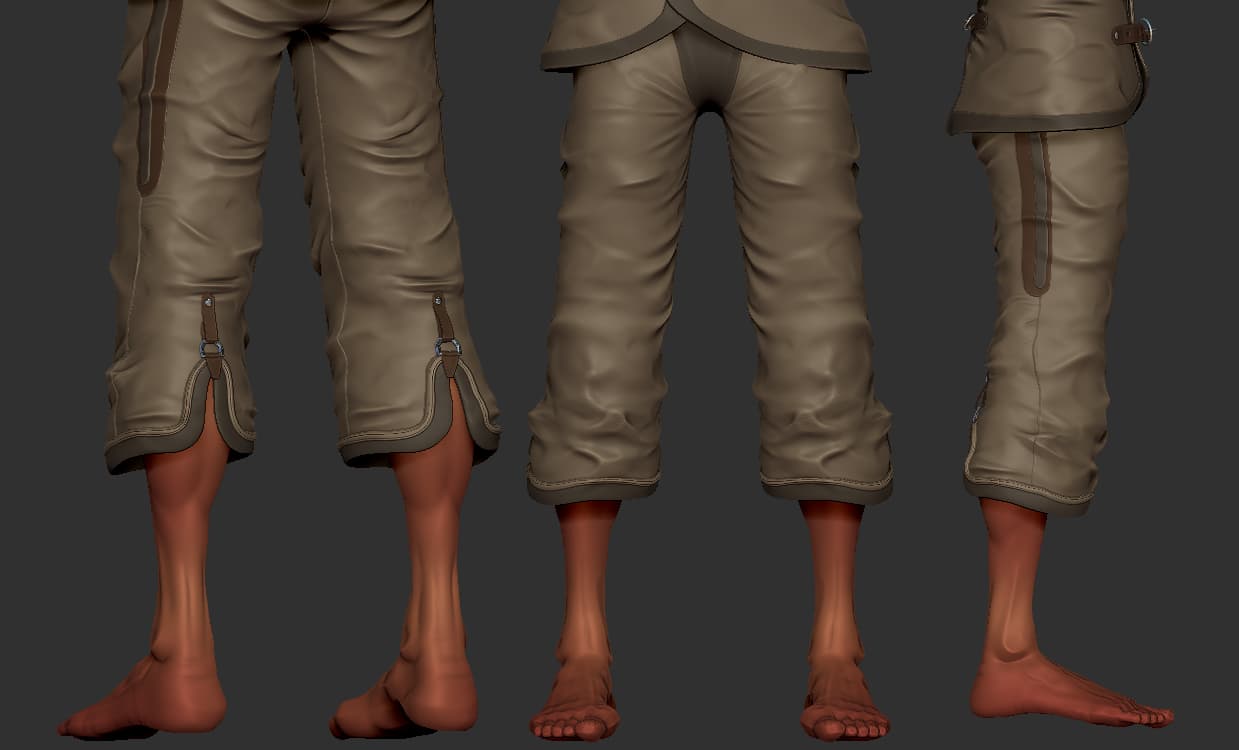
NOTE: yes I know, they wouldn’t be able to wear pants as this could be a hazard in mental institutions but this is better for weight painting
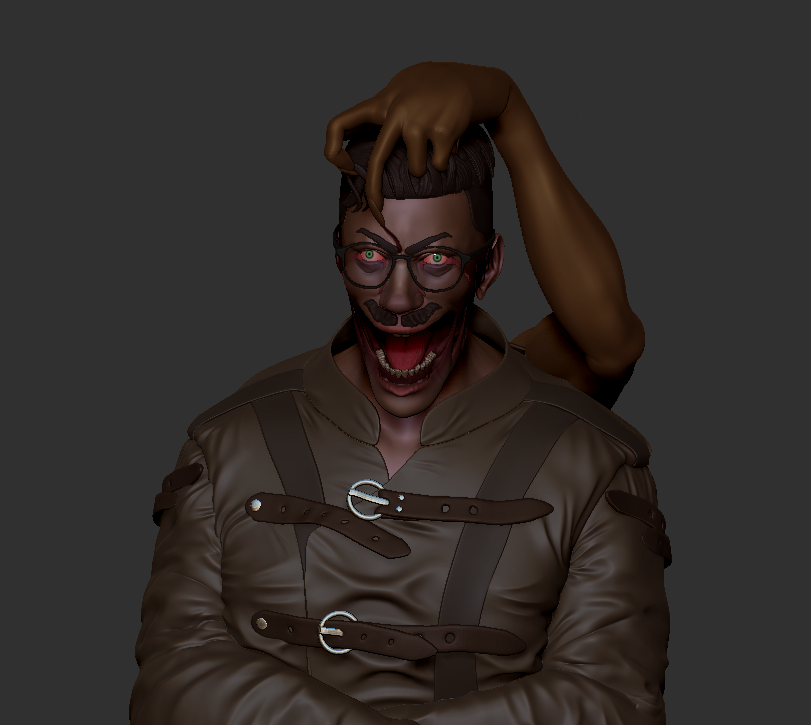
NEXT STEP: adding details to clothing, building up likeliness
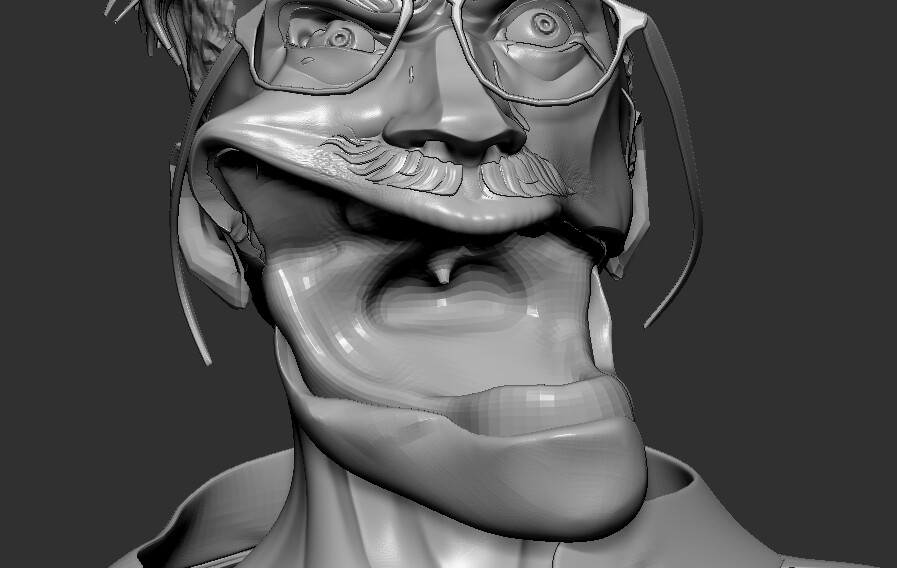
I worked a few hours to add some more details and folds and decided to leave out seams for Substance Painter as their latest update is really graded when it comes to adding seams. I looked at more reference material for the face and the jacket to get the feeling and mechanic right.
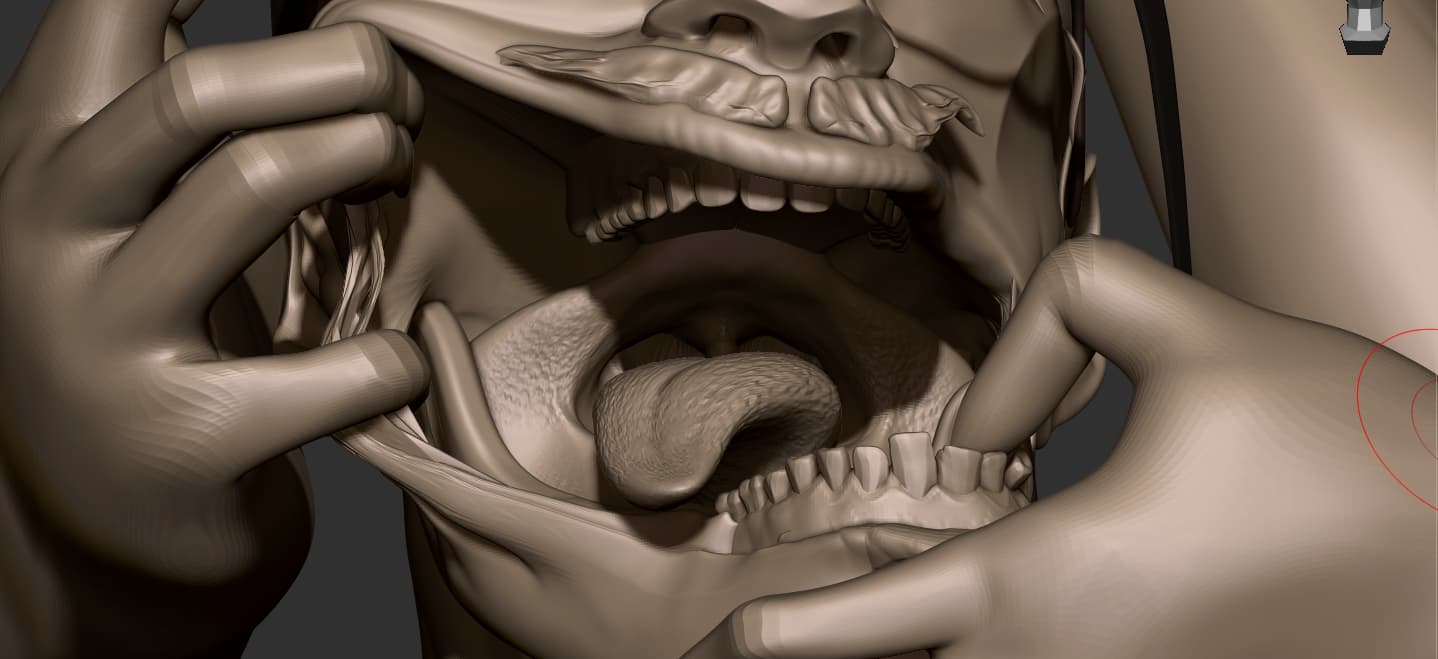
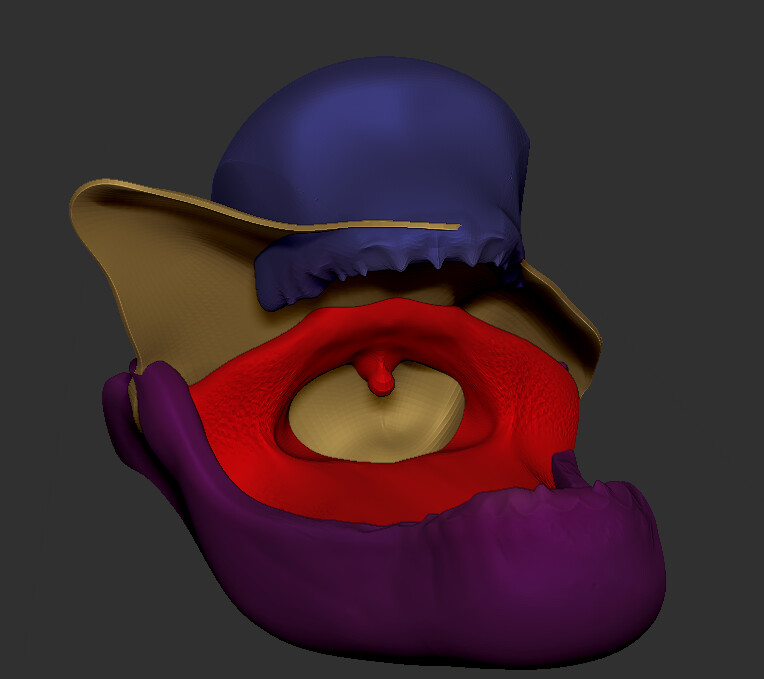
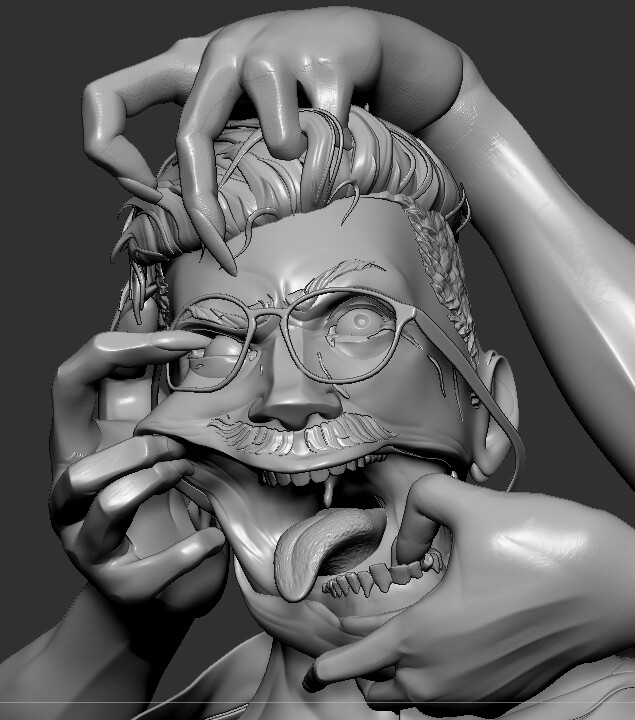
This mouthpiece was meant as “a whole” but using this as one mesh in maya to retopo turns into a lot of errors and frustration due to the overlapping of geometry. How do I fix this? merge merge merge!
The past few days have been very exhausting due to the realisation of “Hey, maybe I do have a burnout!” feelings of worthlessness combined with troubles breaking into the industry flushed through my mind. Hearing and internalising that only hard work, day and night will be the key to breaking in. But this grind, following these things only led me to agony. I understand jobs don’t just come flying in but it was a little heartbreaking in the end. I’ve achieved great things this year but I, for myself, have to realise that it’s ok to take the time to improve and eventually get a job.
I hope anyone who reads this knows; yes, If you don’t do any extracurricular activities to improve your portfolio you might not make it, but for the love of yourself, take it slow, and care for your mental health. Don’t make the same mistakes I and so many others have made.
---- back to the project ----
I took a day off to go outside and recollect myself a little. Since I committed to this challenge and would felt worse leaving this unfinished, I am going to continue this but I will decide to cut some corners. So, let’s revisit the purpose of this project:
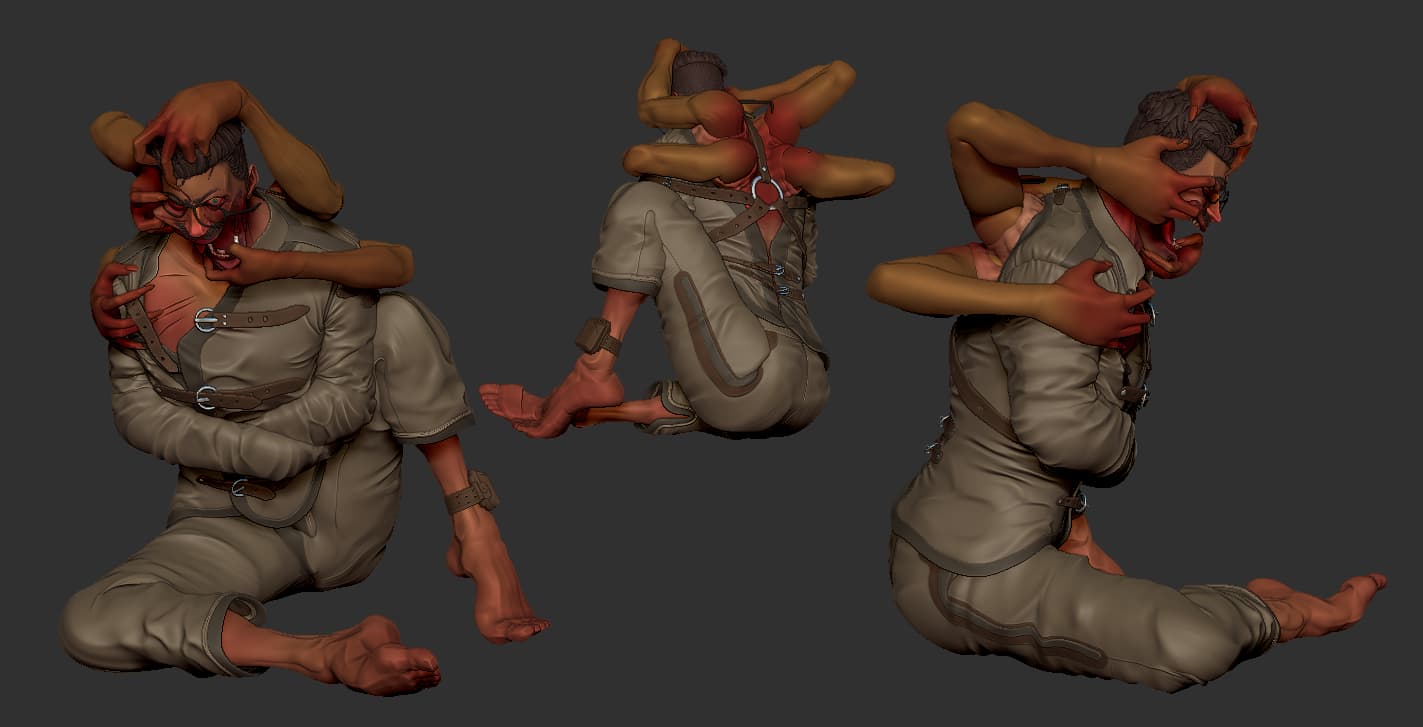
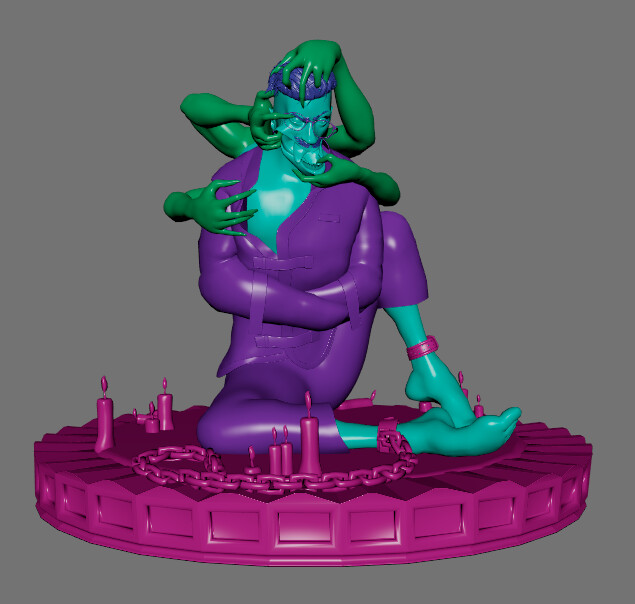
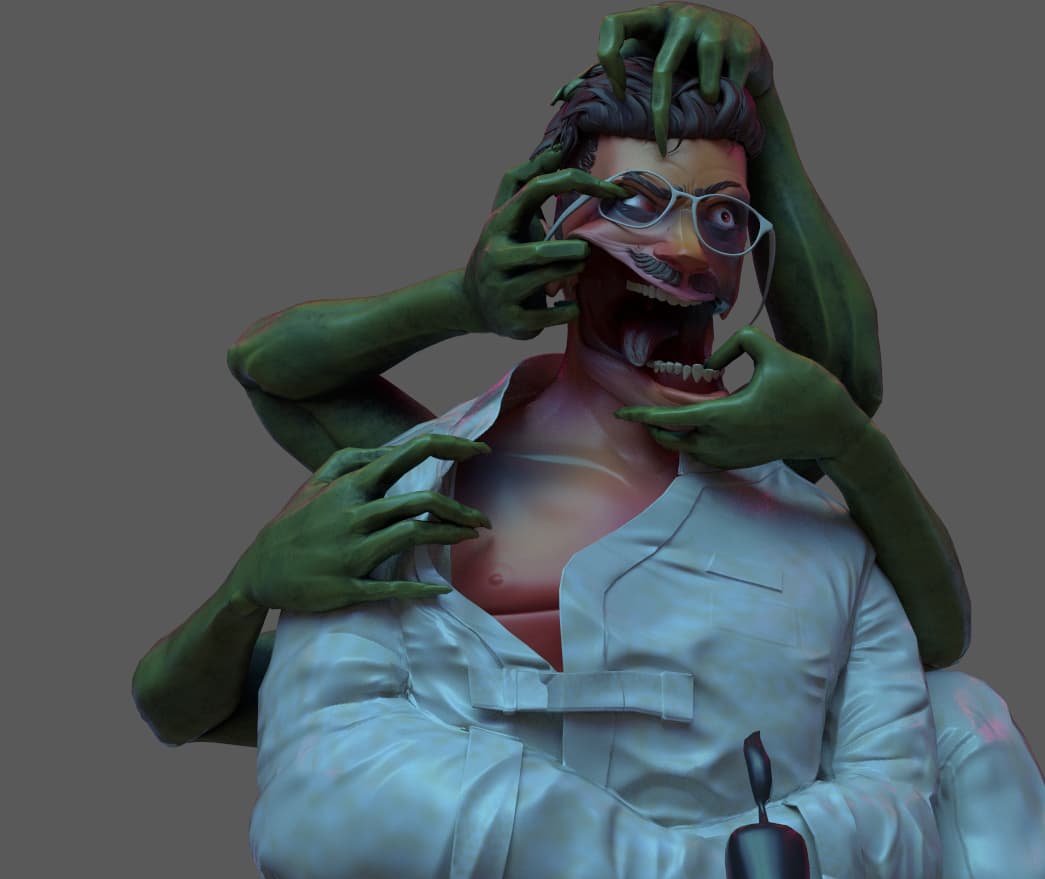
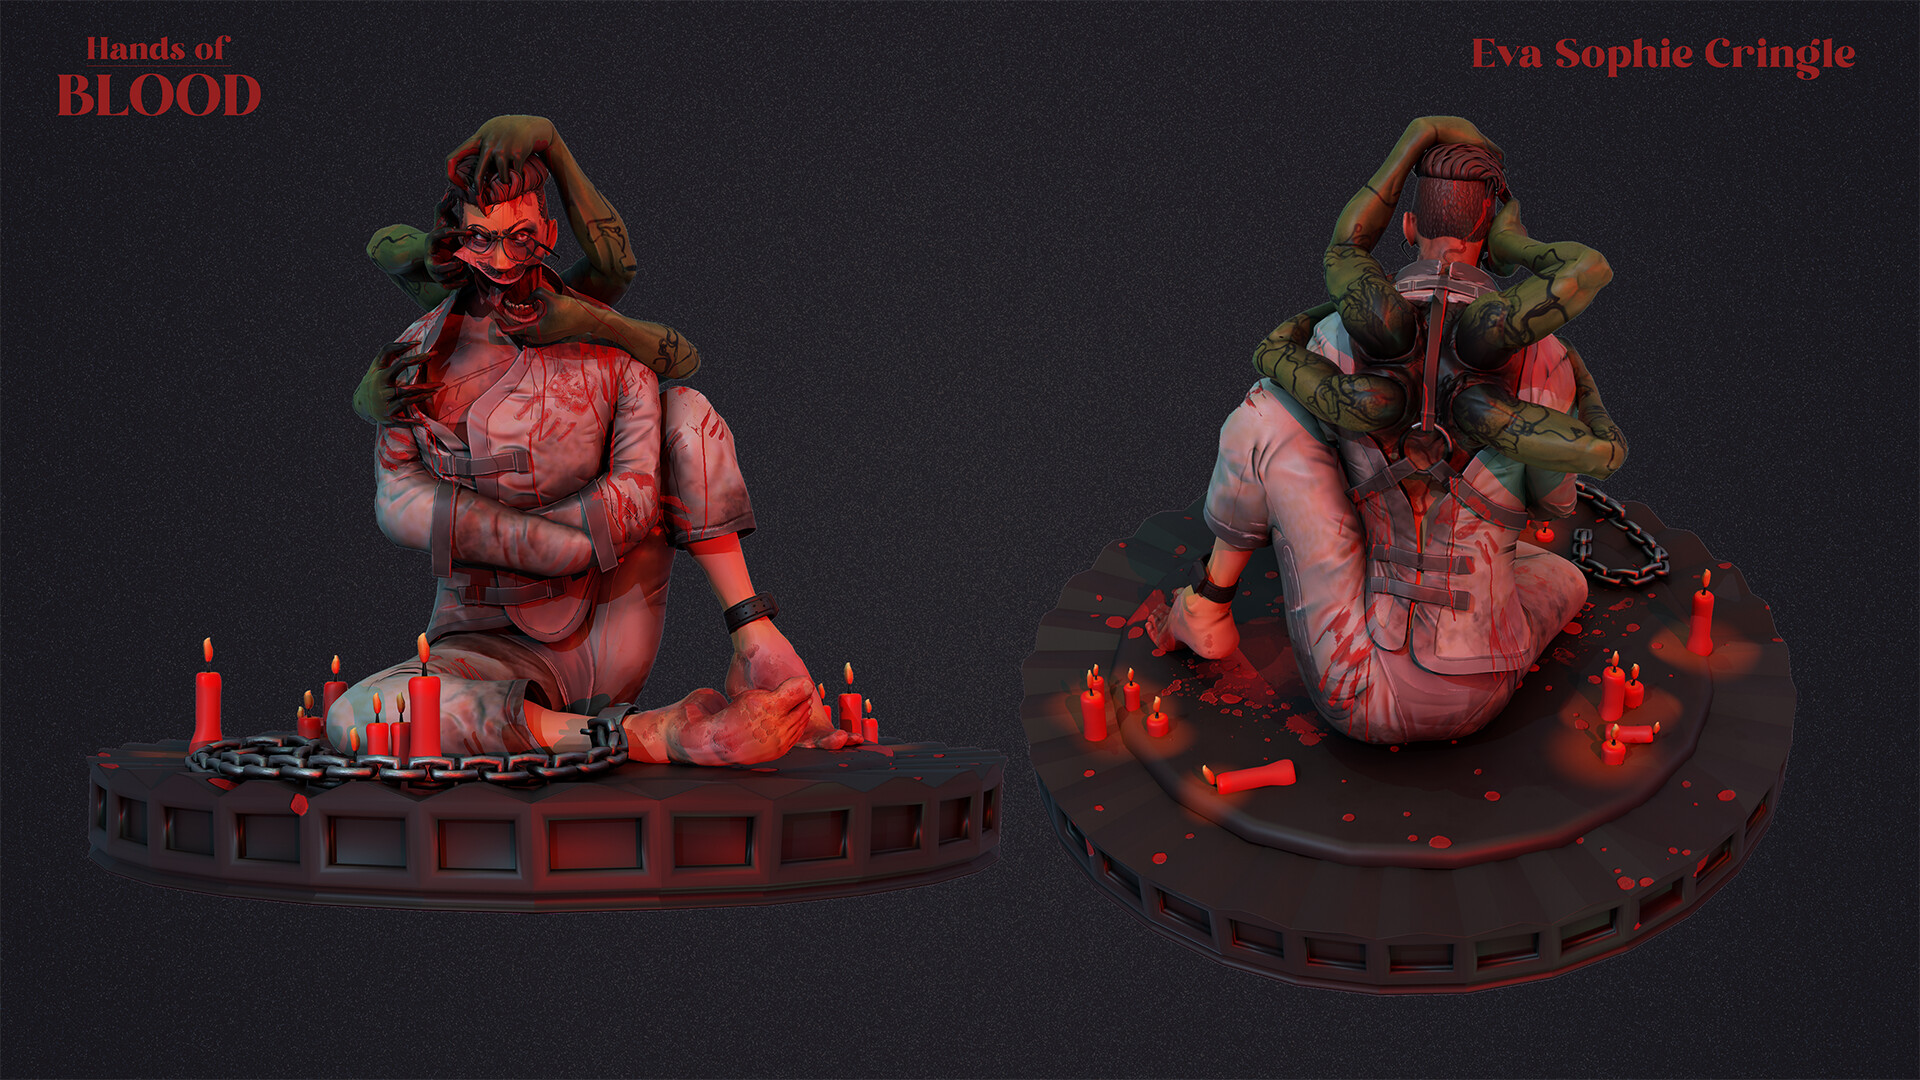
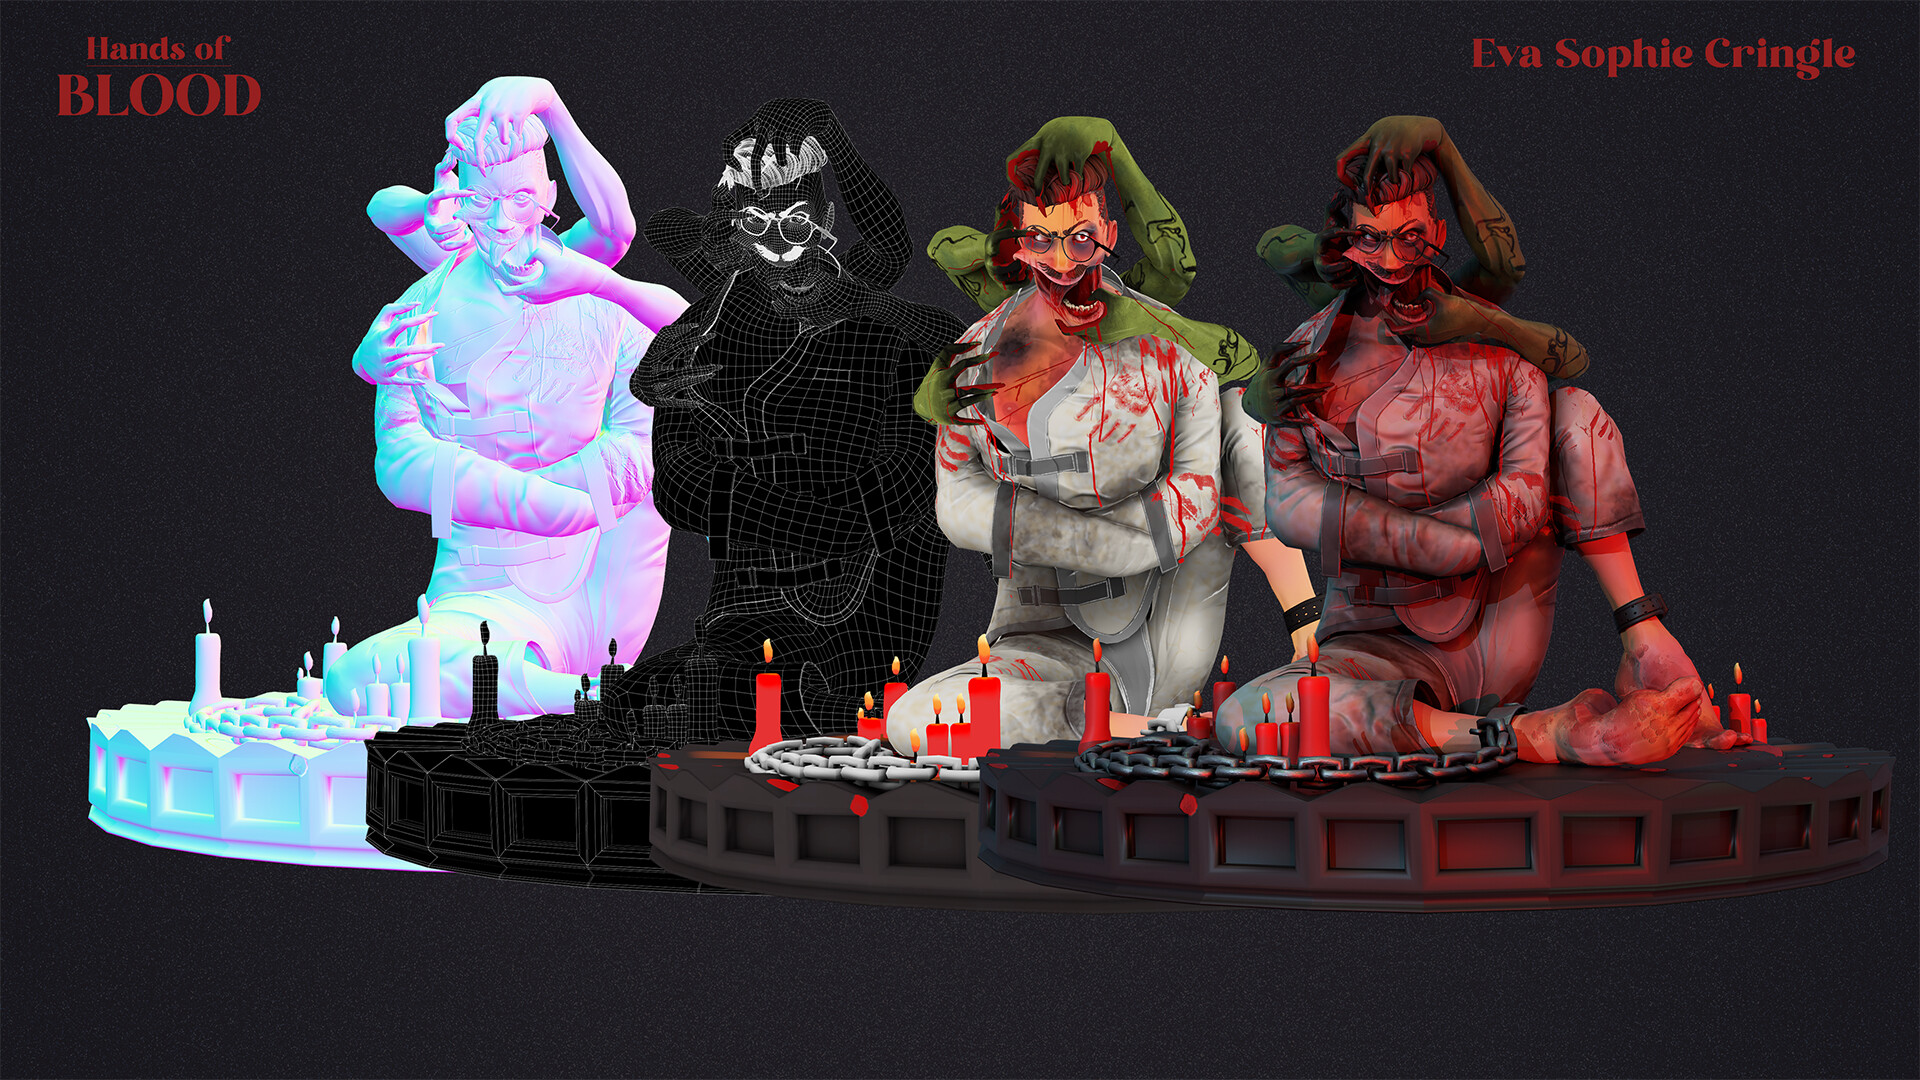
PURPOSE: The model is stationary, sitting on the ground in a pose. Reminiscent of a collectors edition sculpture.
what does this mean?
It will NOT be rigged, nor animated = loops can be abandoned if form comes first.
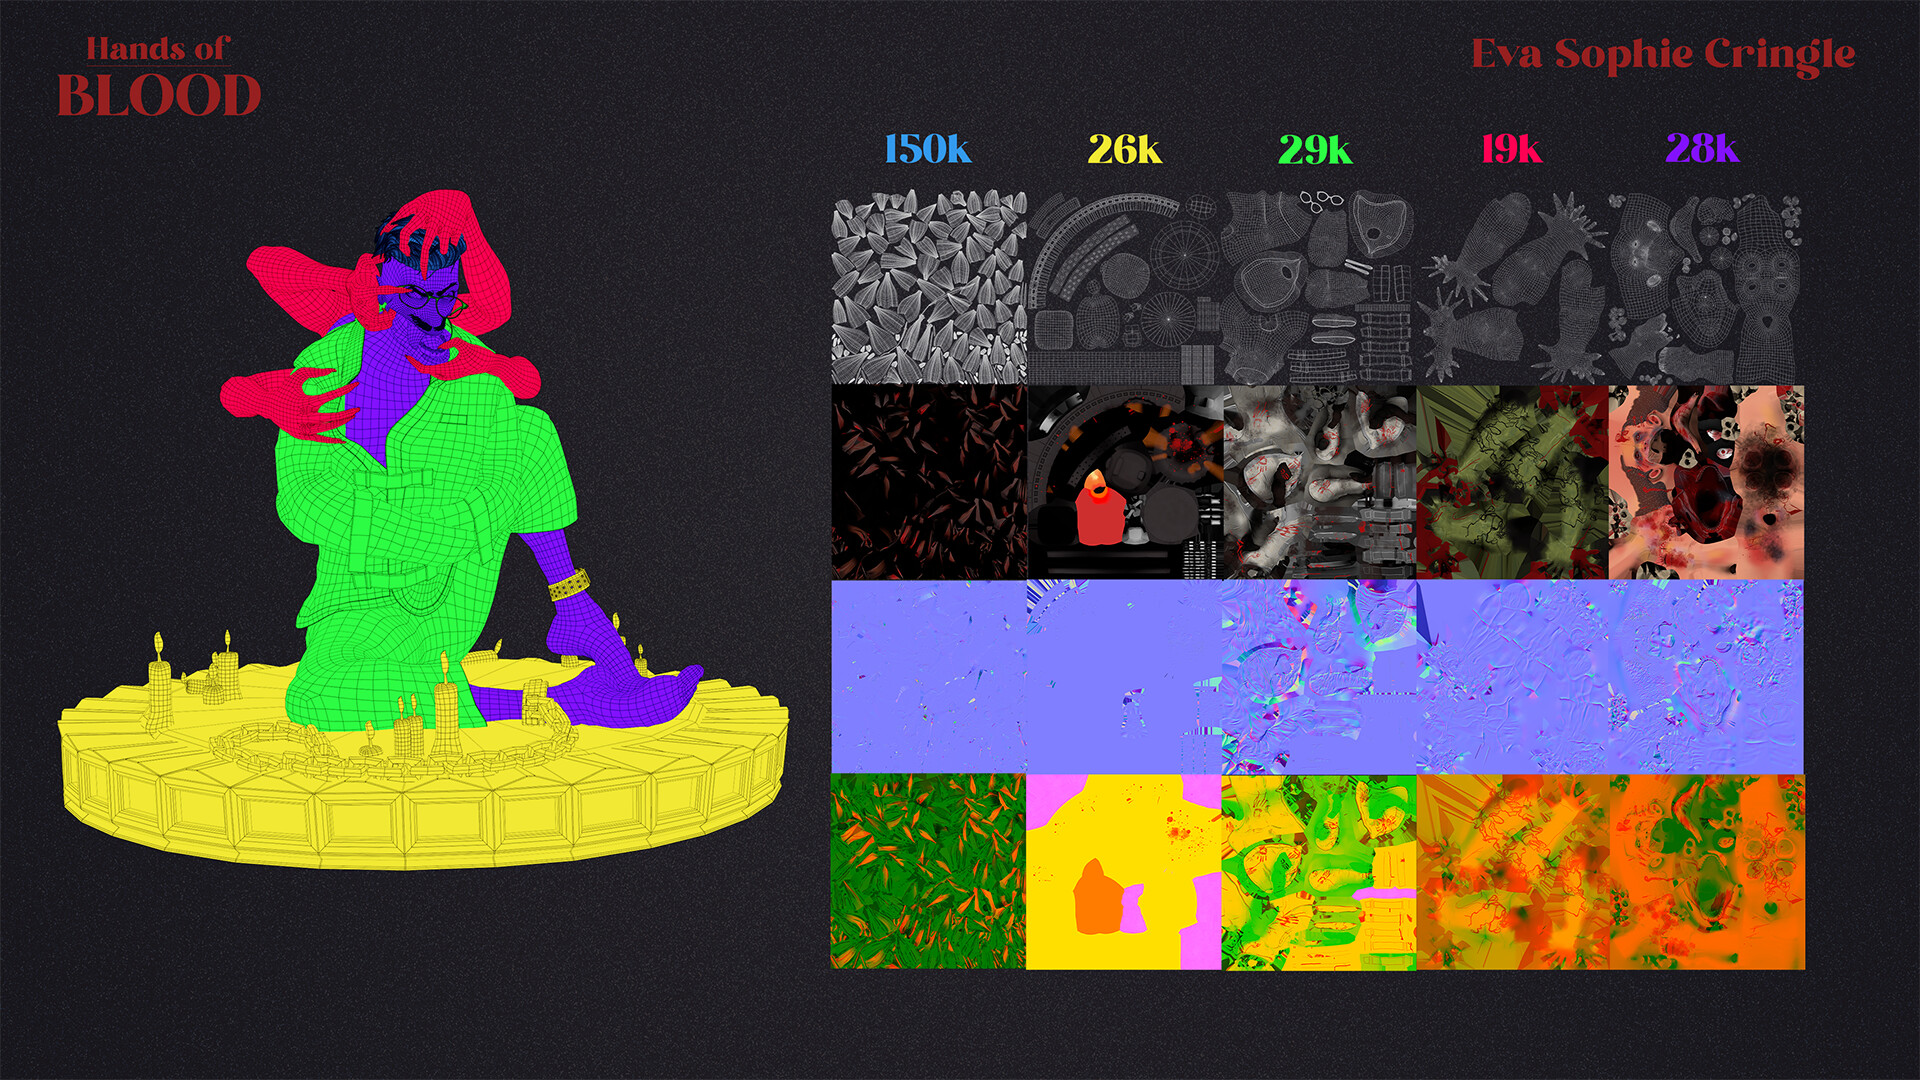
It can have a higher polycount, where it makes sense
Real-life techniques for painting on gore can be used with FX
Texturing has to emulate brushstrokes/spray
rendering techniques can be used to emulate photography
Needs to have a diorama or something to sit / stand on
Burnout is never ever worth it. A good artist is a happy artist, so it’s very important to take care of your headspace. Well done for realising this and taking a step back.
Please don’t be too hard on yourself either - the industry is going through a rough patch right now with mass firings and the Hollywood strike (which thankfully has just ended), but it means it’s EXTRA hard to find a job right now, so remember to give yourself some grace while the industry returns to a somewhat normal state
Finally, your work is looking awesome! I really hope you’ll finish it in time. There’s still 5 days to go so remember to post your final result in the final submissions thread before the deadline has passed.
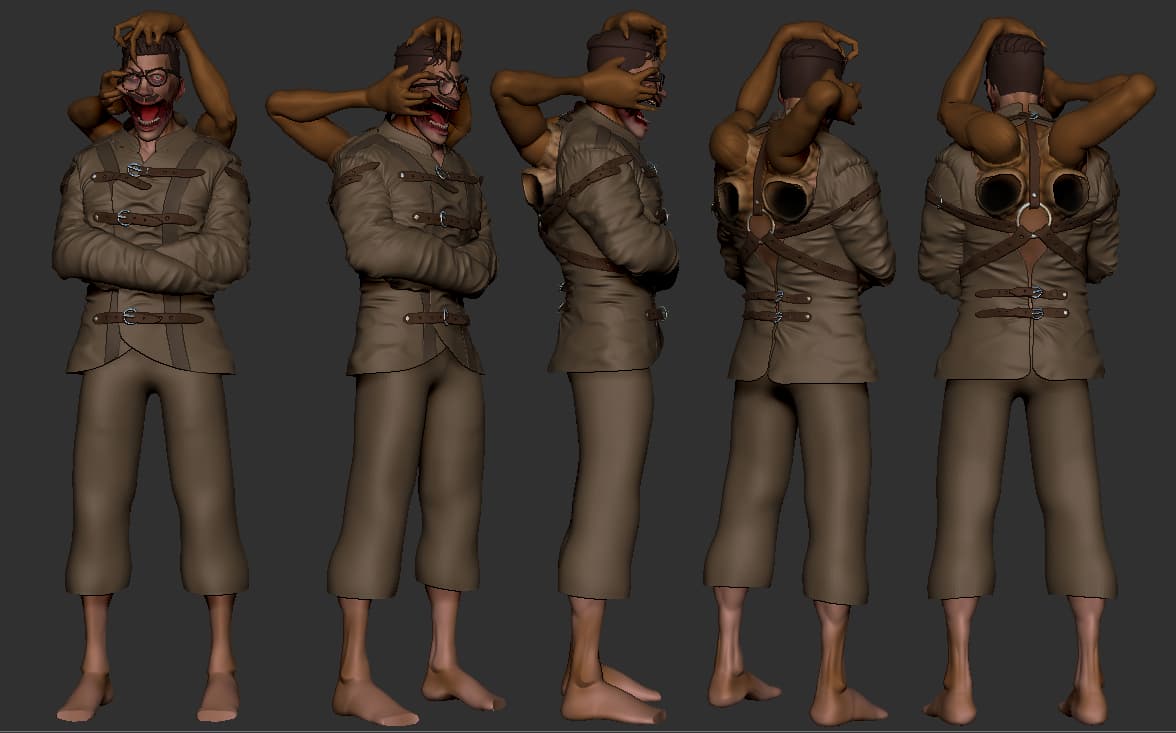
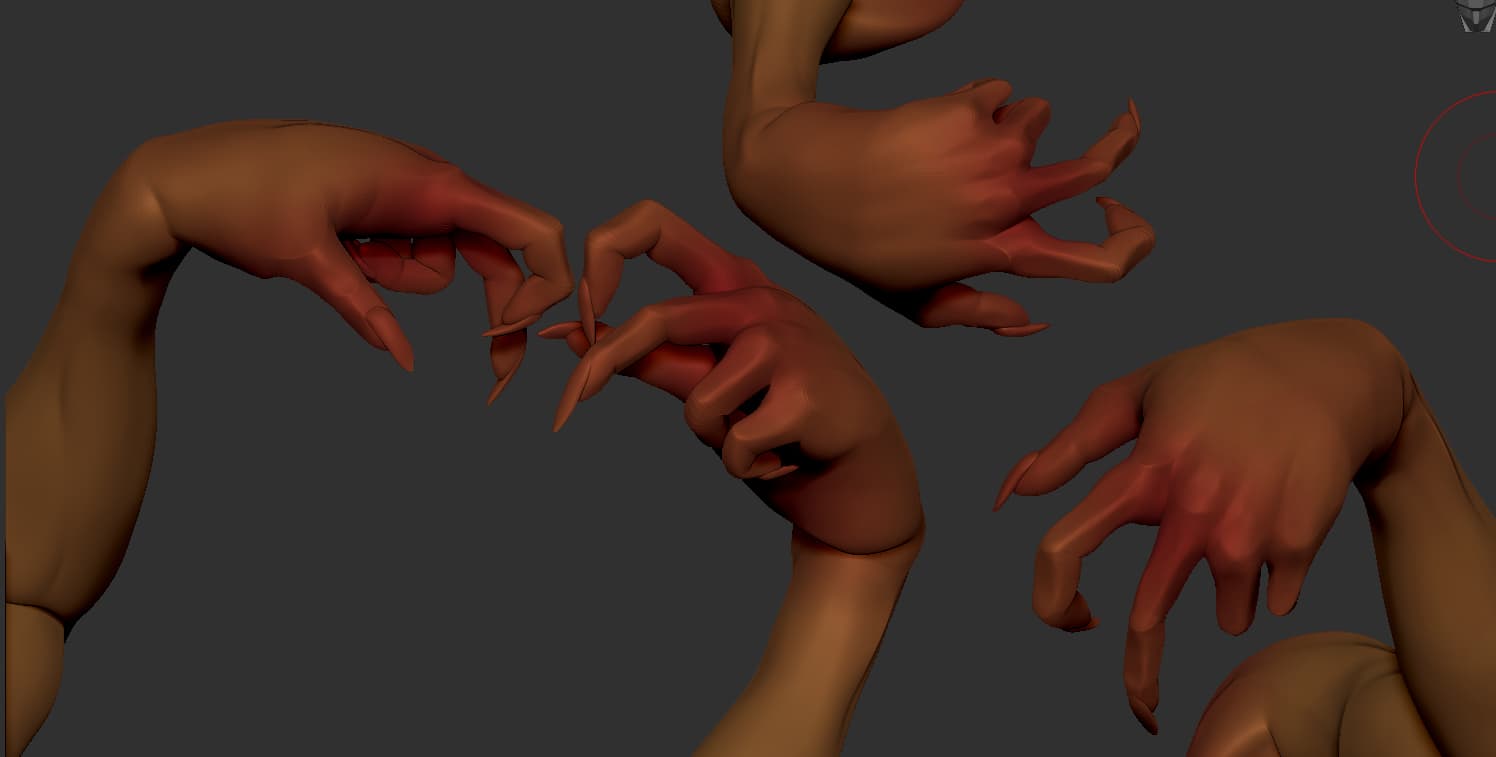
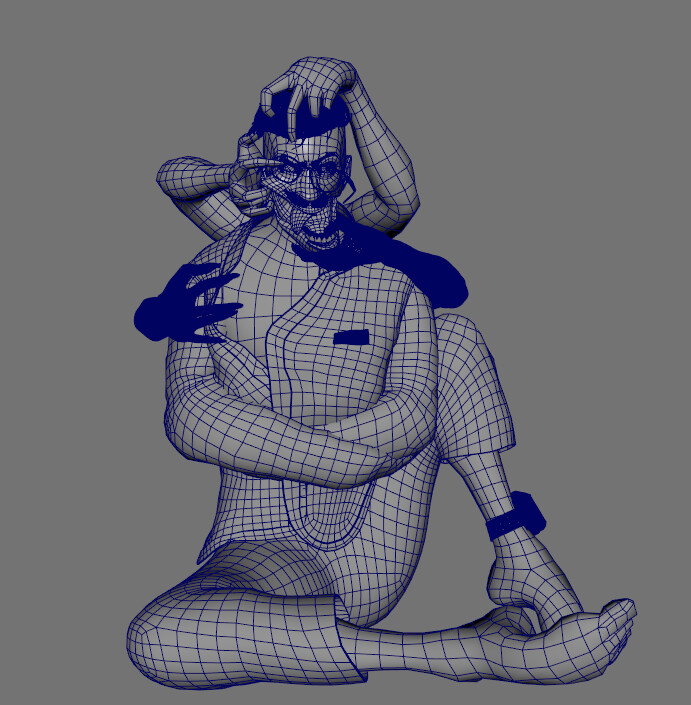
I’ve been working on the retopo in between taking days off for myself (including the rest for today) Another mistake I have realised way too late is that I messed up somewhere in the process, as there was no low version of the hands before I posed them. Retopo by hand as there is no way to get back the information and might take too much time to recover.
“oh he’s not gonna have any hands, will save me some time with retopo or rigging”
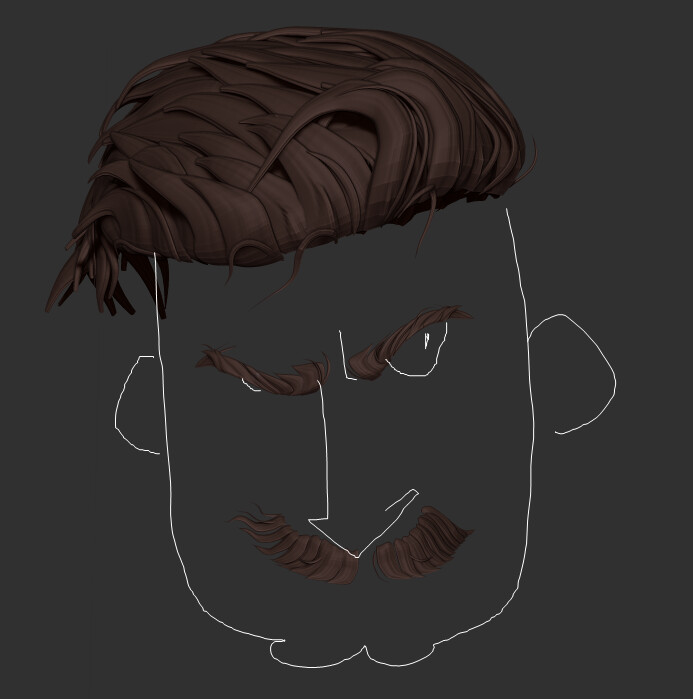
hah, uh… and then came the idea with the hands that have only given more more headaches. Right now, the plan is to retopo it low, then subdivide it later like I’ve already done for the clothes. In the end, this will be a sculpture/collectable printed thingy (??) so loops are not the biggest concern here. Still not sure what to do with the hair, I might leave it like that, or do Dynamesh and Zremesher. A good example of doing before thinking
I’m gonna take some pictures later of places with nice light, to bring into UE5 and emulate the lighting. Got a really nice camera with my new Pixel 8 Pro too.
Also took some pictures in different settings and light to experiment with that in Unreal (or maybe Marmoset, unsure yet) I’m watching a tutorial on how to add liquids in bifröst, maybe i can add some gore details with that! otherwise I have to resort doing that by hand…