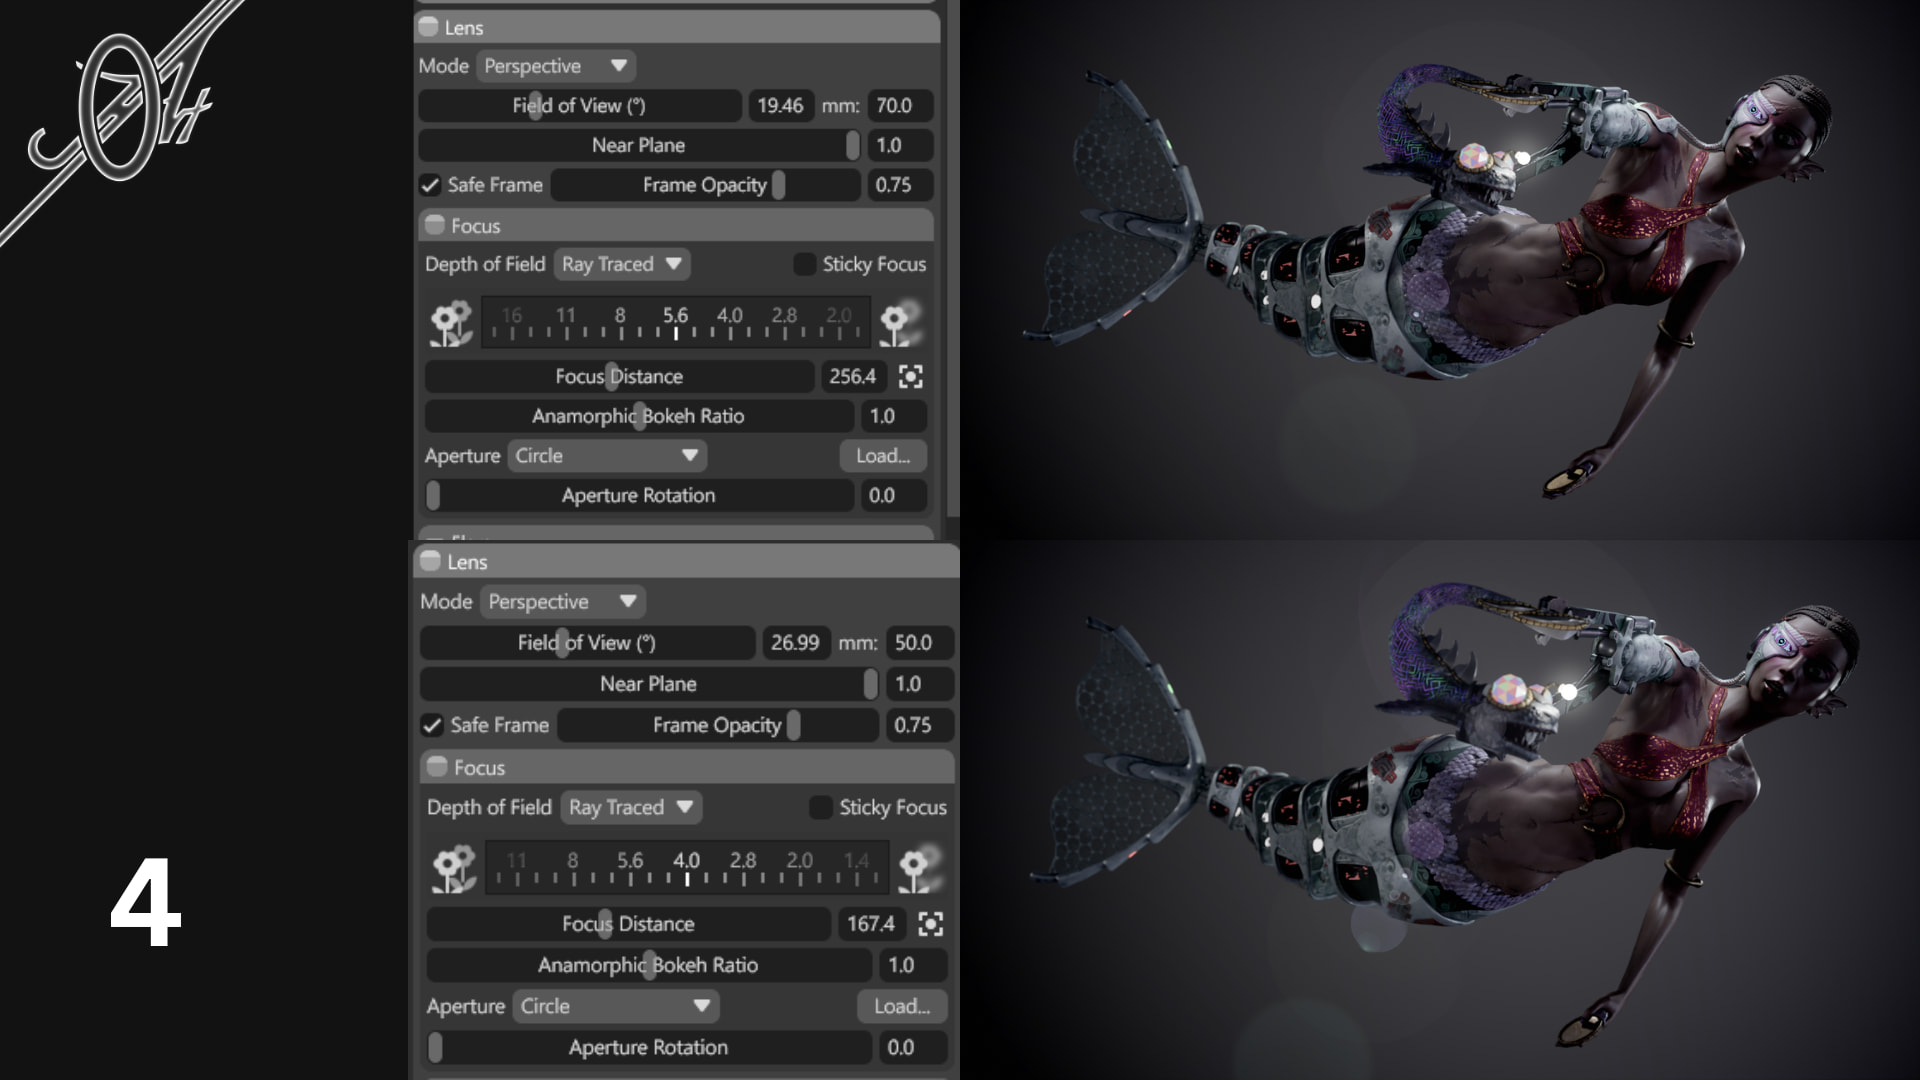
I like 2 and 4 but I hear you on how it hides the arm a bit, how do these look once you’ve played around with the focal lengths?
1 Like

Older renders:
I’m not going any lower with focal lengths, because then the fish literally covers everything…
As for me, 4/50 looks quite nice, it shows a lot (although I admit that the original composition (1) has the most narrative power, it’s a difficult choice :/).
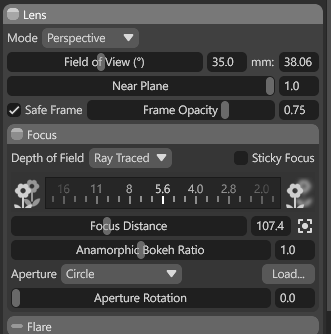
This is original with 45 focal lengths and very bad light…
2 Likes
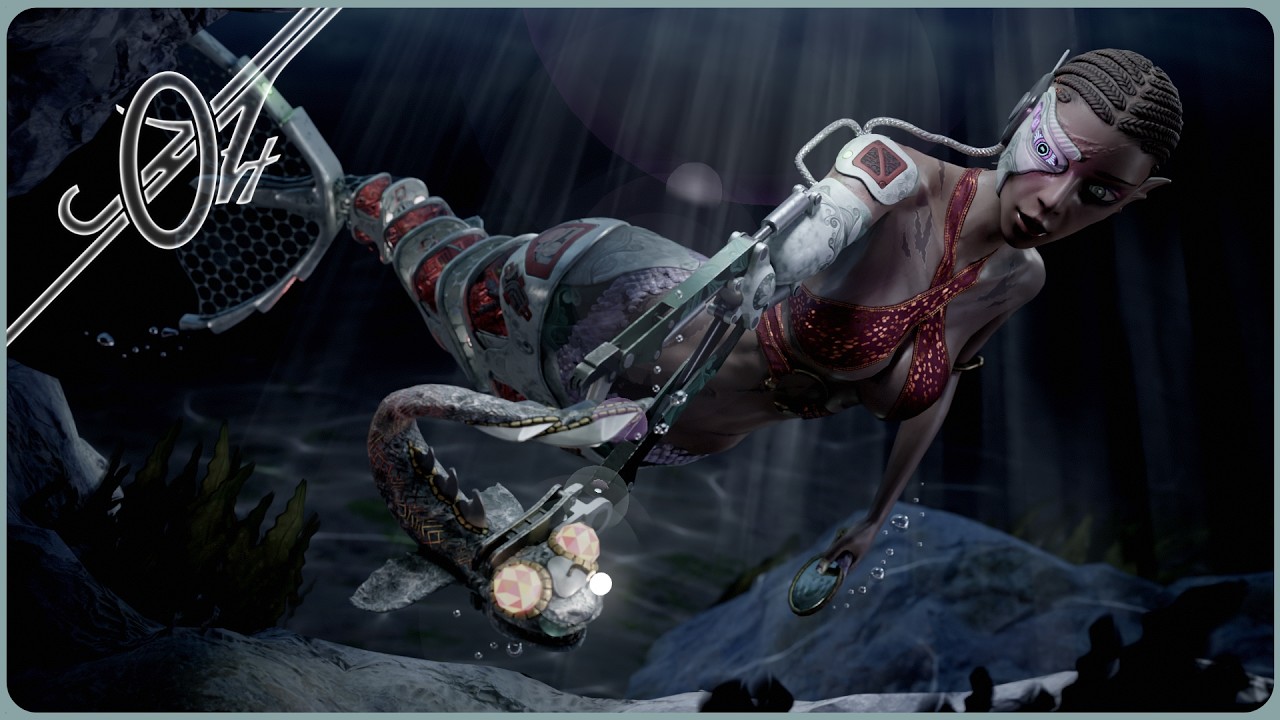
I think I’ll stick with the original camera setup, but I changed the focal length to 45, so the fish takes up less space and the character is more evenly visible (thanks Mhiko )
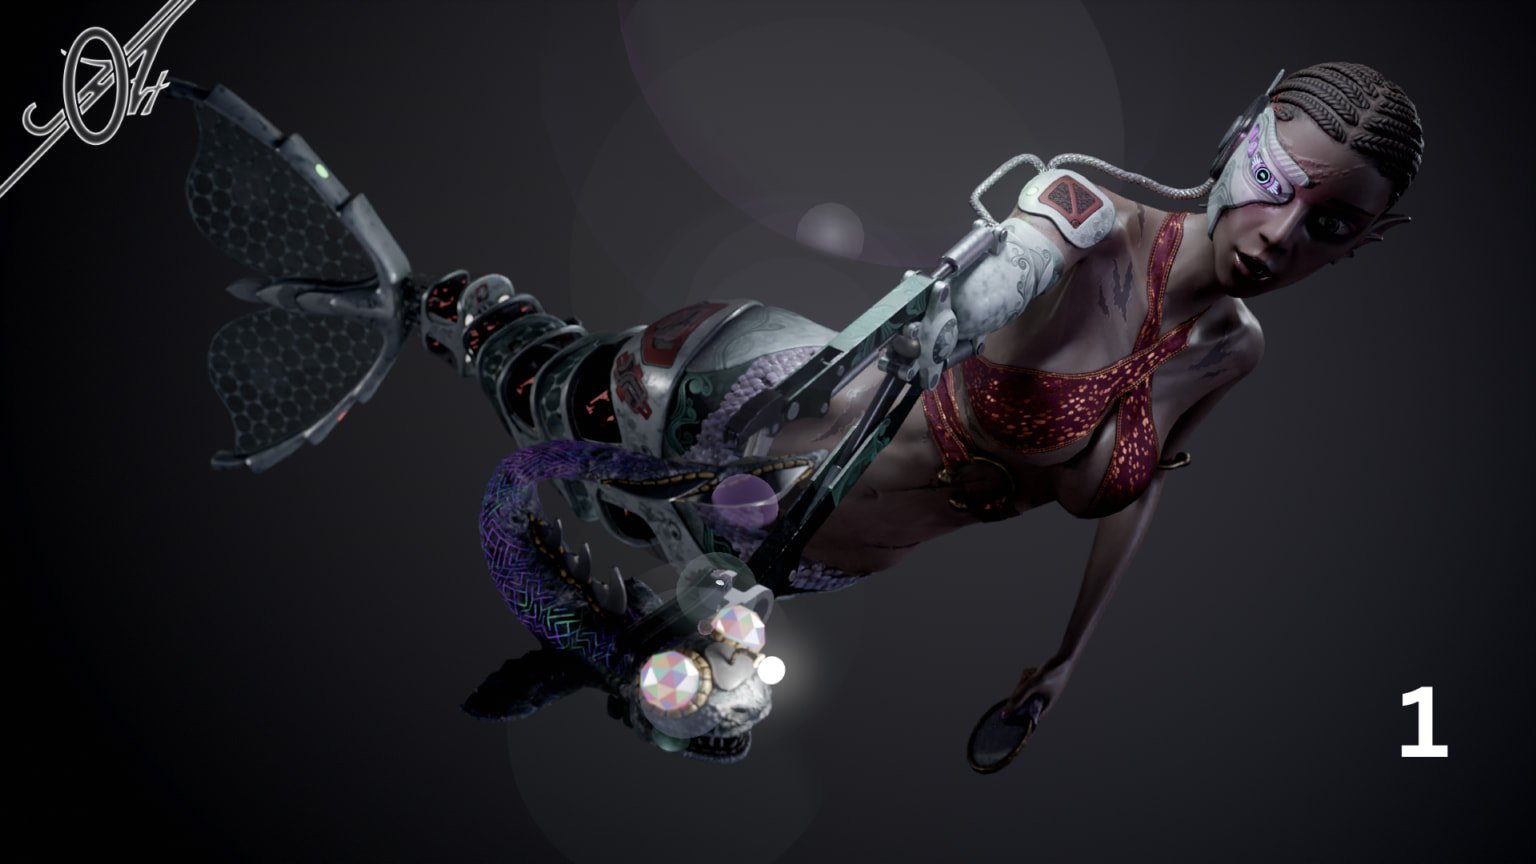
But why am I staying with this arrangement? Well, the character was positioned for this camera, and you can see the tail’s movement much better this way. Besides, as I wrote earlier, it has more narrative potential.
I also added more lights, also to better highlight the emissive elements - I probably wouldn’t have thought of that without feedback from SkullCat3D . ![]()
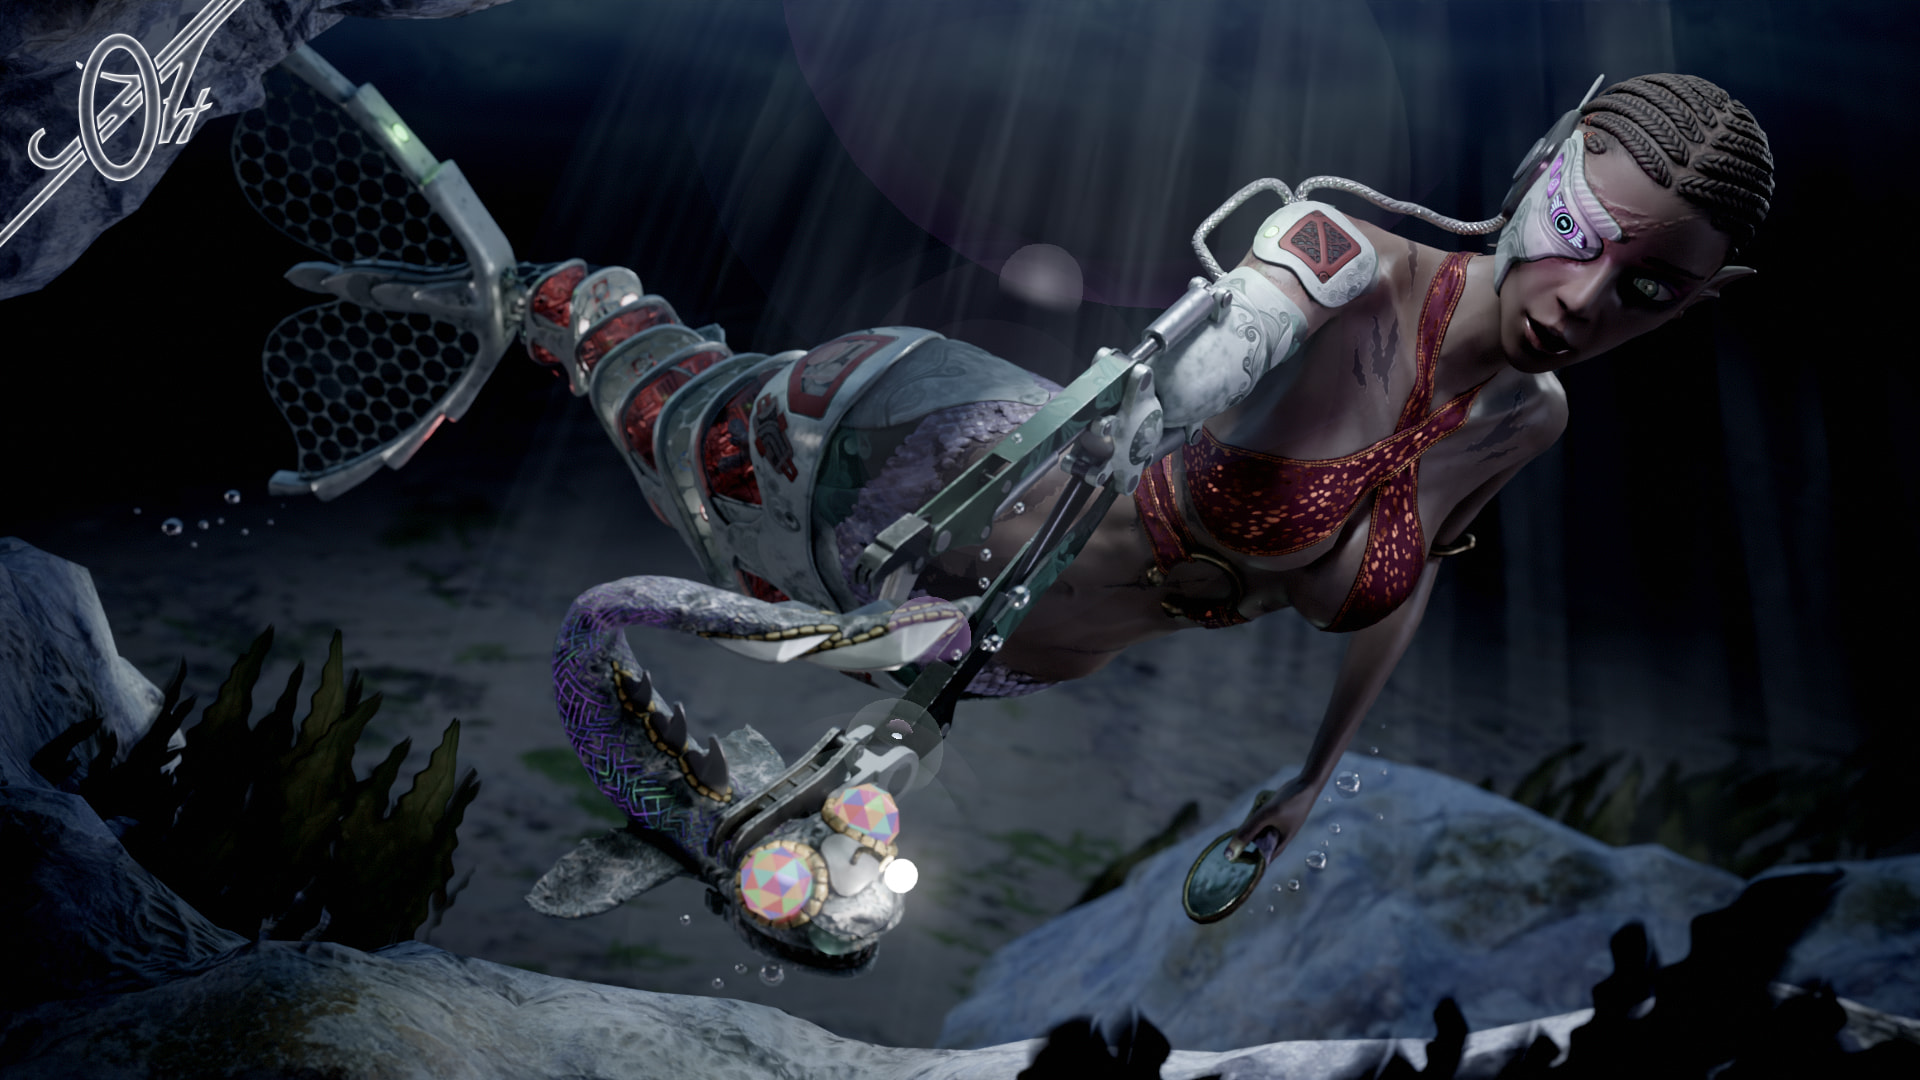
(I also trimmed stones to see if the air bubbles would fit within the range of 150k triangles - I could probably trim it some more, but luckily it fits, because I really wouldn’t want to deal with setting up individual squares with a bubble texture… instead of a small spheres. xD)
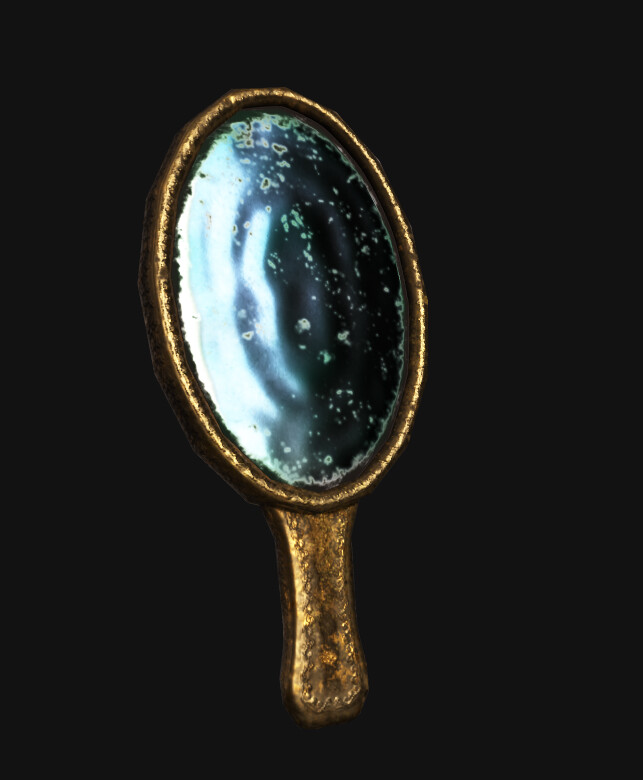
Ou!, and I change mirror texture - added ripples, like magic is happening, or was…
3 Likes
No Fair, Youre already tweaking a finished model and im still on baking, hehe. Good job BTW!
1 Like
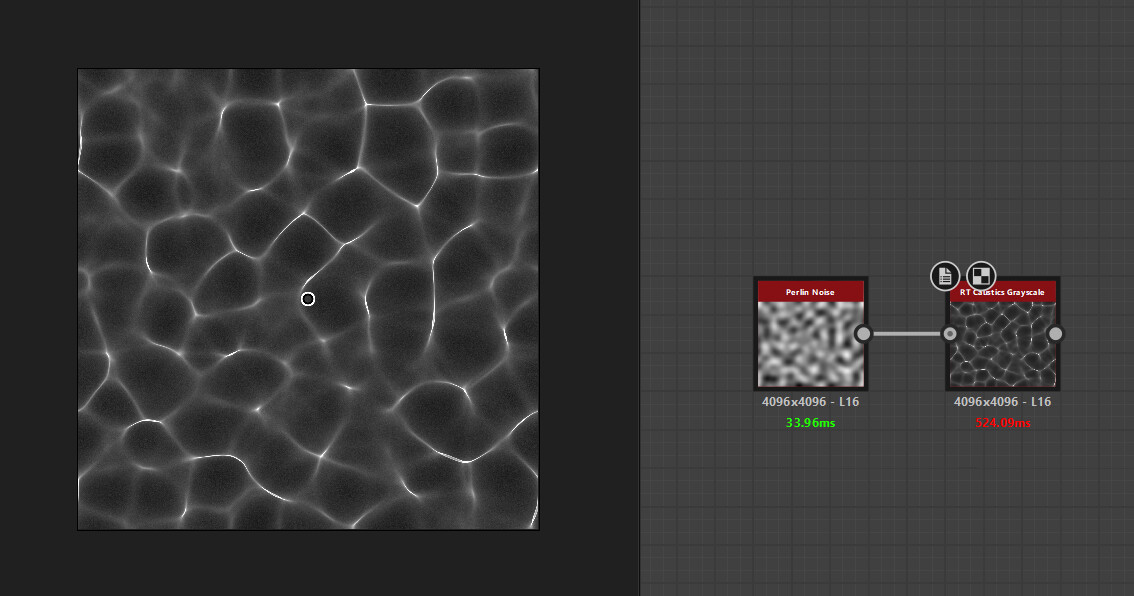
This is really cool! You could try adding in fake underwater reflections (caustics) - you can do it in marmoset by putting a mask like this into Gel section in a light and it gives a cool effect. (There may be other ways you can try as well)
1 Like
Well, I started earlier Thivolan - been lucky to learn about this challenge fast ![]()
You have good timing sofiejg xD
I just sat down to work (and check what’s new here) with the intention of doing just that! And one more small change…
This is very good advice, especially since the sand at the bottom looks rather bland, especially since it is outside the area where the camera is focused.
kek… that was too easy xD
Ou… love it xD

Thanks sofiejg - I needed that kick to open Designer (love the program, but I’m going to far here already xD)
I would add a hair cards (I didn’t even know this term before this challenge… not a Character Artist ![]() ) so that the braids don’t contrast so much, but that’s not part of this challenge for me, maybe later I’ll make a different use of this character… when I convert UVs to something that makes more sense.
) so that the braids don’t contrast so much, but that’s not part of this challenge for me, maybe later I’ll make a different use of this character… when I convert UVs to something that makes more sense.
_______ Edit:
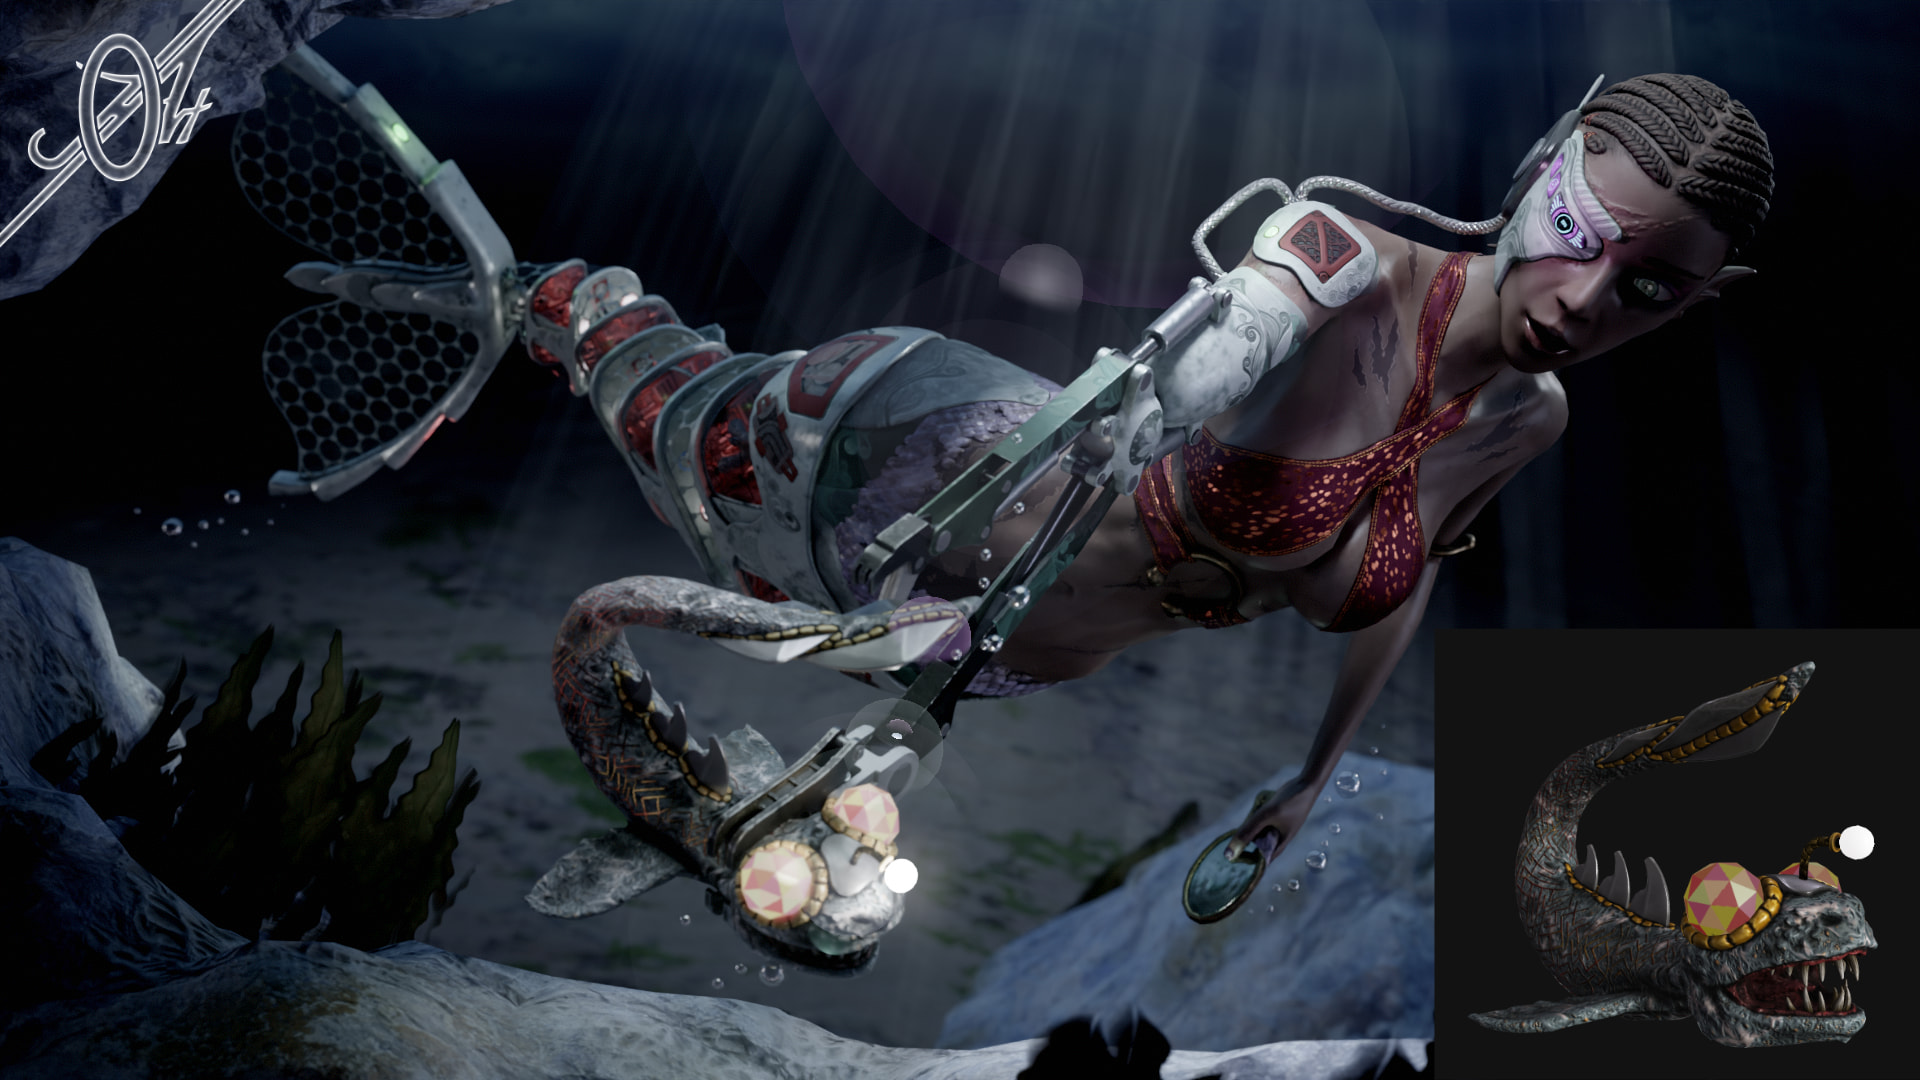
Small and final corrections:
- air bubbles are not just spheres anymore - I deformed them a bit
- there is one more light aiming on darker side of mermaid face, so it’s no so dark
- moved a bit sun rays - one is nicely over her shoulder now
- had to fix lights on my Spyfish… cause I delete them by accident, and save… and than well… no help for it if you group it with a model and than re-export that model X_X

Now to presentation setup.
3 Likes
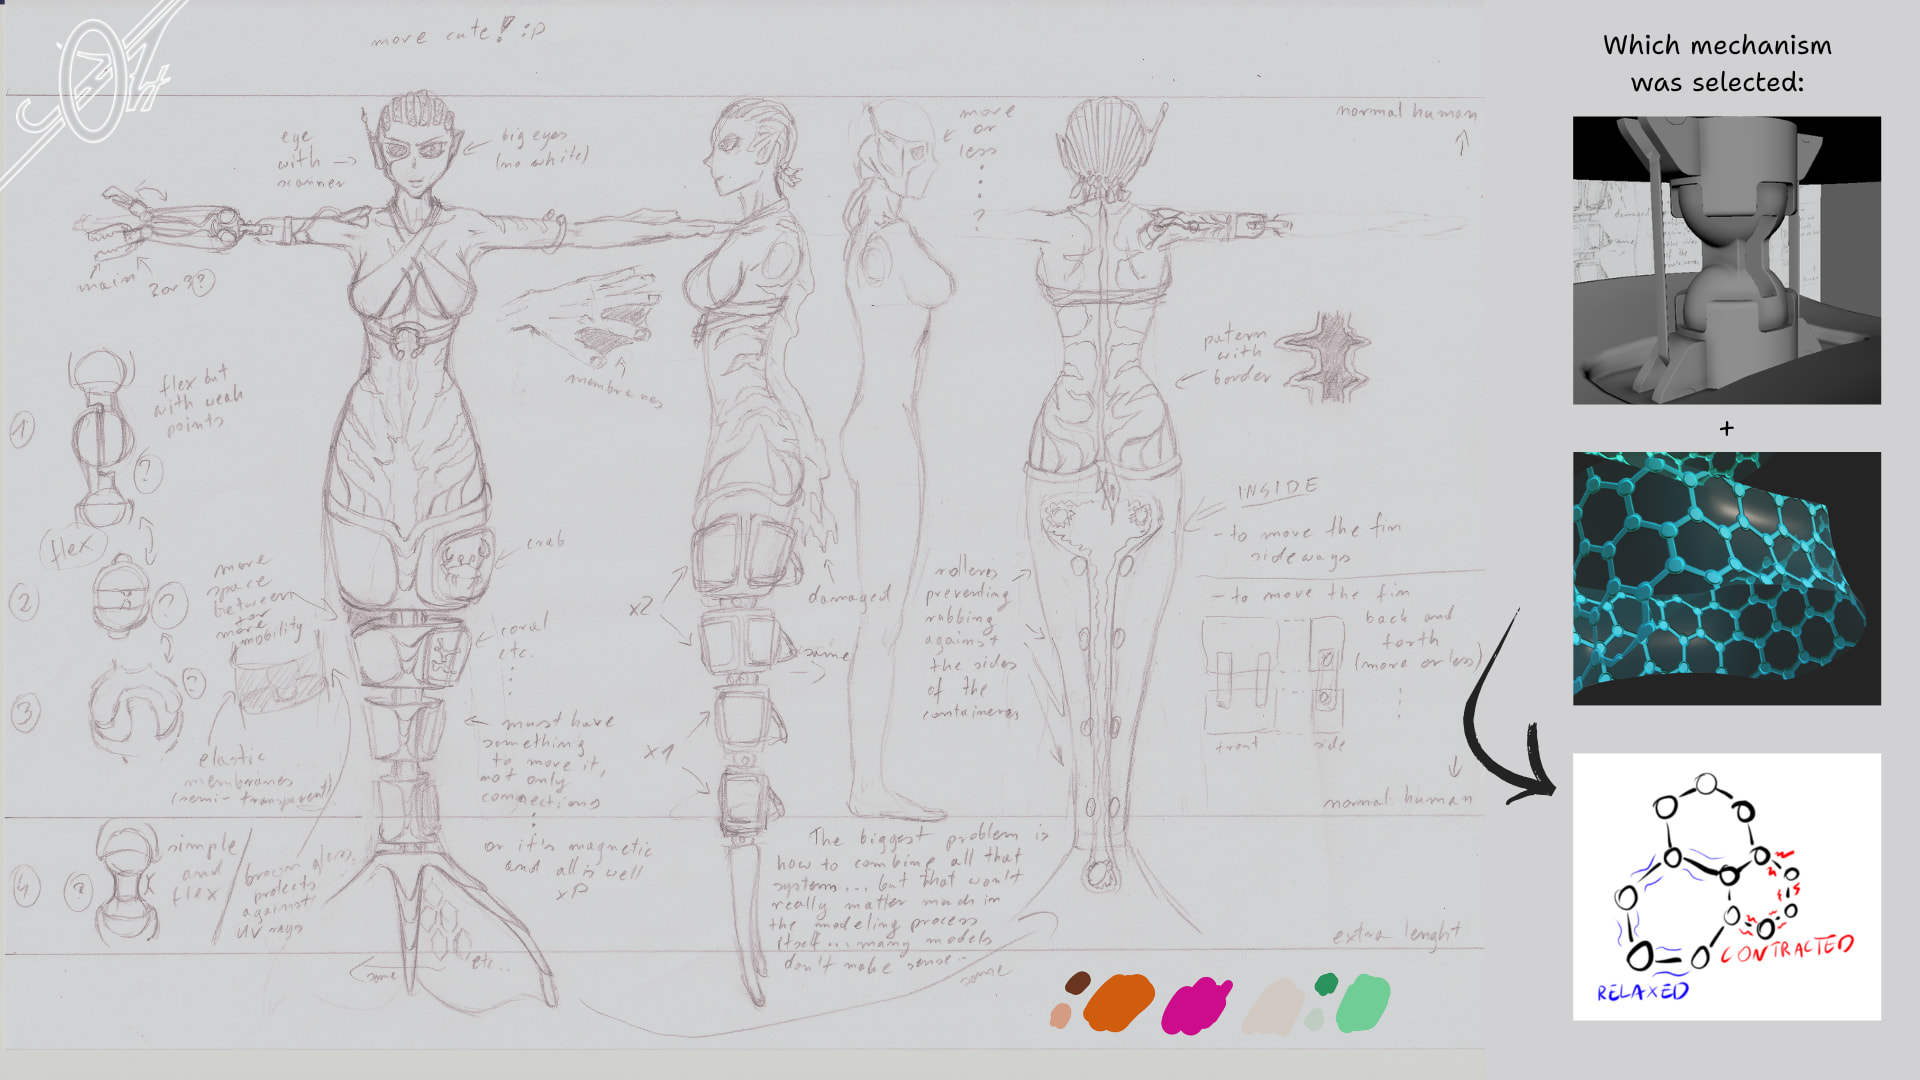
I am still working on the presentation, which reminded me that I was supposed to describe how her tail works.
It’s a simple principle, really:
-
the joints make up pairs of spheres, so each segment can basically collide with each other – meaning they have a big range of motion
-
but this is stabilised and managed by a hexagonal pattern between the segments - where each strip can contract and expand with elecric impulses, which gives great flexibility and ensures that nothing collides
-
the strips that run alongside the spheres are wiring, passing from segment to segment and connecting the entire system - and at the same time they are quite well secured
(And anyway, there was a serious power outage in my neighbourhood for several hours… few thousands of customers without electricity… I’ve been living here for three years now and this is only the second time this has happened!)
Reminder that there are only 5 days left of the challenge ![]() Remember to post your final results here before the deadline is up: Myths Reimagined - Real-Time Game Character: Final Submissions
Remember to post your final results here before the deadline is up: Myths Reimagined - Real-Time Game Character: Final Submissions
1 Like
And finally, the last element ![]()
___
Edit:
Now I can add my video
____
Edit 2:
And my template for presentation (you can use it if you want), I collected important info in one place

TEMPLATE:
Model Name
Your Name
Link to WIP thread - LINK
(final render – with logo - 1920px+ on the longest edge for all included images – uniformed presentation)
Software:
• ex. Maya / Blender – what was done
Tri-count:
• Model Name – XXX XXX
(Modelling software scene screenshot with models and tri-count visible)
Textures:
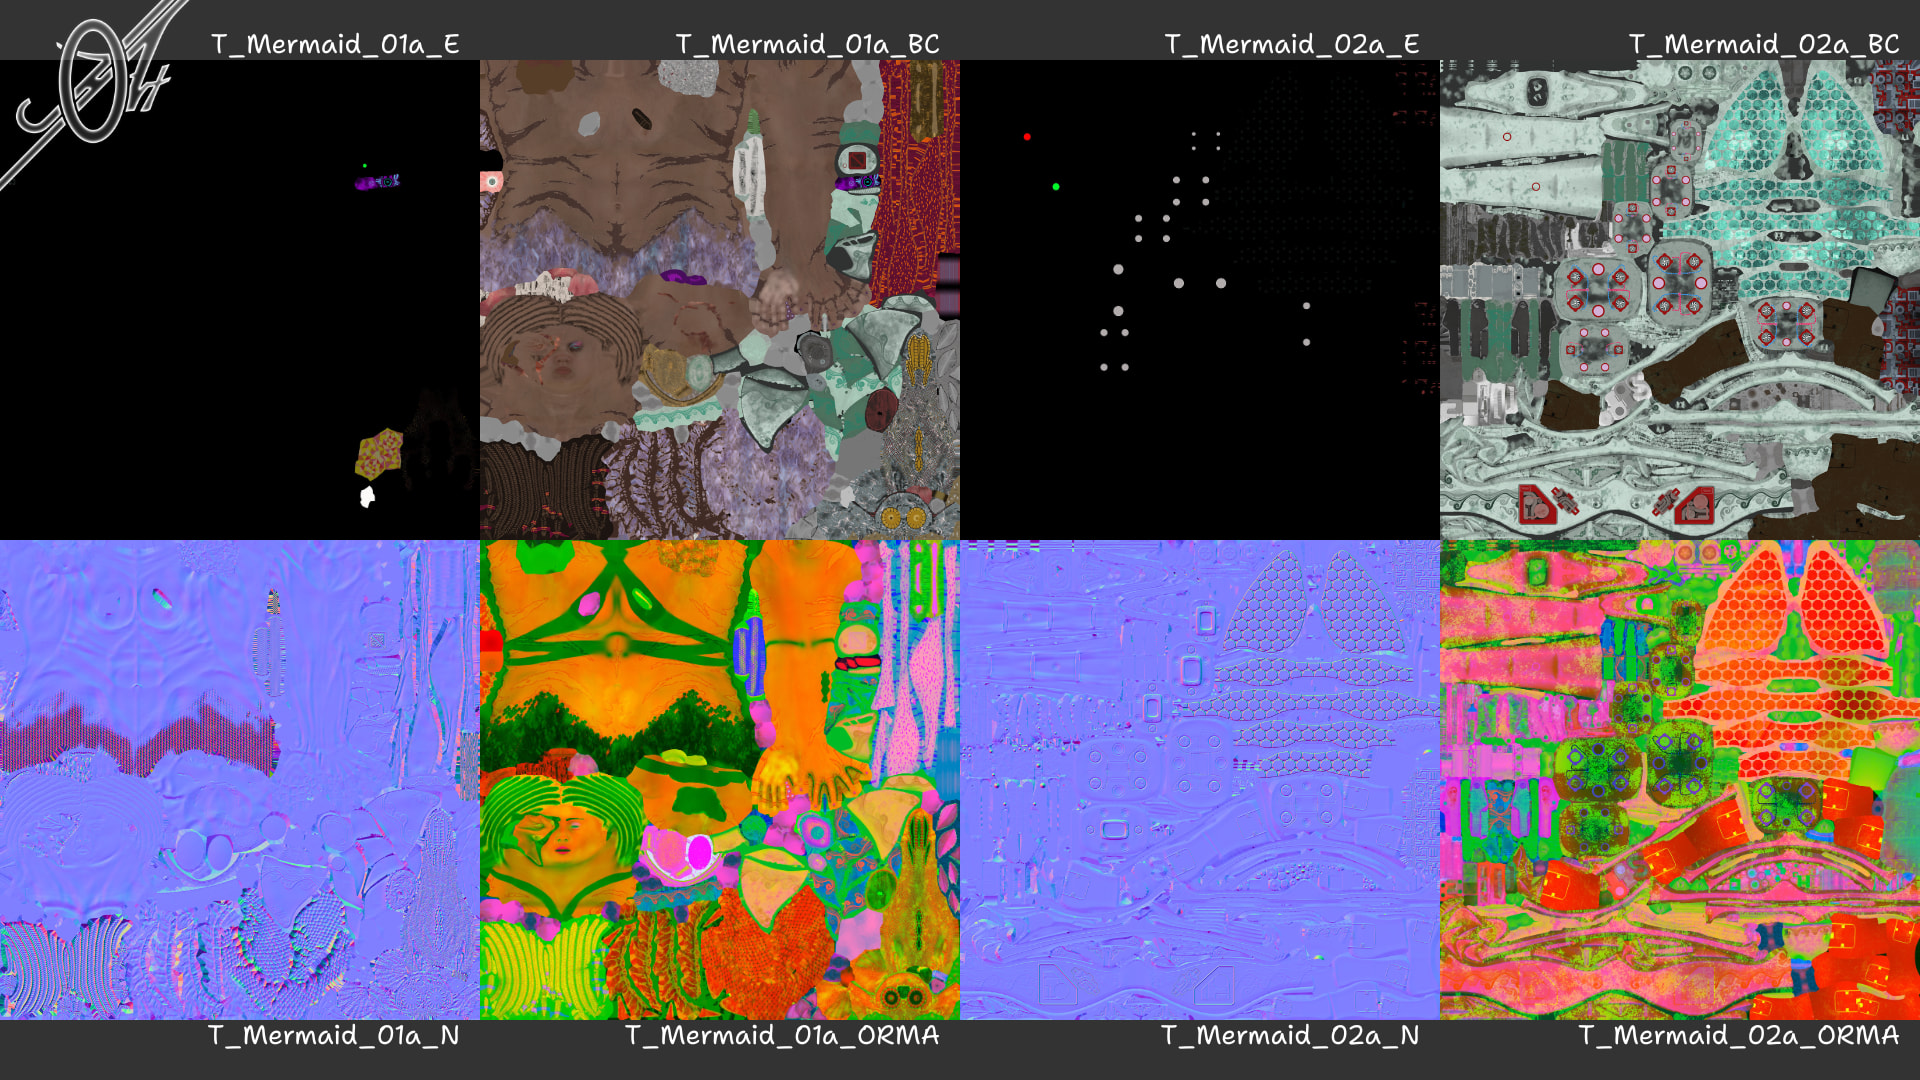
• Number of sets - size x size
(Texturing software export screenshot for character textures only)
(Both sets as flat renders)
Based on the replay from emiliestabell in Rules thread environment textures are separate, not included in Character UVs.
Views:
(Front, side and back T-pose)
(Front, side and back in presentation pose – no background)
(Wireframe T-pose)
(Wireframe, passes and mat in presentation pose – no background)
( optional video presentation)
___
The journey:
(since it’s listed and as a courtesy, because it makes it easier for those evaluating the model)
(Concept Art image)
• Modelling / Sculpting
(2x modelling form Modelling Software)
(2x sculpting form Sculpting Software)
• Retopo
(2x reopo screens)
• UVs
(1x UVs screen)
• Texturing
(backing screen)
(texturing beginning)
(2x texturing end)
• Rendering
(composing in Software Name screen)
(scene in Rendering Software Name screen)
More detailed journey can be found in my WIP thread - link
___
Summary / Social links
(final render – no logo)
___
Template end - If you want to see it in use, see my final submission.
1 Like