Fairy Tales Challenge - Final Submissions

:bear: Goldilock’s Porridge Pajama Party :bear:
A very current day pajama pandemic take on Goldilocks and the Three Bears with a personal touch of my very own teddy bears :sparkling_heart:
Here is the link to the WIP thread: Porridge Pajama Party

And here is my ArtStation post which has videos included if you want to see as I couldn’t figure out how to put the marmoset viewer on this: https://www.artstation.com/artwork/Qr8yg8


I’ve never done an art challenge before, it was so helpful to update my portfolio with as its been great for accountability and creativity (I feel more creative when restricted). Thank you for running it, its been a blessing in disguise for my art side and I defiantly want to do more! GL HF to all the peeps still working on theirs it will be exciting to see the final versions of ones I’ve been following :slight_smile:

12 Likes

Postapocalyptic Gretel


So I’ve finally finished her! She is a badass Grtetel from times after nuclear war. Tough, strong-willed and relentless girl… so she would shovel a witch into a furnance without any problem :wink:

I’ve made her in zbrush, then retopologized in Maya, Textured in Substance, then rigged in Maya and finally rendered in Marmoset.
Triangles: 97.7k
Vertices: 49k

side1:


side2:

back

wireframe front

wireframe back

3d textures preview

2d textures preview, two sets
back:

Sketchfab prewiew: https://skfb.ly/onD6B

Additonal renders:


And my “in progress” thread

Also if you would like to see more of her, turntable animation and stuff… and also more of my work then have a look at my artstation page :smiley: https://www.artstation.com/lunea

7 Likes

My Egyptian mummy piper is done! I had to speed things up considerably and couldn’t spend as much time as I wanted on the project but I still wanted to at least call her done. The contest helped me to get more confident using Blender for the majority of my pipeline, use Marvelous Designer for a full character for the first time and how to get stuff done in a short amount of time ( I had to cut a lot of corners :sweat_smile:) Even if I wanted to approach things a bit differently, I still am happy I finished her and can post her now!

I hope you enjoy!
Faces: 92k
Rendered in Blender’s Eevee
Zbrush sculpt, retopo, modeling and cleanup in Blender
Textured in Substance Painter


11 Likes

Hello, everyone, this is my final submission for the contest.
I reimagined a cyberpunk version of Aladdin inspired by the style of Cyberpunk 2077.
it was a wonderful experience from which I learned a lot because it’s the first time I’ve ever created a real-time game character with certain restrictions.

Here is my work in progress thread

• Sculpting in Zbrush
• Hard surface modeling in Zbrush and Modo
• Retopology in 3DCoat and Modo
• UV in Modo
• Texturing in Substance Painter
• Rendering in Marmoset Toolbag

You can check it out on ArtStation too along with some of my projects.
Thank you and good luck to everyone.
G;

Final shot and storyline

Final shot alone

Marmoset online viewer

Sketchfab online viewer

Front, side, back views

Front, side, back views + wireframes

1 x 4K map set

Texture overview

Additional shots

The process of creating Cyberpunk Aladdin

5 Likes

It looks amazing and luck!

I think you also need to render in either marmoset toolbag, unreal engine or unity

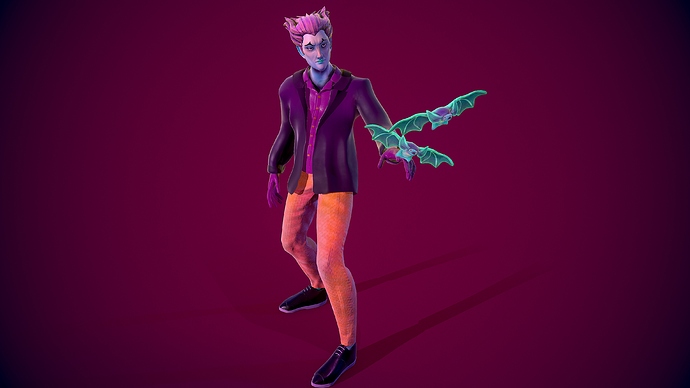
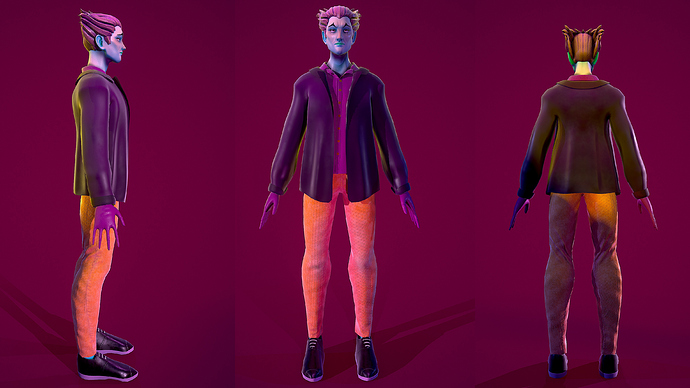
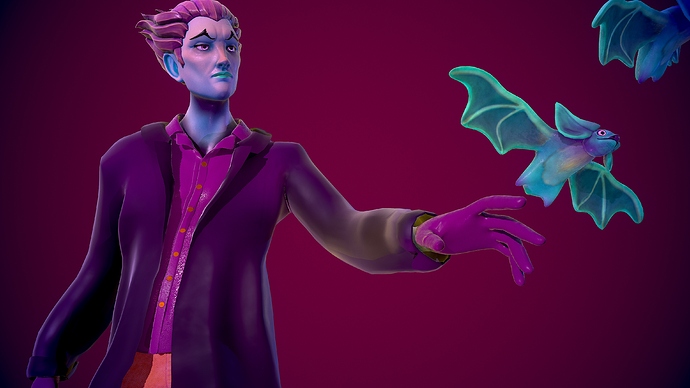
Here’s my final Render’s for this challenge! I reimagined Dracula in a vaporwave aesthetic. Putting this together required heavy research on fashion design and color theory to come up with an idea I felt would best fit the theme I was going for. In the end I’m super happy with how he came out!

!

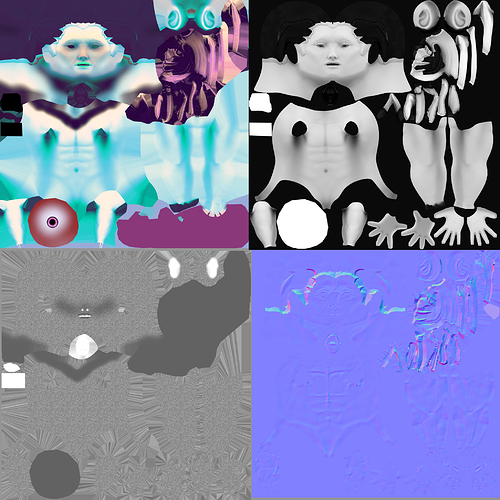
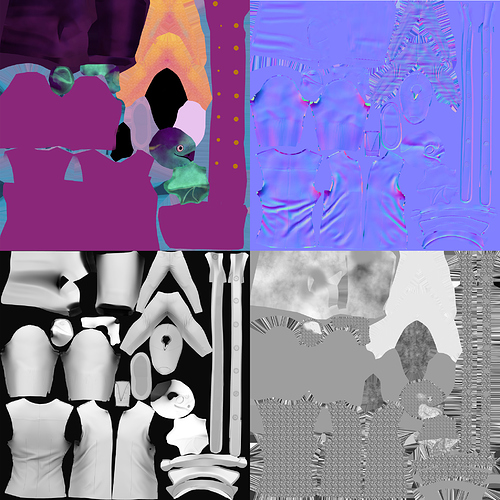
2 4K maps

Heres a link to my WIP thread: Fairy Tale Challenge - Vaporwave Dracula

And heres a link to an Artstation post where I have a Marmoset Viewer of the scene and some additional renders! https://www.artstation.com/artwork/J90wWZ

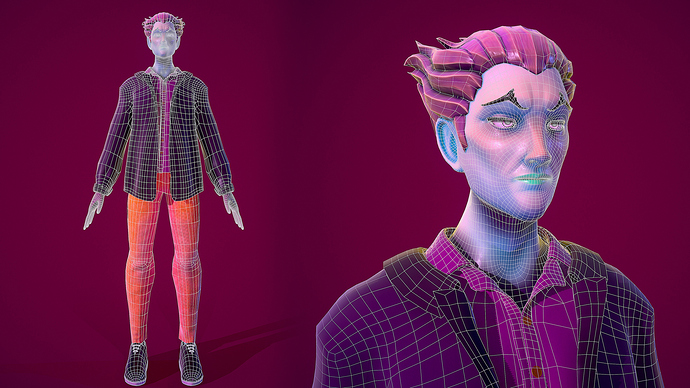
The high poly for this was done in Zbrush, retopology and uv’s done in Maya, textures done in substance painter, and he had his final renders through toolbag! The scene is roughly 63k tri’s, I personally wanted to go lower rather then try to hit the full 100k.

This was an incredibly enjoyable and fun challenge, thanks for the opportunity!
6 Likes

Here is my final render for my version of a younger Baba Yaga. I’m not totally satisfied with the final render, but I still think that I was able to progress on some parts during this challenge :smile:
The work in progress can be found here
There was a lot of incredible characters from everyone and I’m really looking forward to all the submissions !

High Poly : Zbrush
Retopology : Maya
Rig : Maya
Textures : Substance Painter
Render : Unreal Engine

Tris Count :
Character : 42 142
Cauldron : 4 832
Staff : 6 348

Final shot :

Front, side and back views :

Body Wireframe :

Face Wireframe :

Rig :

UV1 :

UV2 :

6 Likes


Lil’ Red - Cyberpunk Little Red Riding Hood

Wow. What a blast this was. I had so much fun with this character. I love the cyberpunk art style and really wanted to utilize that with this character. There was so much thought and detail that went into making this character. Even her tattoos reflect the story with the flowers, the big bad wolf, the axes from the woodcutter in the forest that saves her from the wolf, her shirt graphic GMA (short for Grandmother) lives. I just had so much fun!

Tri-count: 64,372

Wireframes:

Textures:

Marmoset Renders:

High Poly:

4 Likes

MALEFICENT

Hi everyone! This is my final submission for the fairy tale contest. I had a blast creating this character, it was something I had never done before!

For the contest I reimagined a scarier version of Maleficent. In the sleeping beauty fairy tale, she is always described as a witch or an old lady. I wanted to change that concept a bit. I decided to try creating a version of Maleficent that is more demon-like. I wanted her to look dark and scary. So, I searched up a lot of references of creatures and monsters to try and replicate it on her body. I also added a lot of details to give more depth to the skin. Hope you guys like the final result! :grin:

And thank you for everyone that supported me. It has been really an honor seeing everyone’s projects grow and evolve into something great!

  • Sculpting in Zbrush
  • Cloth in Marvelous Designer
  • UV and Retopo in Maya
  • Texturing in Substance Painter
  • Final rendering in Unreal Engine
  • Triangles : 67k
  • Two 4K map sets

Here’s a link to my wip if you want to see my progress : Evil Creature Maleficient - WIP. I will post my final entry on ArtStation soon if you you want to check it out more : https://www.artstation.com/chantalprentice

FINAL SHOT

APOSE FRONT, SIDE AND BACK VIEW


DYNA POSE FRONT, SIDE AND BACK VIEW


CLAY RENDER

WIREFRAME RENDER

TEXTURES


HIGHRES

ADITIONNAL SHOTS

13 Likes

STEAMPUNK GENIE

This is my reimagining of the Genie from Aladdin/Arabian Nights.

Set in London rather than Agrabah, the Kingdom is in peril from the gentleman Lord Gafar who using a mystical gem has forced the engineer Al Ladeen to construct a Wish Granting Genie, to marry Queen Victoria and become the most powerful man in the world!

Final Render:

Additional Renders:

Polygon Count

Front/Back

Side/Lamp

Front/Back Wireframe

Side/Lamp Wireframe

4K Texture 1

4K Texture 2

This has been perfect for me to renew some skills and learn I am not as good as I thought and have a great deal to improve on. Especially UVing and general topology.

I juggled the project between ZBrush, 3DsMax and Substance Painter amd rendered images in Unreal. And god I love Unreal. Kinda want to animate my Genie next just for fun.

I will be uploading to my Artstation soon if anyone wants to check me out there.

And here is my WIP.

Loved the Contest and Good Luck to everyone. Can’t wait to see more of peoples ideas.

4 Likes

Modern world Sleeping Beauty

Finally finished. This princess has an awful, but very much real curse.

First I sculpted her in Zbrush, then retopologized and modeled few details in Blender. Also added hair cards which I prepared in Maya Xgen. Textures were done in Substance Painter and then imported back to Blender. I rigged her using Blender Rigify addon. And at last rendered in Eevee. Only 47,832 tris.

Front, side, back views:

Textures with wireframe and wireframe alone:


Here are some additional shots:

2x4K texture sets:

And the final shot without the text:

Also here is my progress thread
and the project on my artstation
Hope you like her!

4 Likes

"Snatchy the 8th Dwarf" / The Gnome Thief

Hello everyone. Excited to share the final version of this character!
Really enjoyed working on this character since there were a lot of cool aspects and details that required different approaches - something I enjoy very much!

The idea of the character I wanted to create was based on mixing the fairy tale of Rumpelstiltskin with Snow White and the Seven Dwarves - An unknown 8th dwarf named “Snatchy”, who steals every shiny thing he lays eyes on.

The illustration that I based the character on was made by Filipe Pagliuso, who very kindly agreed to let me adapt his illustration into 3D!

Here are some technical aspects about the character:

  • 99,775 total triangles.
  • 2 * 4096x4096 Texture Sets.

Software I used in the making of this character was ZBrush, Maya, Blender, xNormal, Substance Painter, Photoshop, and Marmoset Toolbag.

Work in progress thread can be found in the hyperlink below.
WIP Thread

All images are rendered in Marmoset with no post-render editing done.

Final Shot

Front, Side and Back Views

Wireframe


Texture Overview

Additional Shots


Marmoset Viewer

Idle Animation

Turntable

Thank you for taking a look!

Also, thanks to everyone who engaged in my thread, and to FlippedNormals for hosting the challenge!

Best of luck to everyone!

9 Likes

Here’s my final !

Slight cyberpunk twist on the Sanbi Kitsune. I spent this challenge focusing on improving my anatomy and trying out some new ways of doing things. Bit of a bumpy road, but always love the learning curve !

ZBrush for sculpting, Blender for retopology (and auto unwrap- which is kinda gross aha) and rendering, Substance Painter for texturing.

I’m quite new to rendering, substance and blender for these things, any CC, advice or tips are warmly welcomed !

One texture set for the entire scene. I understand my texture quality would of vastly improved if I unwrapped and retopped efficiently - still learning how to do that in Blender !

Entire scene 75k Poly Count. Rendered in EEvee.

Online 3D View available on Sketchfab here https://skfb.ly/onQu8

3 Likes

Hello everyone. Wow, i finished! (⁄ ⁄>⁄ ▽ ⁄<⁄ ⁄) My Alice in Futuristic Wonderland.

Wonderful competition! I learned a lot of interesting techniques and got a new experience while working on this project. Thanks for watching and good luck to everyone! (─‿‿─):heart:

4 Likes

2 Likes

Modern Day Girl Dracula (Dede)

Phew! Made it to the end haha!

I’m really happy with how she turned out, despite being one of the more simple characters up here. I’m so glad I found this competition because it definitely pushed me to try things I wouldn’t usually. I learned ZBrush during lockdown after pretty much exclusively using Maya, so it’s amazing to see my progress!

Anyway, onto the girl herself:

Final Shot

Turnaround

Wireframe

Textures

WIP

Other stuff

Sculpted in Zbrush
Additional details in Maya
Retopology in Topogun
Texturing in Substance Painter
Rendered in Marmoset Toolbag 4
72080 tris

I’m kind of obsessed with her? Definitely have things I would change if I were to do it again, but I think one thing I’m proud of is letting her personality shine through.
While I was working on her I ended up nicknaming her Dede, because I figured she’d want to give herself a modern name after waking up in the 21st century!

Thank you for the really fun brief, and best of luck to everyone! I’m off to go update my WIP thread after neglecting it for a few weeks :grimacing:

12 Likes

I hope the judges will take my part in the competition, because my time zone has not yet finished the deadline and I did not think that it might be over, I really want to share the result of my work!
Tris = 30 180
Two 4K map sets
It was interesting to take part in this challenge from coming up with the character image to learning new techniques. This is my second experience in creating low poly models and creating textures and i really enjoyed all the process. In this work I tried to learn how to make high quality low poly hair. I tried to make textures that are more varied in color scheme and at the same time do not go out of the general style of the color scheme of the work. I wanted to make Dracula in the future, who have already lost part of their body because of which it was replaced with metal parts, but at the same time did not lose their vampire charm. I love the cultural image of Dracula in different ways, so I wanted to create a dark character but romantic at the same time.


https://youtu.be/dCSeg6Zn1Is
My artstation https://www.artstation.com/kain_gretxen
Progress Dracula's future

6 Likes

Here’s my final submission. Let me introduce you to the Way-Too-Heavy-Polycount-Peter-Pan (yeah that’s his new name since yesterday, when I just discovered that I were always wrong about polygons…). Sad truth, sad moment…

Yep, that’s true, I thought poly/tri-count was the number of FACES I had on my character… but sadly I just learned that it wasn’t… :upside_down_face:. Like I said in my thread (Fairy Tales Reimagined - Peter Pan Teenager), this is my first character from start to finish and I learned everything myself. I thought about every mistake I could have make and I made the simplest one… Nevermind, I will never forget what poly/tri count means. I promise :skull:

So I thought about throwing my brain on my computer and not posting my work then I told myself that it would be to bad not to show my work even if it doesn’t fit with the rules of the challenge.

So here is my Teenager Bad’ass Peter Pan. Hope you’ll like it.

Like I said earlier, this is almost the first time I’m making a character from start to finish. I mean concept, sculpting, retopology and everything, so in spite of this big fundamental mistake, I’m happy I did it. I learned so much stuff. Thanks a lot Flipped Normals pushing me to do my best (almost).

You can check the whole process in my thread : Fairy Tales Reimagined - Peter Pan Teenager

Project on Sketchfab : https://skfb.ly/onR6C

Instagram : @adrien_requin
Artstation : https://www.artstation.com/adrienrequin

Sculpting : ZBrush
Retopology/ Modelling : Maya & Blender
Textures : Substance Painter
Render : Blender Eevee
And some grading with Photoshop

Polycount… 156.398 :sweat:

Front, side and back views :

Wireframes :

Textures

Extra shots :

6 Likes

Concept/Synopsis

My version of Rumpelstiltskin is based around the 1950’s. His cover is that he is a door-to-door salesman but really he meddles with people and acts more like being a part of the mafia. He charms people by approaching them at their door and offers them deals they cannot refuse. He flaunts his gold and his figure to people upon approach. His figure has muscle build, but they are not as defined as he is slowly reverting to his small frail character with the more evil he commits from his devilish deals.

Final renders – Posed

This is my favorite shot that I have selected to be my final showcase image as I feel this best shows his uncomfortable yet intriguing menacing stare. I also chose to pose him leaning on his magical staff in a sly, overly confident and thuggish manner as I believe this shows his devious nature in a compelling way.

Final shot

All sides

Wireframe

Thought it would be easier to assess the mesh with it in the rigging stance. I have uploaded the jacket and close-ups of the more heavy poly areas for investigation of the wireframe purposes.

Texture Layers

Texture sets

Additional shots in A-Stance

Software breakdown

These are the software’s I used and for what stage of the project

ZBrush: Sculpting

Maya: Modelling, Retopology, UV mapping and Rigging

Marvellous designer: Clothing

Substance painter: Texturing

Substance Design: Texture creation

Unreal Engine 4: Scene setup and Rendering

Photoshop: Layout of images for submission

Polycount

My overall design is optimised at a count of 76,276 tris. I could have further reduced the count by merging the clothes to the body sculpt but I preferred leaving his body sculpt intact in case the character was to be used again with a new appearance/attire, which I thought would also be non-destructive for potential future uses.

Bonus/Links

Since I had rigged the character, I decided to create a very rough and basic walk cycle and idle animation and bring my character to life in UE4. I wanted to see what he would look like alive and to test how game-ready he could be. I have included a hyperlink to where you can see a quick shot of him circling around my render scene in a movement test.

If you wish to find out more about my process please look at my WIP where I have added some more information on specific areas of this project. I’ll also link my Artstation that im trying to build.

Note: Thank you so much for running this challenge my goal for partaking was to refresh myself on what I know and what I need to work upon by working to a brief. This has helped set me on the right track to understanding and developing my skills as an artist.

3 Likes

“Calls herself ‘Red’, she’s been hunting the Bleeding Wolf Gang since they allegedly killed her grandmother 10 years ago.”
“What can one girl do against a whole gang?”
“Maybe you should ask those boys out back.”
“She did that?!”
“She did, and God help anyone that gets in her way.”

Red - A Film Noir Red Riding Hood

Turnaround

Texture Overview


Everything rendered in Marmoset Toolbag 3

Sketchfab Viewer - Simplified lighting

Work in Progress Thread

9 Likes